
Navigating the documentation
- Back
- Administrative Panel Main Page (Dashboard)
- Content (posts, pages, categories, comments, selections, forms)
- Media files (File Manager)
- Users, their groups, and permissions
- Feeds (Content Distribution)
- Modules
- Themes
- Analytics
- CMS Settings
- About the System
Content Management via the GIRVAS CMS Administrative Panel
The CMS admin panel provides management of text, graphic, and interactive content, including posts, static pages, categories, comments, selections, and forms.
The "Content" section includes six subsections:
- Posts – a section for managing posts;
- Pages – a section for managing static pages;
- Categories – a section for managing post categories;
- Comments – a section for managing comments on posts;
- Selections – a section for managing post selections;
- Forms – a section for managing personalized forms.
Posts
Posts on the website are the primary content unit, as they represent a targeted information resource for users from external networks. For this reason, the CMS has a dedicated "Posts" section.
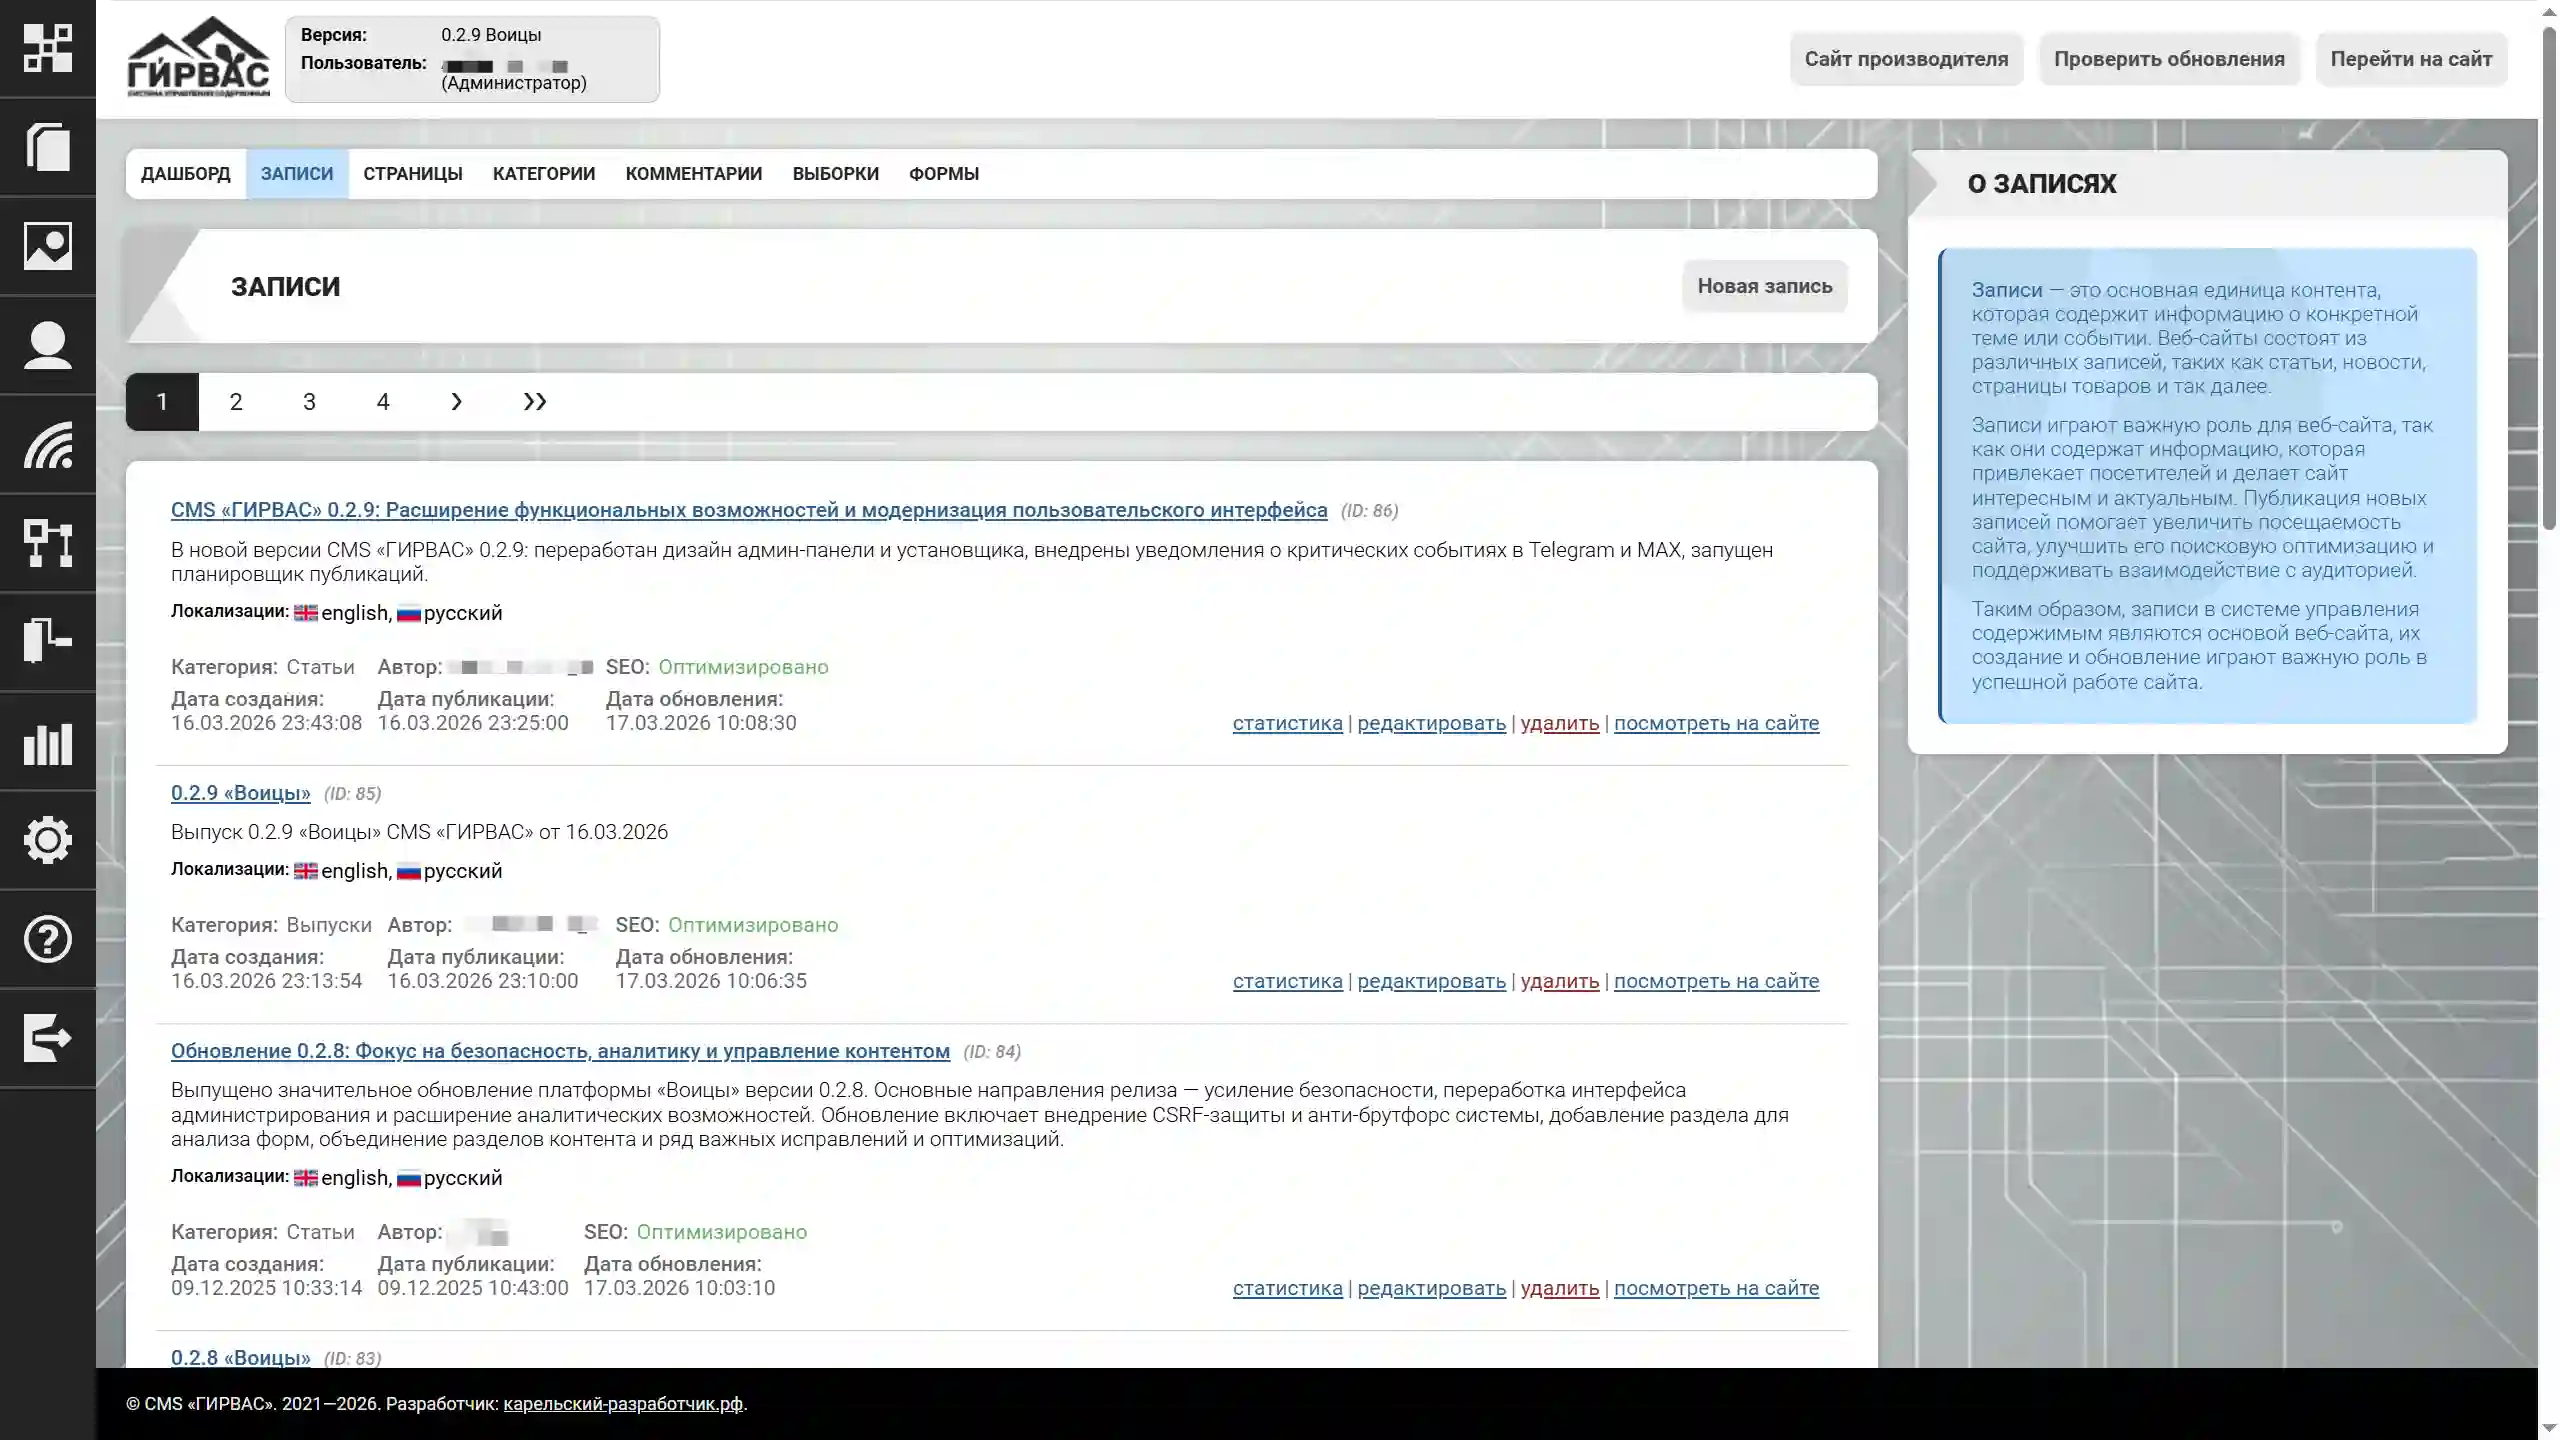
The starting subsection of the toolkit is "Posts." This subsection displays a list of recently created posts with brief information: title, description, category, creation, update, and publication dates. To the right of the section title is the "New Post" button, which takes you to the tools page for creating and editing posts.
Each entry supports localization: if a translation is available, the corresponding language is displayed as a list with a flag icon in the entry's metadata (below the description). The metadata also includes a text indicator of the SEO optimization status, creation date, publication date, update date, and the author (their username).
Each entry list item also has a toolbar for interaction:
- Statistics – view statistics for the entry;
- Edit – edit an existing entry;
- Delete – delete the entry;
- View on Site – open the entry on the public side of the site.
Creating and Editing an Entry
Entries are created and edited using the "Edit Entry" tool, which is a form for entering data.
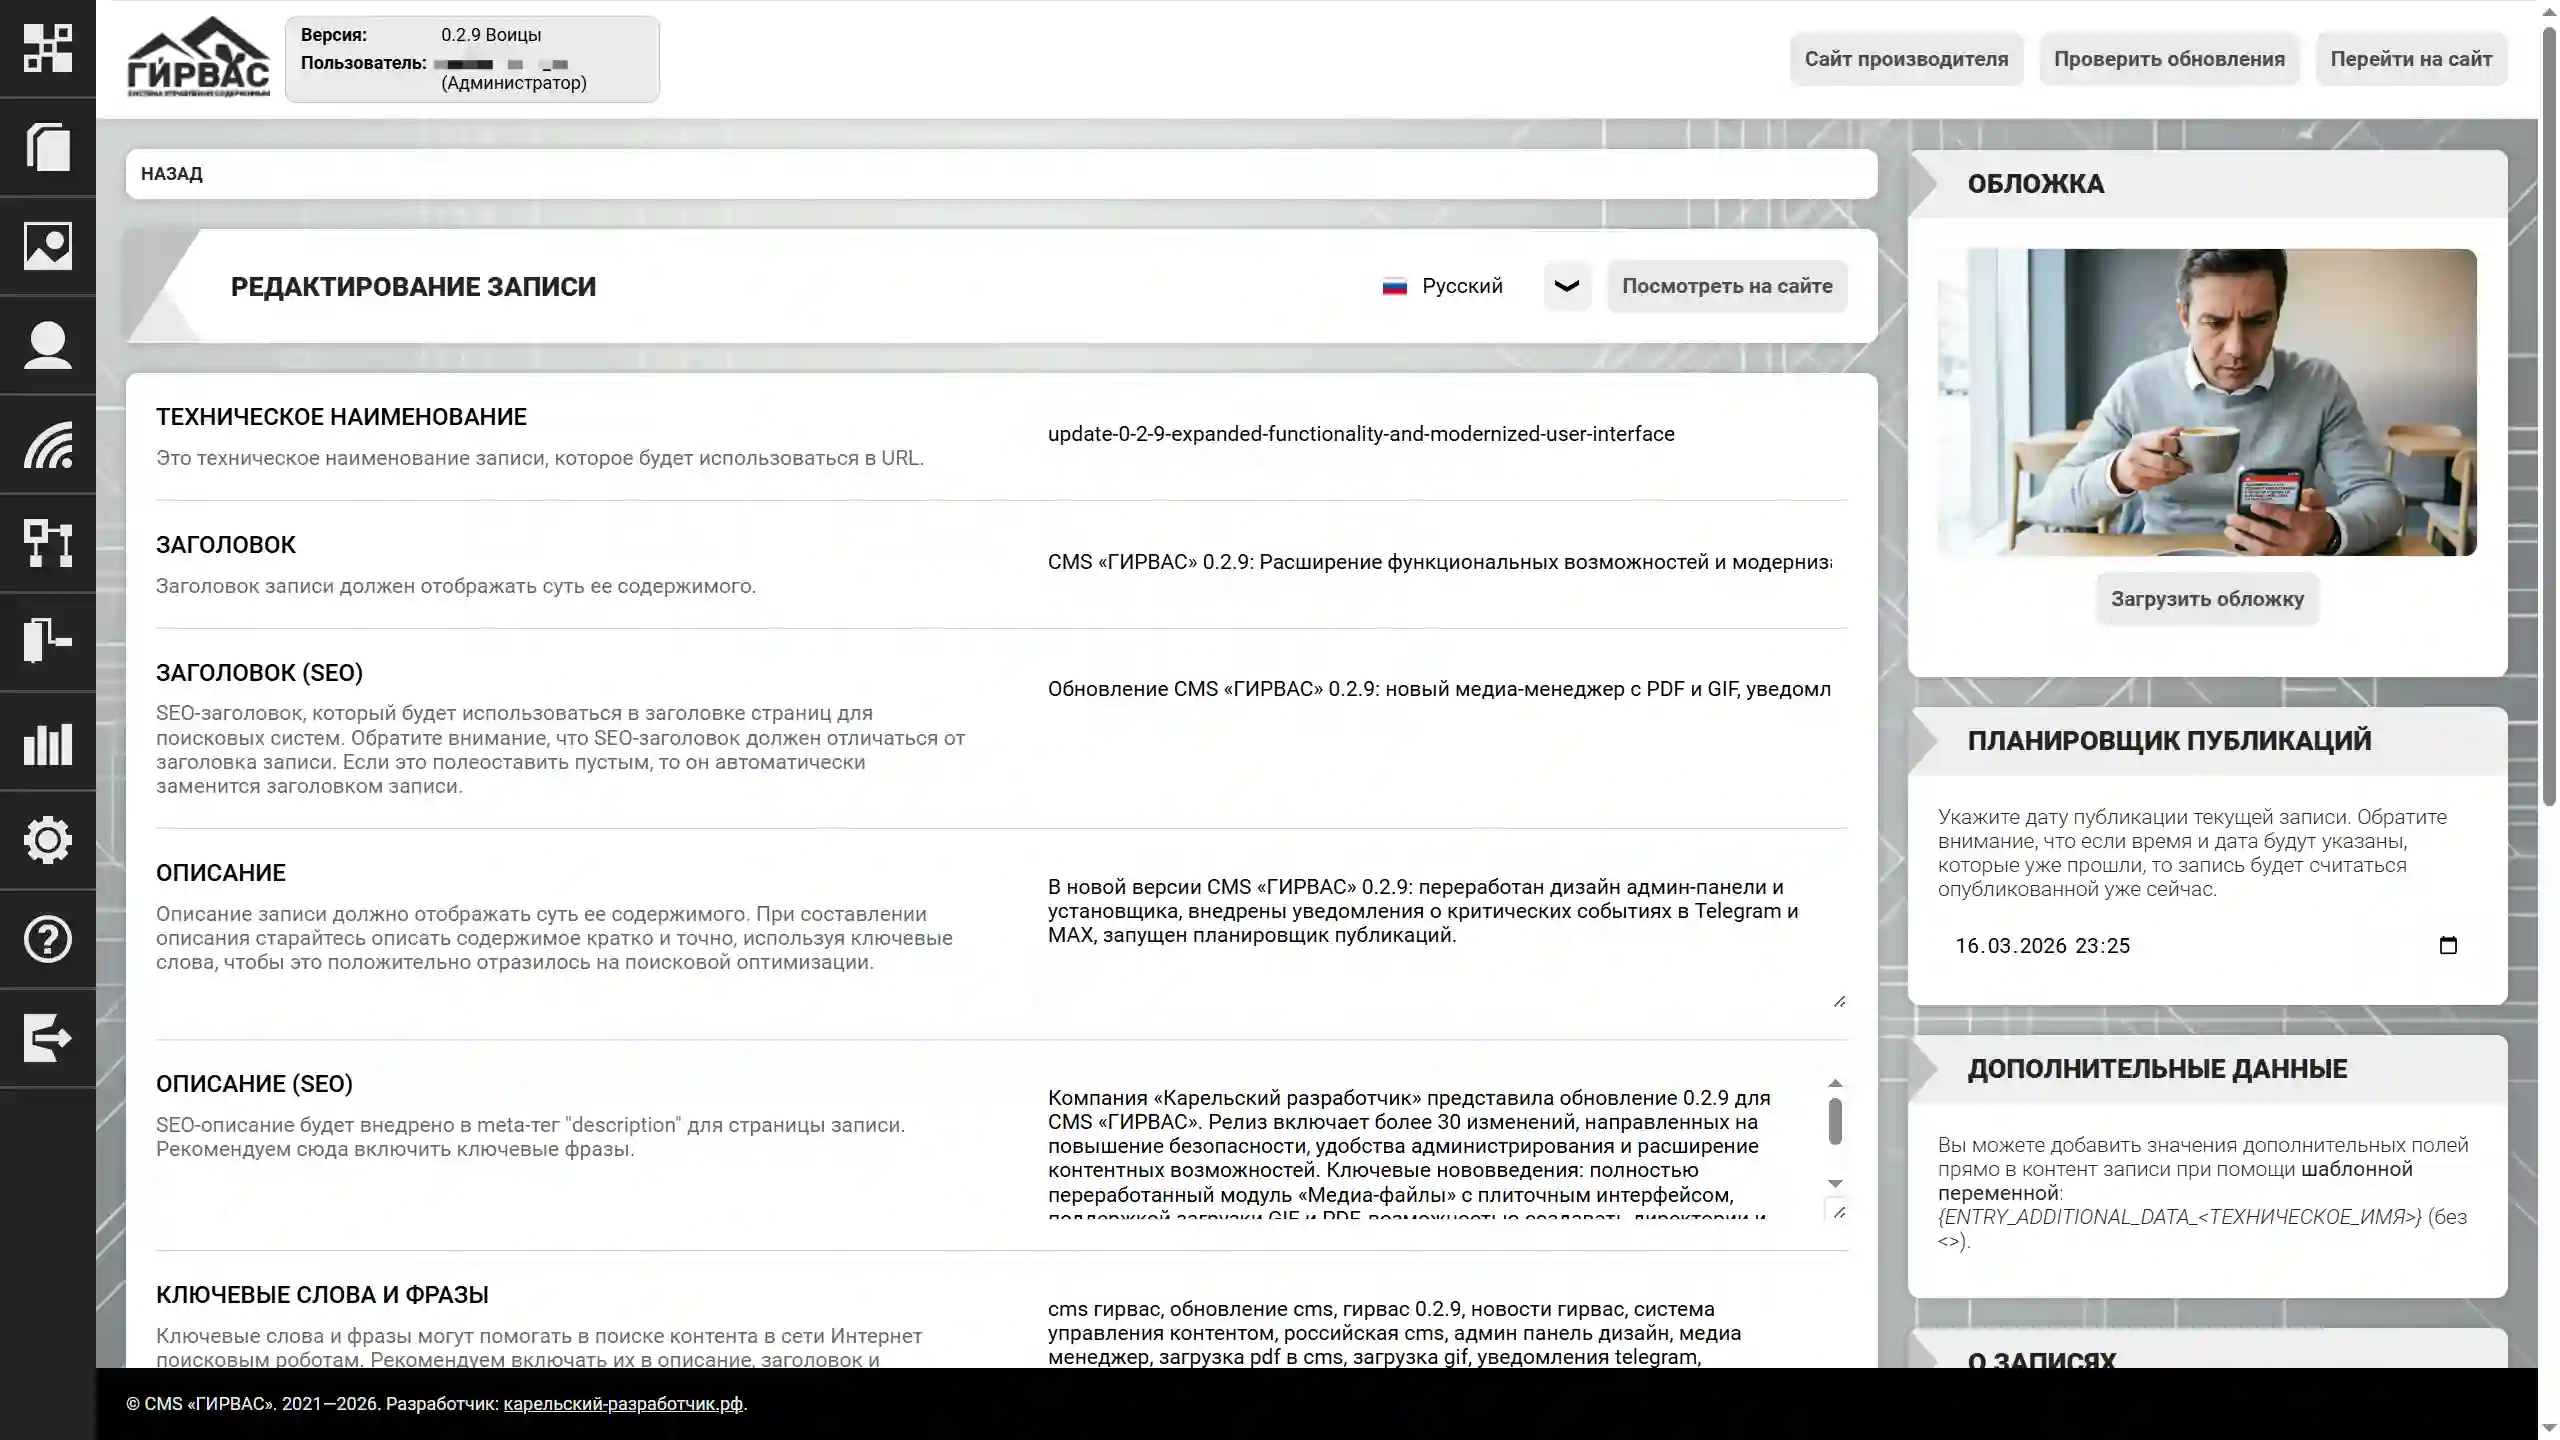
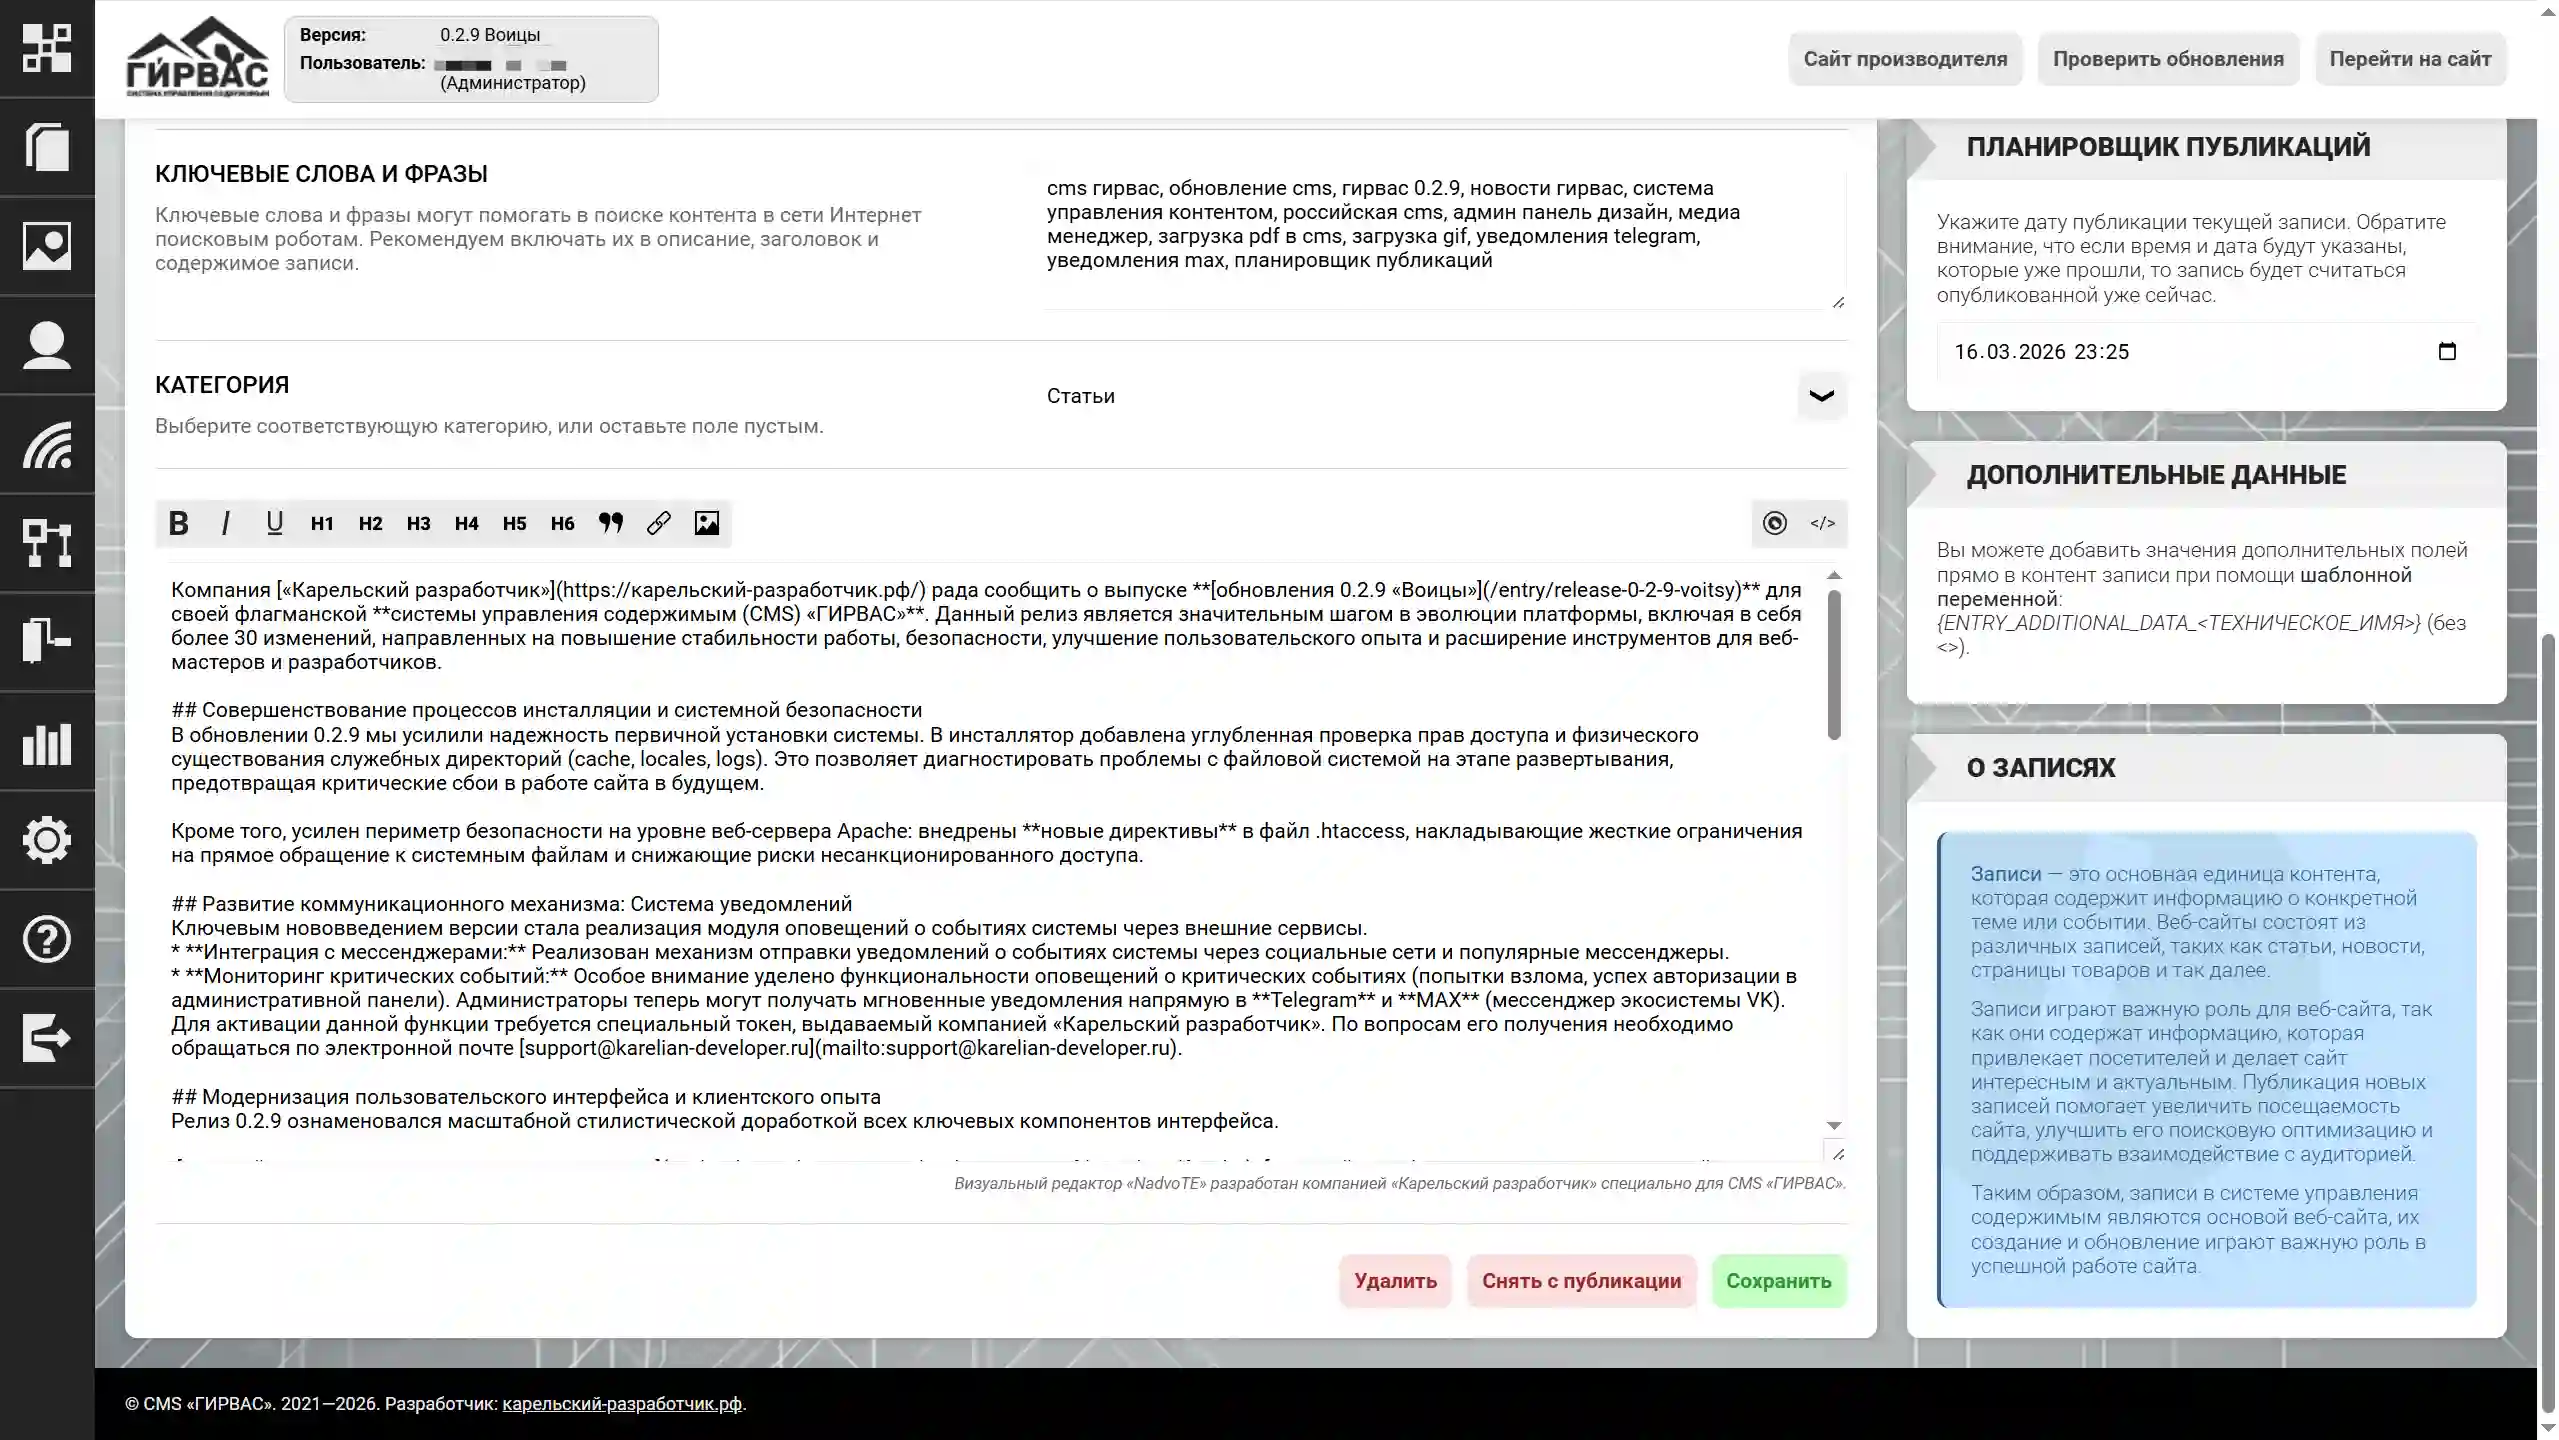
The form includes the following fields:
- Technical Name – the post name used to generate the URL. Only Latin characters are allowed in this field. Future versions may include the ability to work with Cyrillic URLs, given the presence of domains in Russia that support Cyrillic characters in the address bar;
- Title – the post title, displayed on the post page and also embedded in the HTML "title" tag of the web page;
- Title (SEO) – a special post title, embedded in the HTML "title" tag of the web page. Note that an SEO title should be different from a regular title;
- Description – a brief description of the post. Embedded in the "description" meta tag of the web page;
- Description (SEO) – a special description for the post, embedded in the "meta" meta tag of the "description" type of the web page. Note that an SEO description should be different from a regular description;
- Keywords and Phrases – words and phrases that describe the content of the post. It is recommended to use terms included in the description and content of the post. Embedded in the "keywords" meta tag of the web page;
- Category – a drop-down list for defining the post category, ensuring correct sorting of posts on the website;
- Content – the main field, equipped with the built-in "NadvoTE" editor for working with text. Designed for posting the main content.
After filling out the form, click the "Save" button. After saving the entry, the following features become available:
- Cover – a graphic image used to illustrate the entry. ATTENTION! Images uploaded via the "Cover" feature are also available in the "Media Files" section.
- Scheduler – a special feature for scheduling publication. If you select a future date, the entry will automatically be considered published, but will become viewable to regular users only after the selected date.
- Additional Data – a special block that allows you to fill in data for additional fields created for entries in the admin panel. Please note that to display values, you must embed the template variables
{ENTRY_ADDITIONAL_DATA_(without <>) in the appropriate place in the topic.} - Publish – a feature for managing public access to the entry. By default, a created post is unpublished, allowing editing and approval. To make a post publicly viewable, click the "Publish" button. To revoke public access, click the "Unpublish" button.
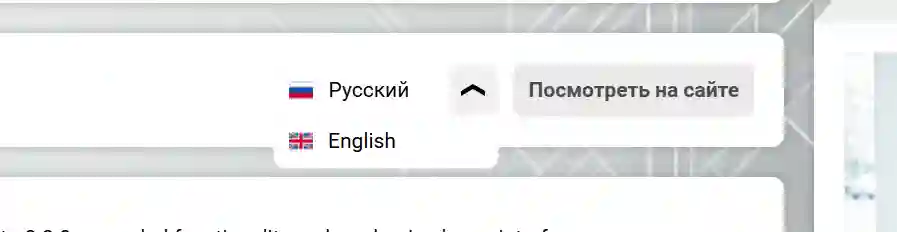
The "Edit Post" tool supports the CMS's multilingual system. To change the language of a post, select the appropriate value from the drop-down list located to the right of the tool's header.
Post Categories
The "Post Categories" subsection of the "Content" section provides additional tools for managing posts on the website, ensuring correct post sorting on web pages.
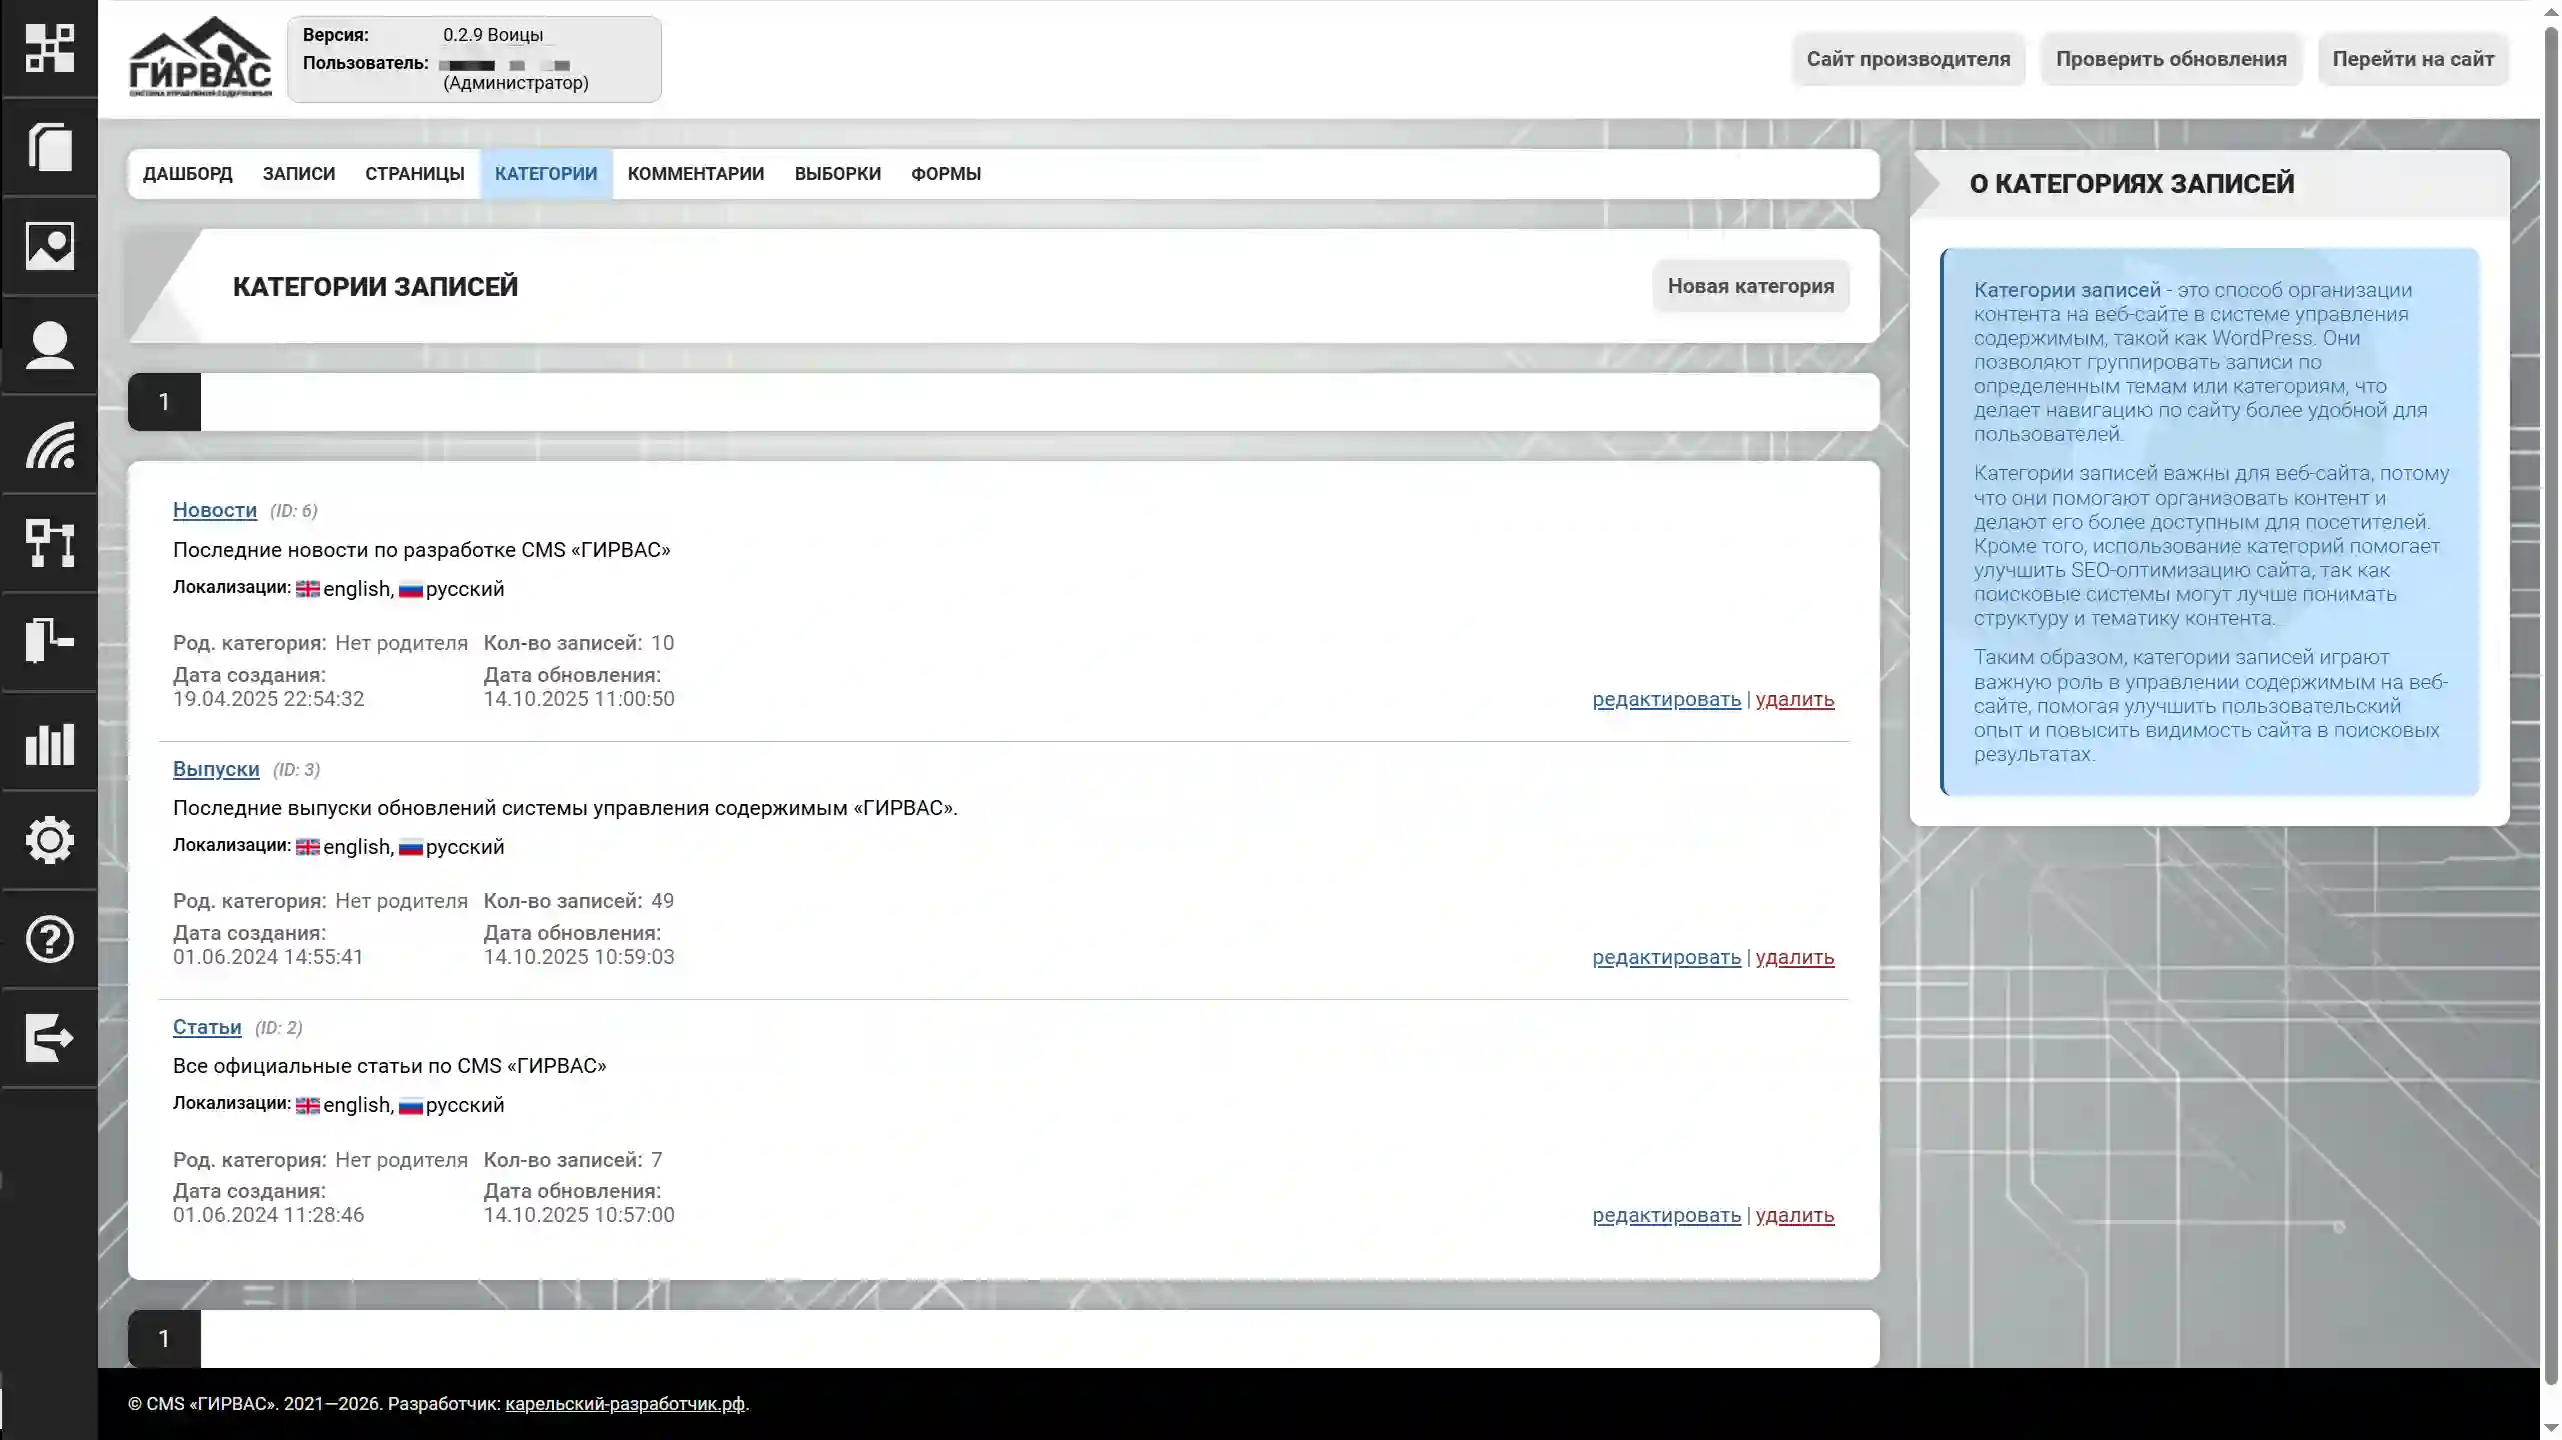
To create a new category, click the "New Category" button. Each category list item has a toolbar for interaction:
- Edit – edit the item;
- Delete – delete the item.
Editing a Post Category
Creating and editing a post category is done through a single "Edit Post Category" tool, which is a form for filling in data.
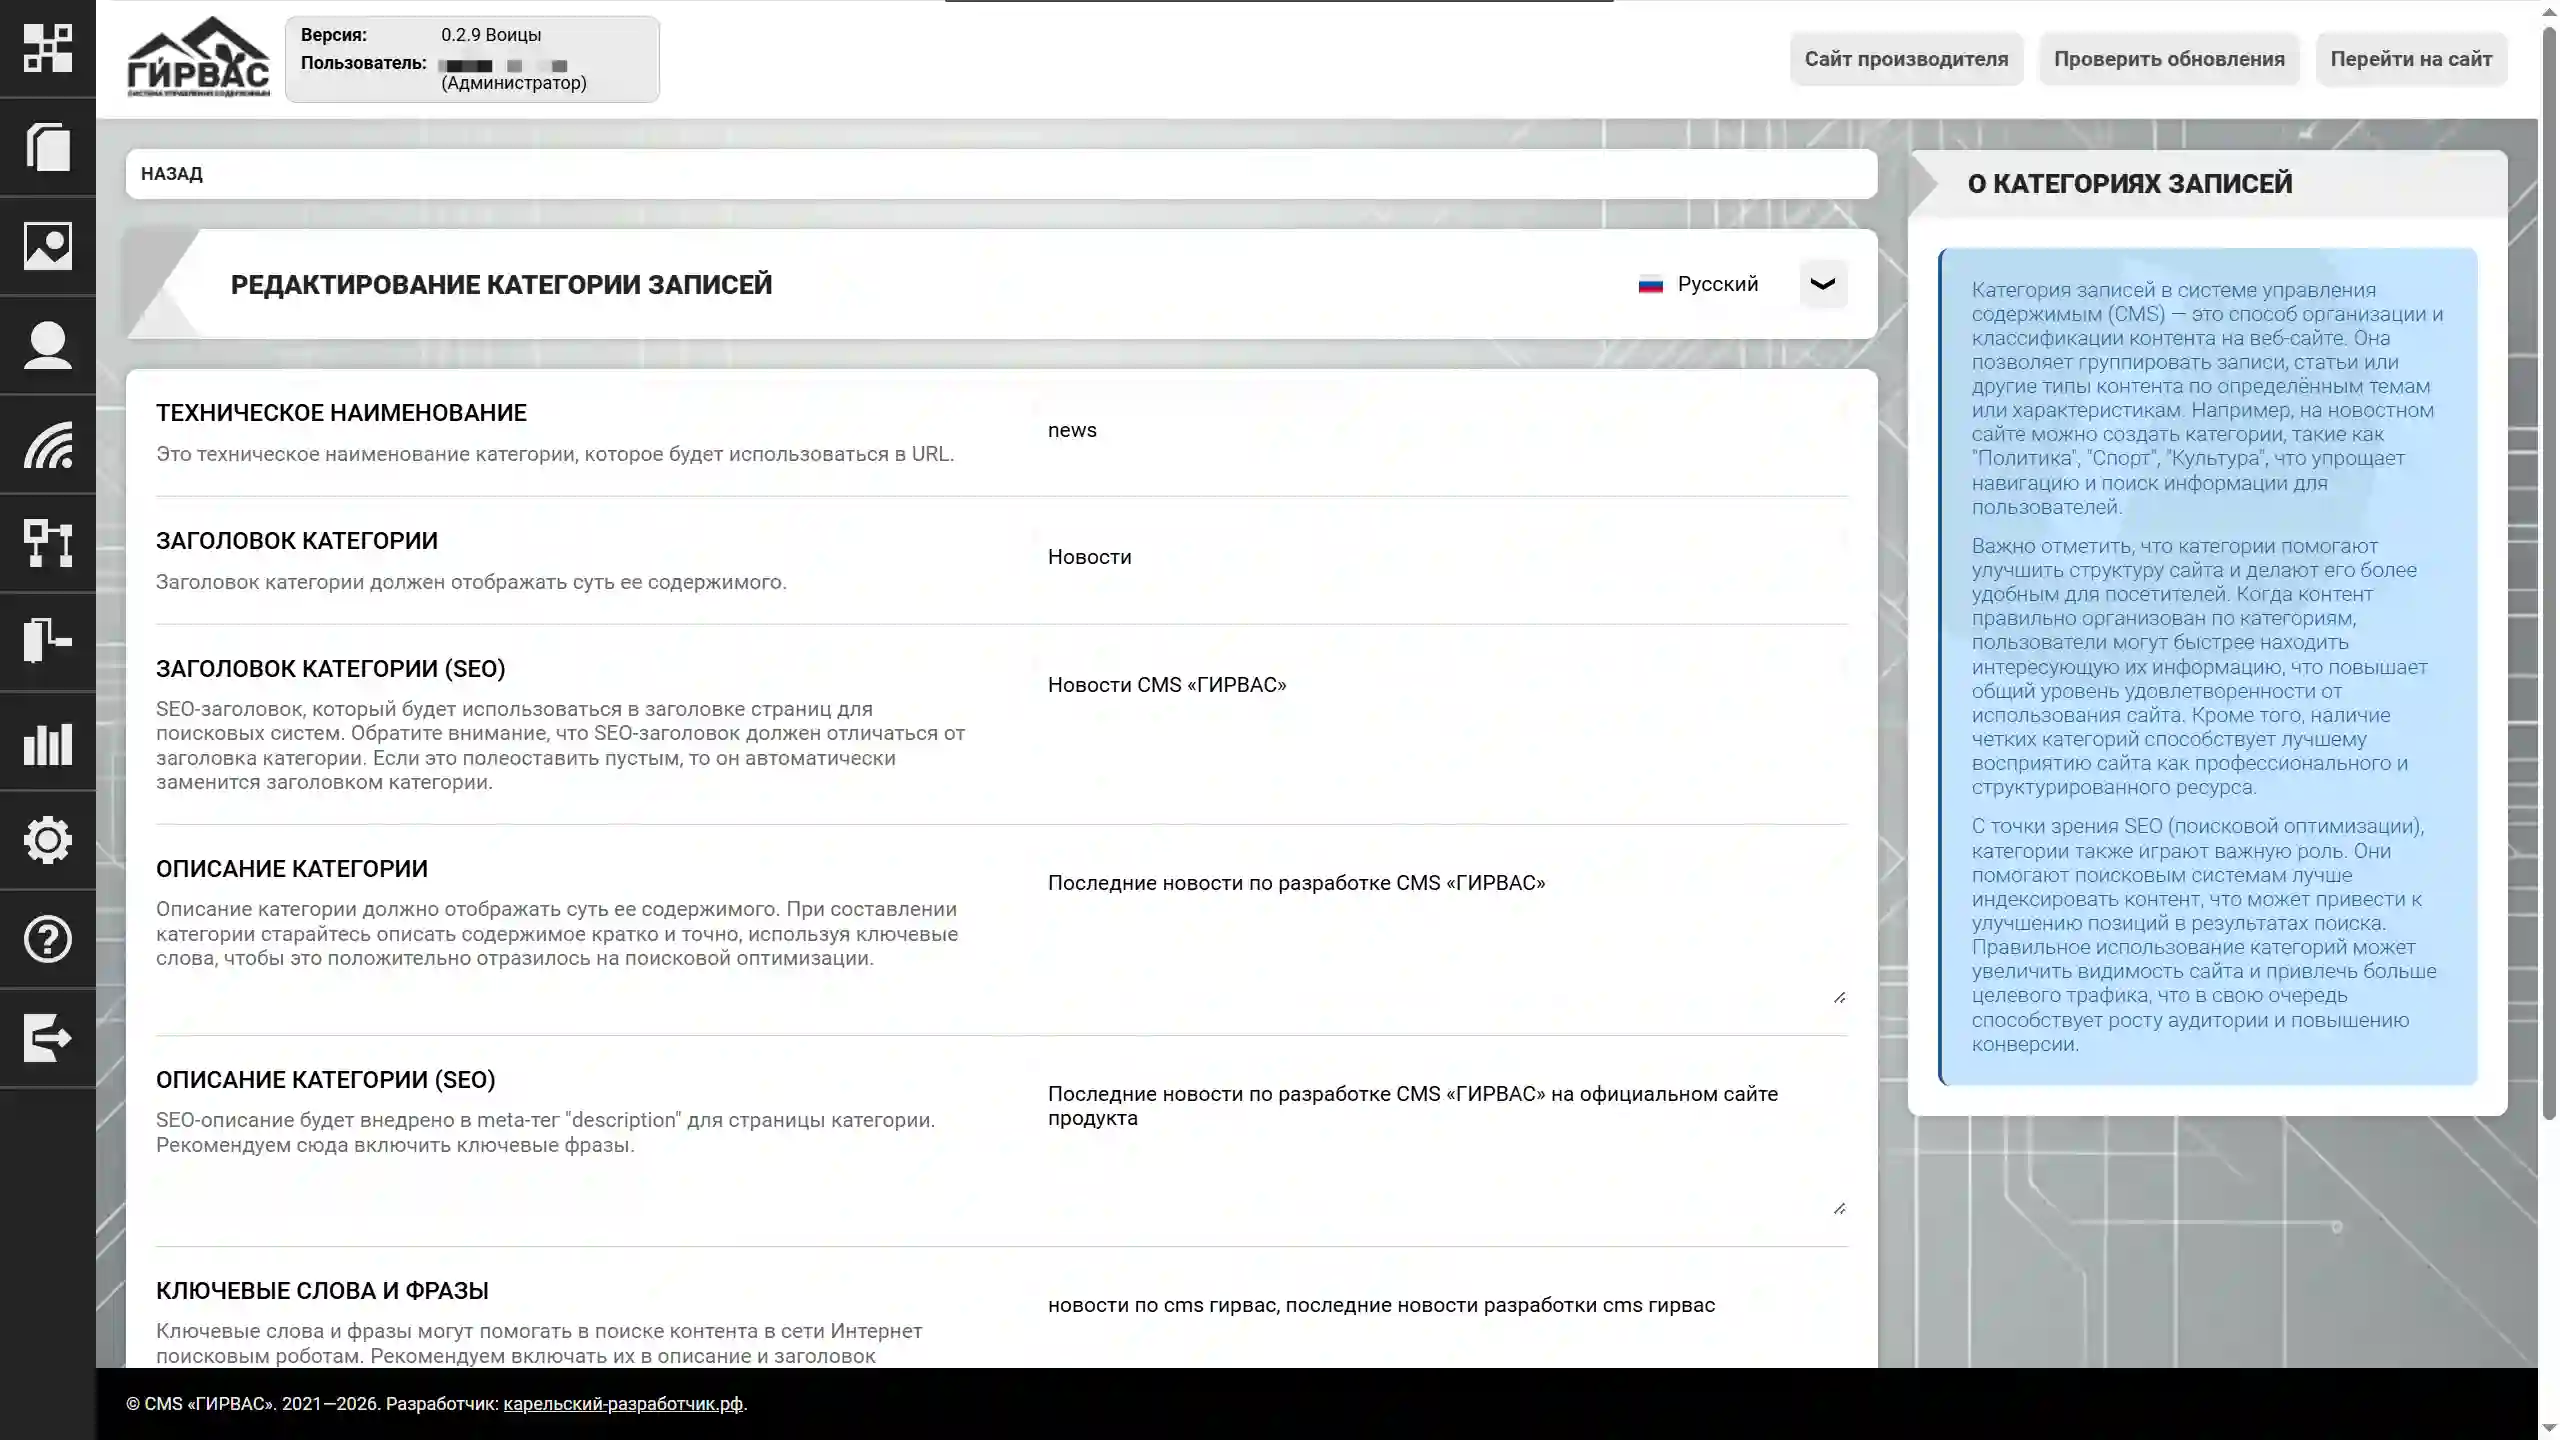
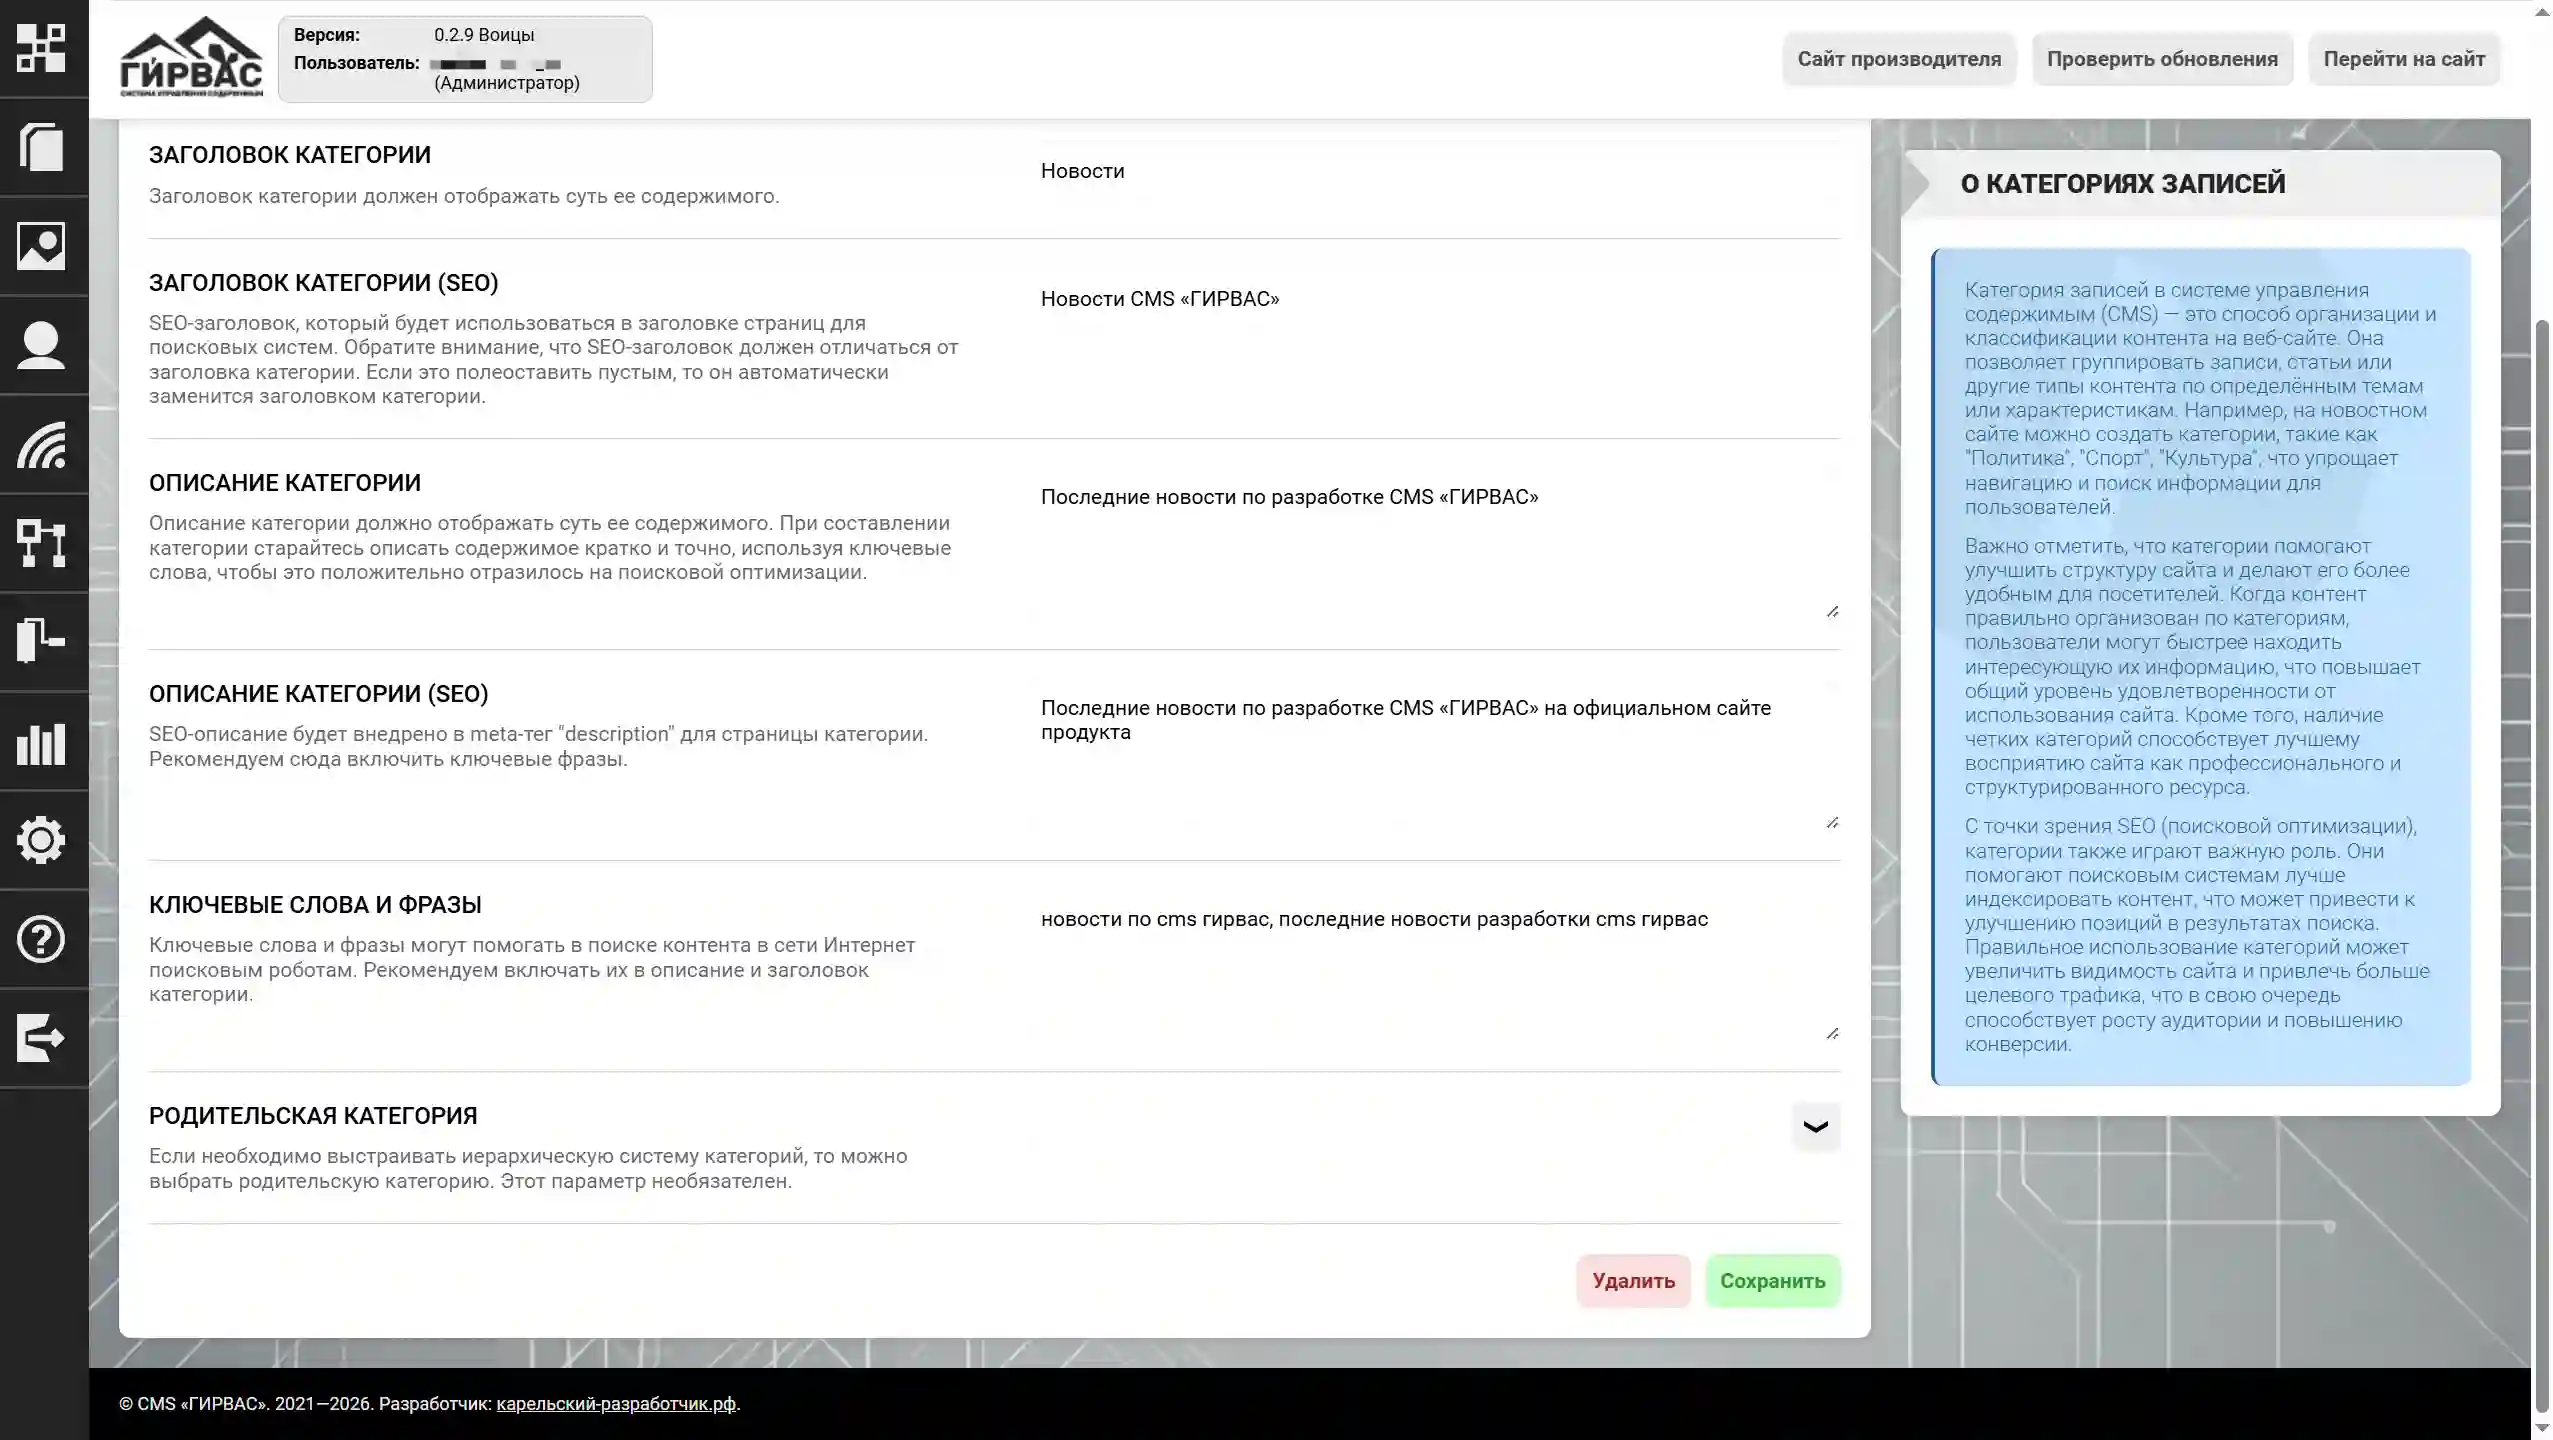
The form includes the following fields:
- Technical Name – the name of the post category used to generate the URL. Only Latin characters are allowed in this field. Future versions may include the ability to work with Cyrillic URLs, given the presence of domains in Russia that support Cyrillic characters in the address bar.
- Title – the title of the post category, embedded in the HTML "title" tag of the web page where the list of posts in this category is viewed;
- Title (SEO) – a special category title, embedded in the HTML "title" tag of the web page. Note that the SEO title must be different from the regular title;
- Description – a brief description of the posts in this category. Embedded in the "description" meta tag of the web page where the list of posts in this category is viewed;
- Description (SEO) – a special description for the category, embedded in the "meta" meta tag of the "description" type of the web page. Note that the SEO description must be different from the regular description;
- Parent Category – the category into which the current one will be nested. When viewing a parent category on the site, all posts within both the parent and child post categories will be displayed.
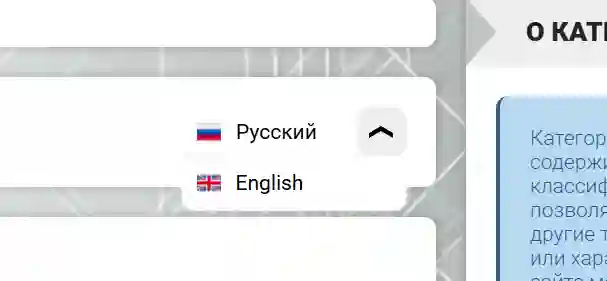
After filling out the form, click the "Save" button. The data will be saved provided there are no errors.
Deleting a Post Category
A post category can be deleted by clicking the "Delete" button on the post category editing page in the admin panel or by clicking the "Delete" button on the post category list page in the "Post Categories" subsection of the "Content" section.
When attempting to delete a category, the CMS displays a pop-up window asking you to confirm the deletion. If you confirm, the category is permanently deleted; if you decline, the action is canceled.
Post Comments
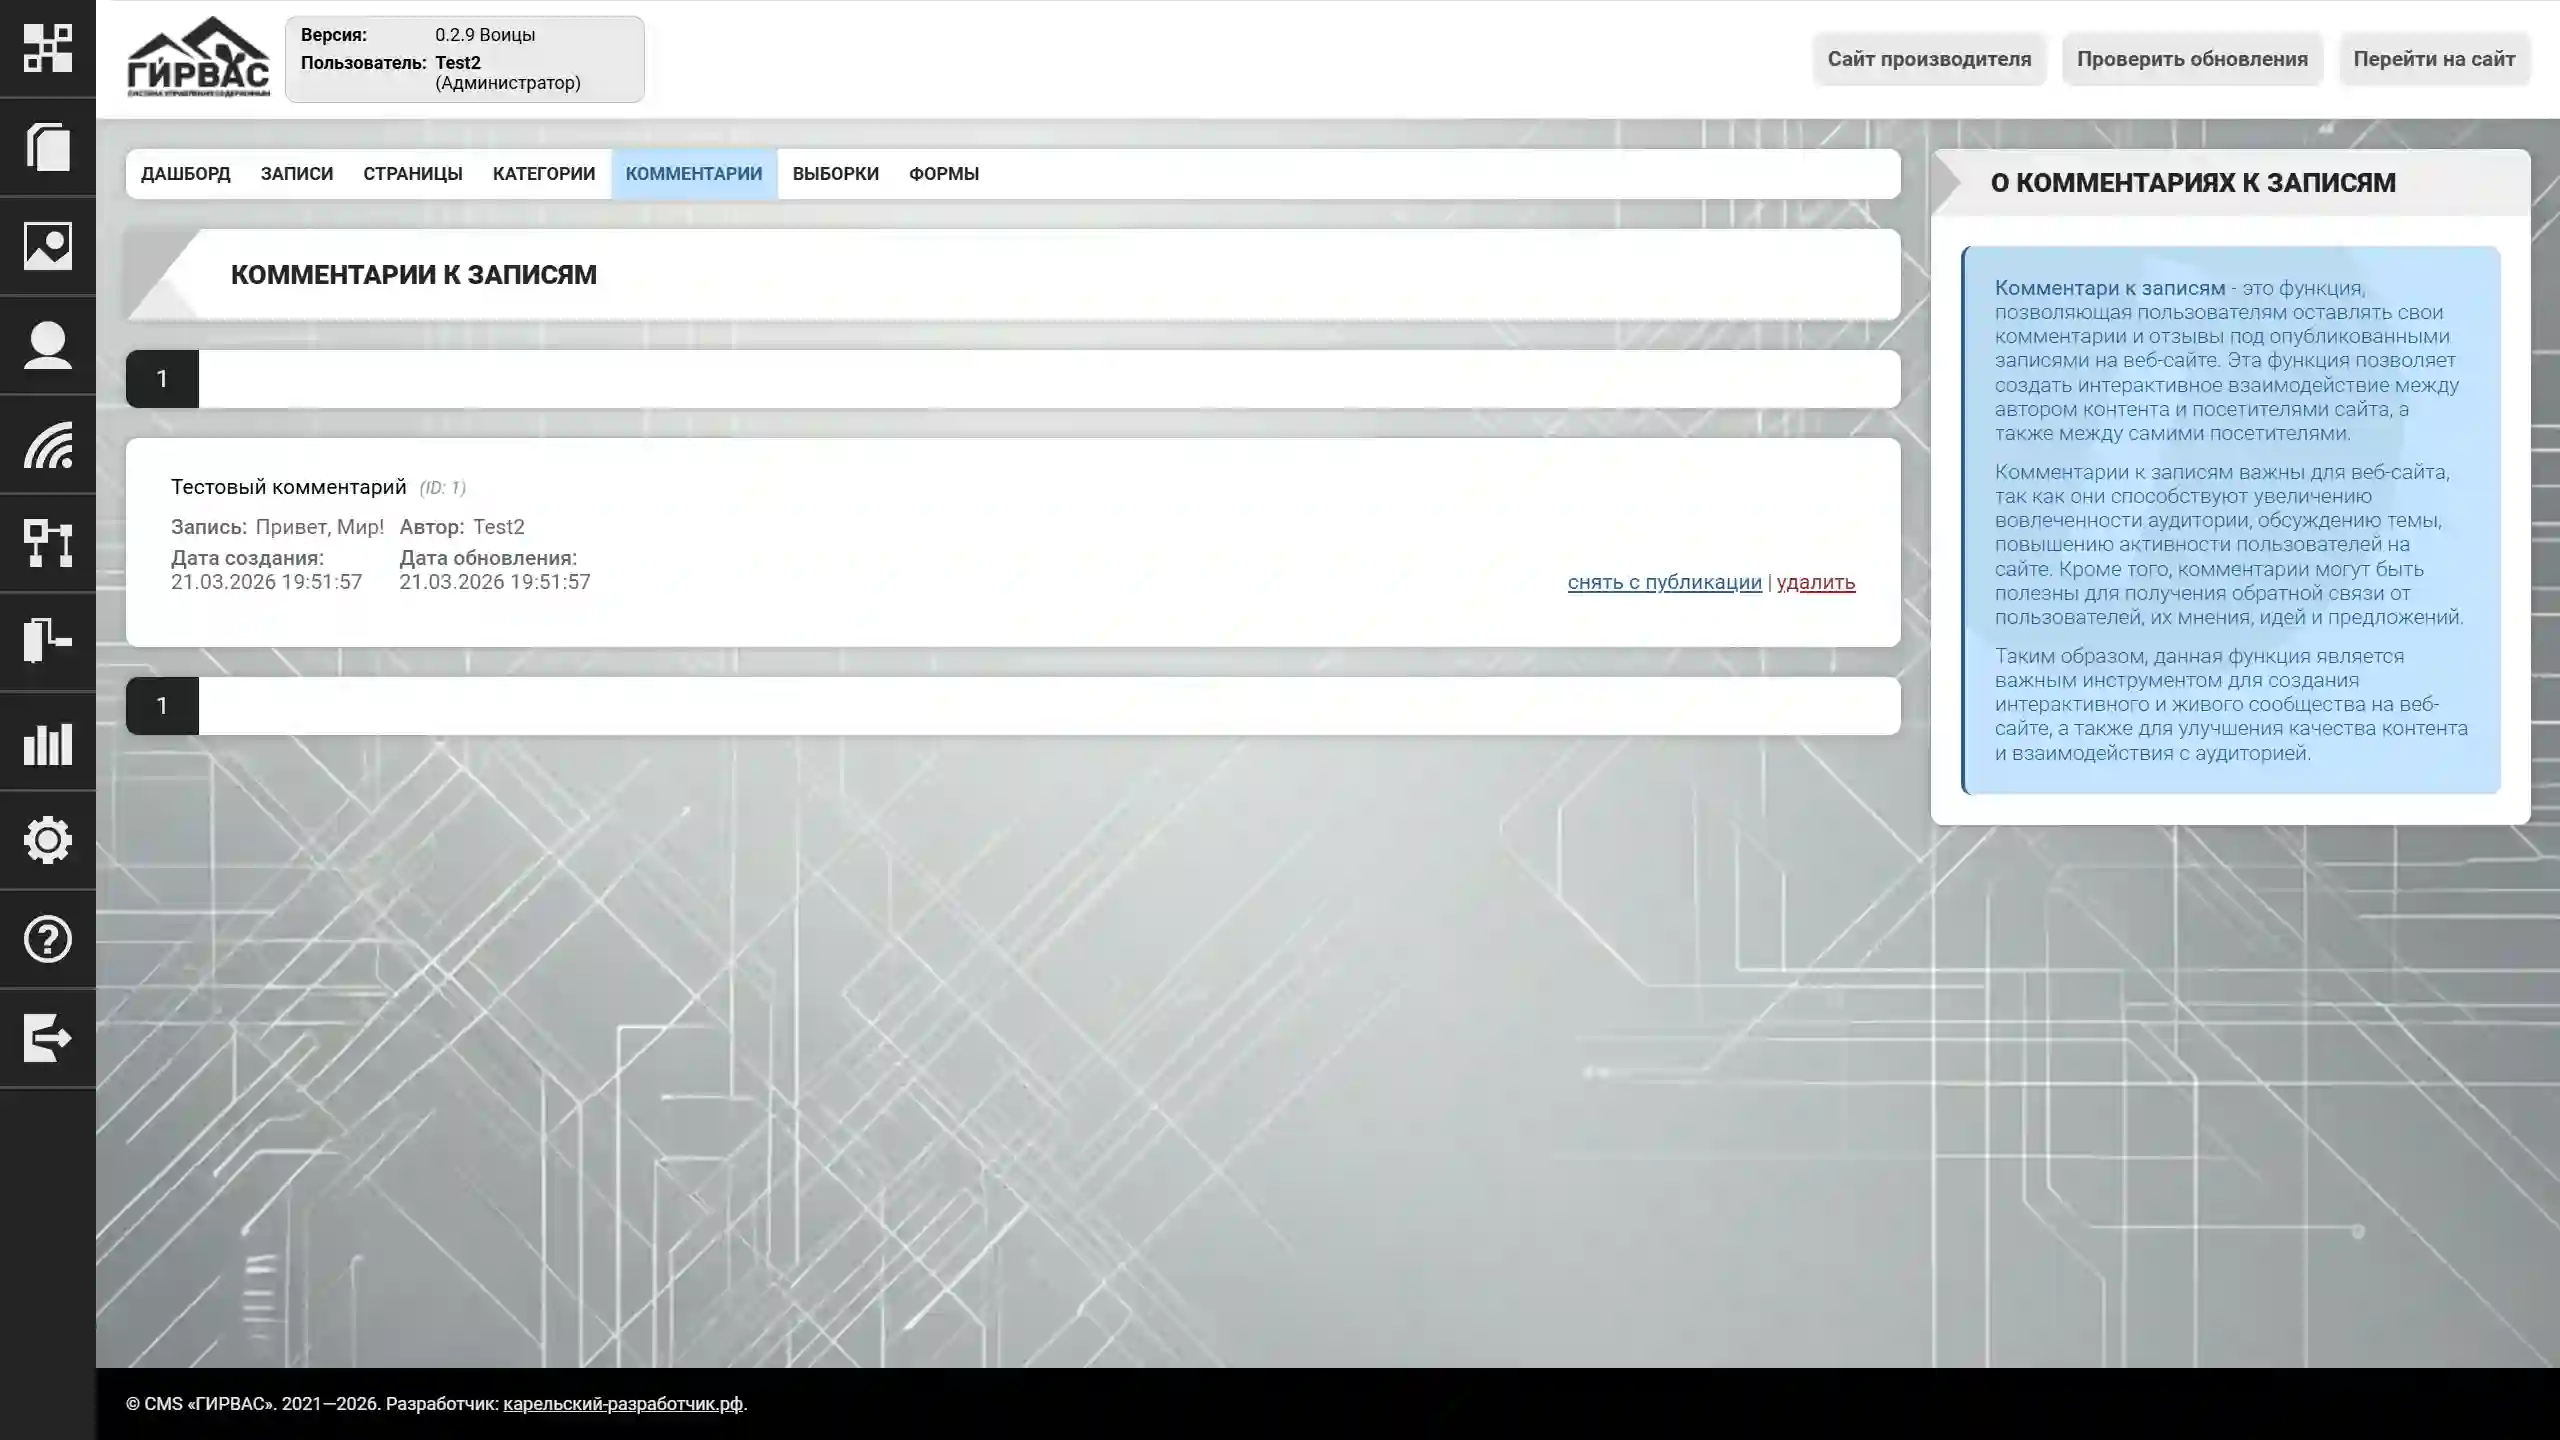
Post comments are a tool for expressing opinions on published content. In the admin panel, the "Comments" subsection of the "Content" section allows you to monitor recent comments, manage their visibility (hide/show), and delete them.
Hiding a comment
Comments can be hidden either manually or automatically. If there are grounds for doing so, such as the comment being offensive, violating site rules, or the current legislation of the country where the site operates, an unwanted comment may be hidden, stating the reason, by clicking the hide icon.
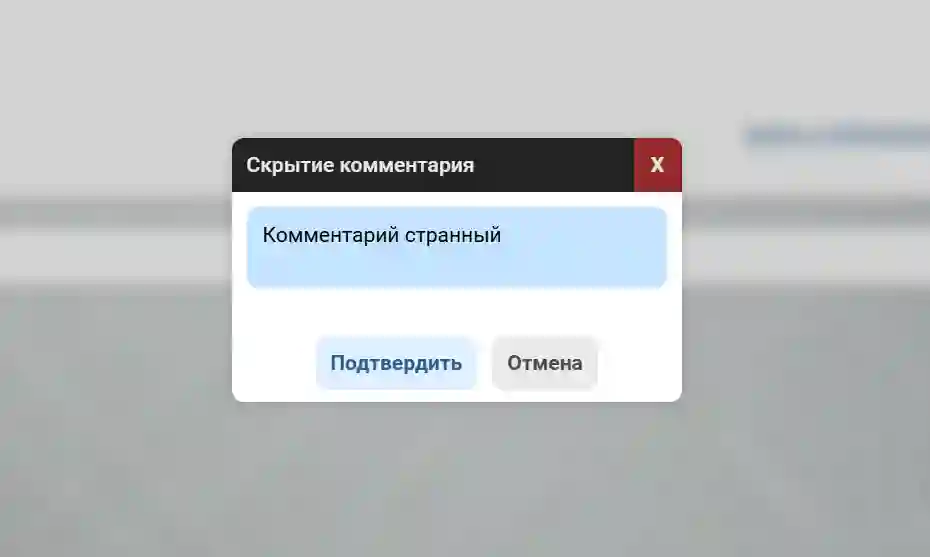
When attempting to hide a comment, a pop-up window appears asking you to specify the reason for hiding. The specified reason is available for display within the comment itself and is also displayed in the admin panel next to the comment content.
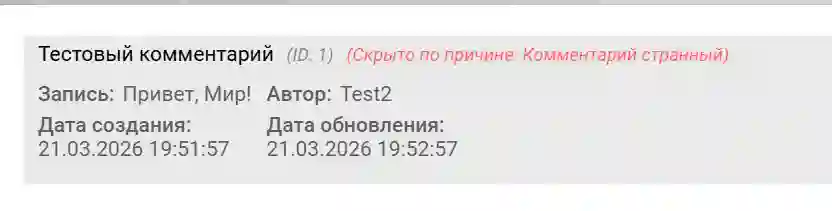
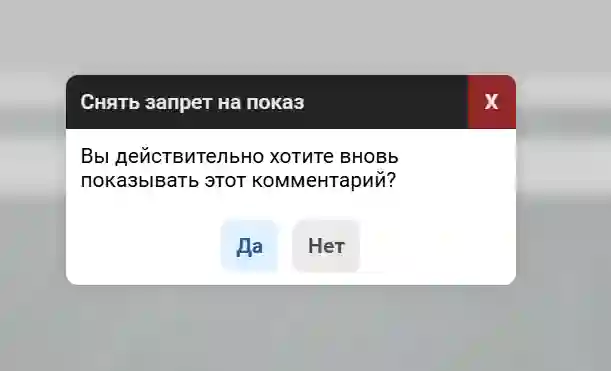
To restore public access to a comment, click the button with the show icon, after which the comment becomes viewable to all users again.
Deleting a comment
A comment can be deleted by clicking the button with the delete icon on the page with the list of comments on posts in the "Comments" subsection of the "Content" section.
When attempting to delete a comment, the system displays a pop-up window asking you to confirm the deletion. If you confirm, the comment is permanently deleted; if you decline, the action is canceled.
Static Pages
Static pages are similar to website posts; however, they do not support user comments, are located at the /page path, and are not displayed in post lists. Static pages typically contain legal or other information that does not require frequent updates.
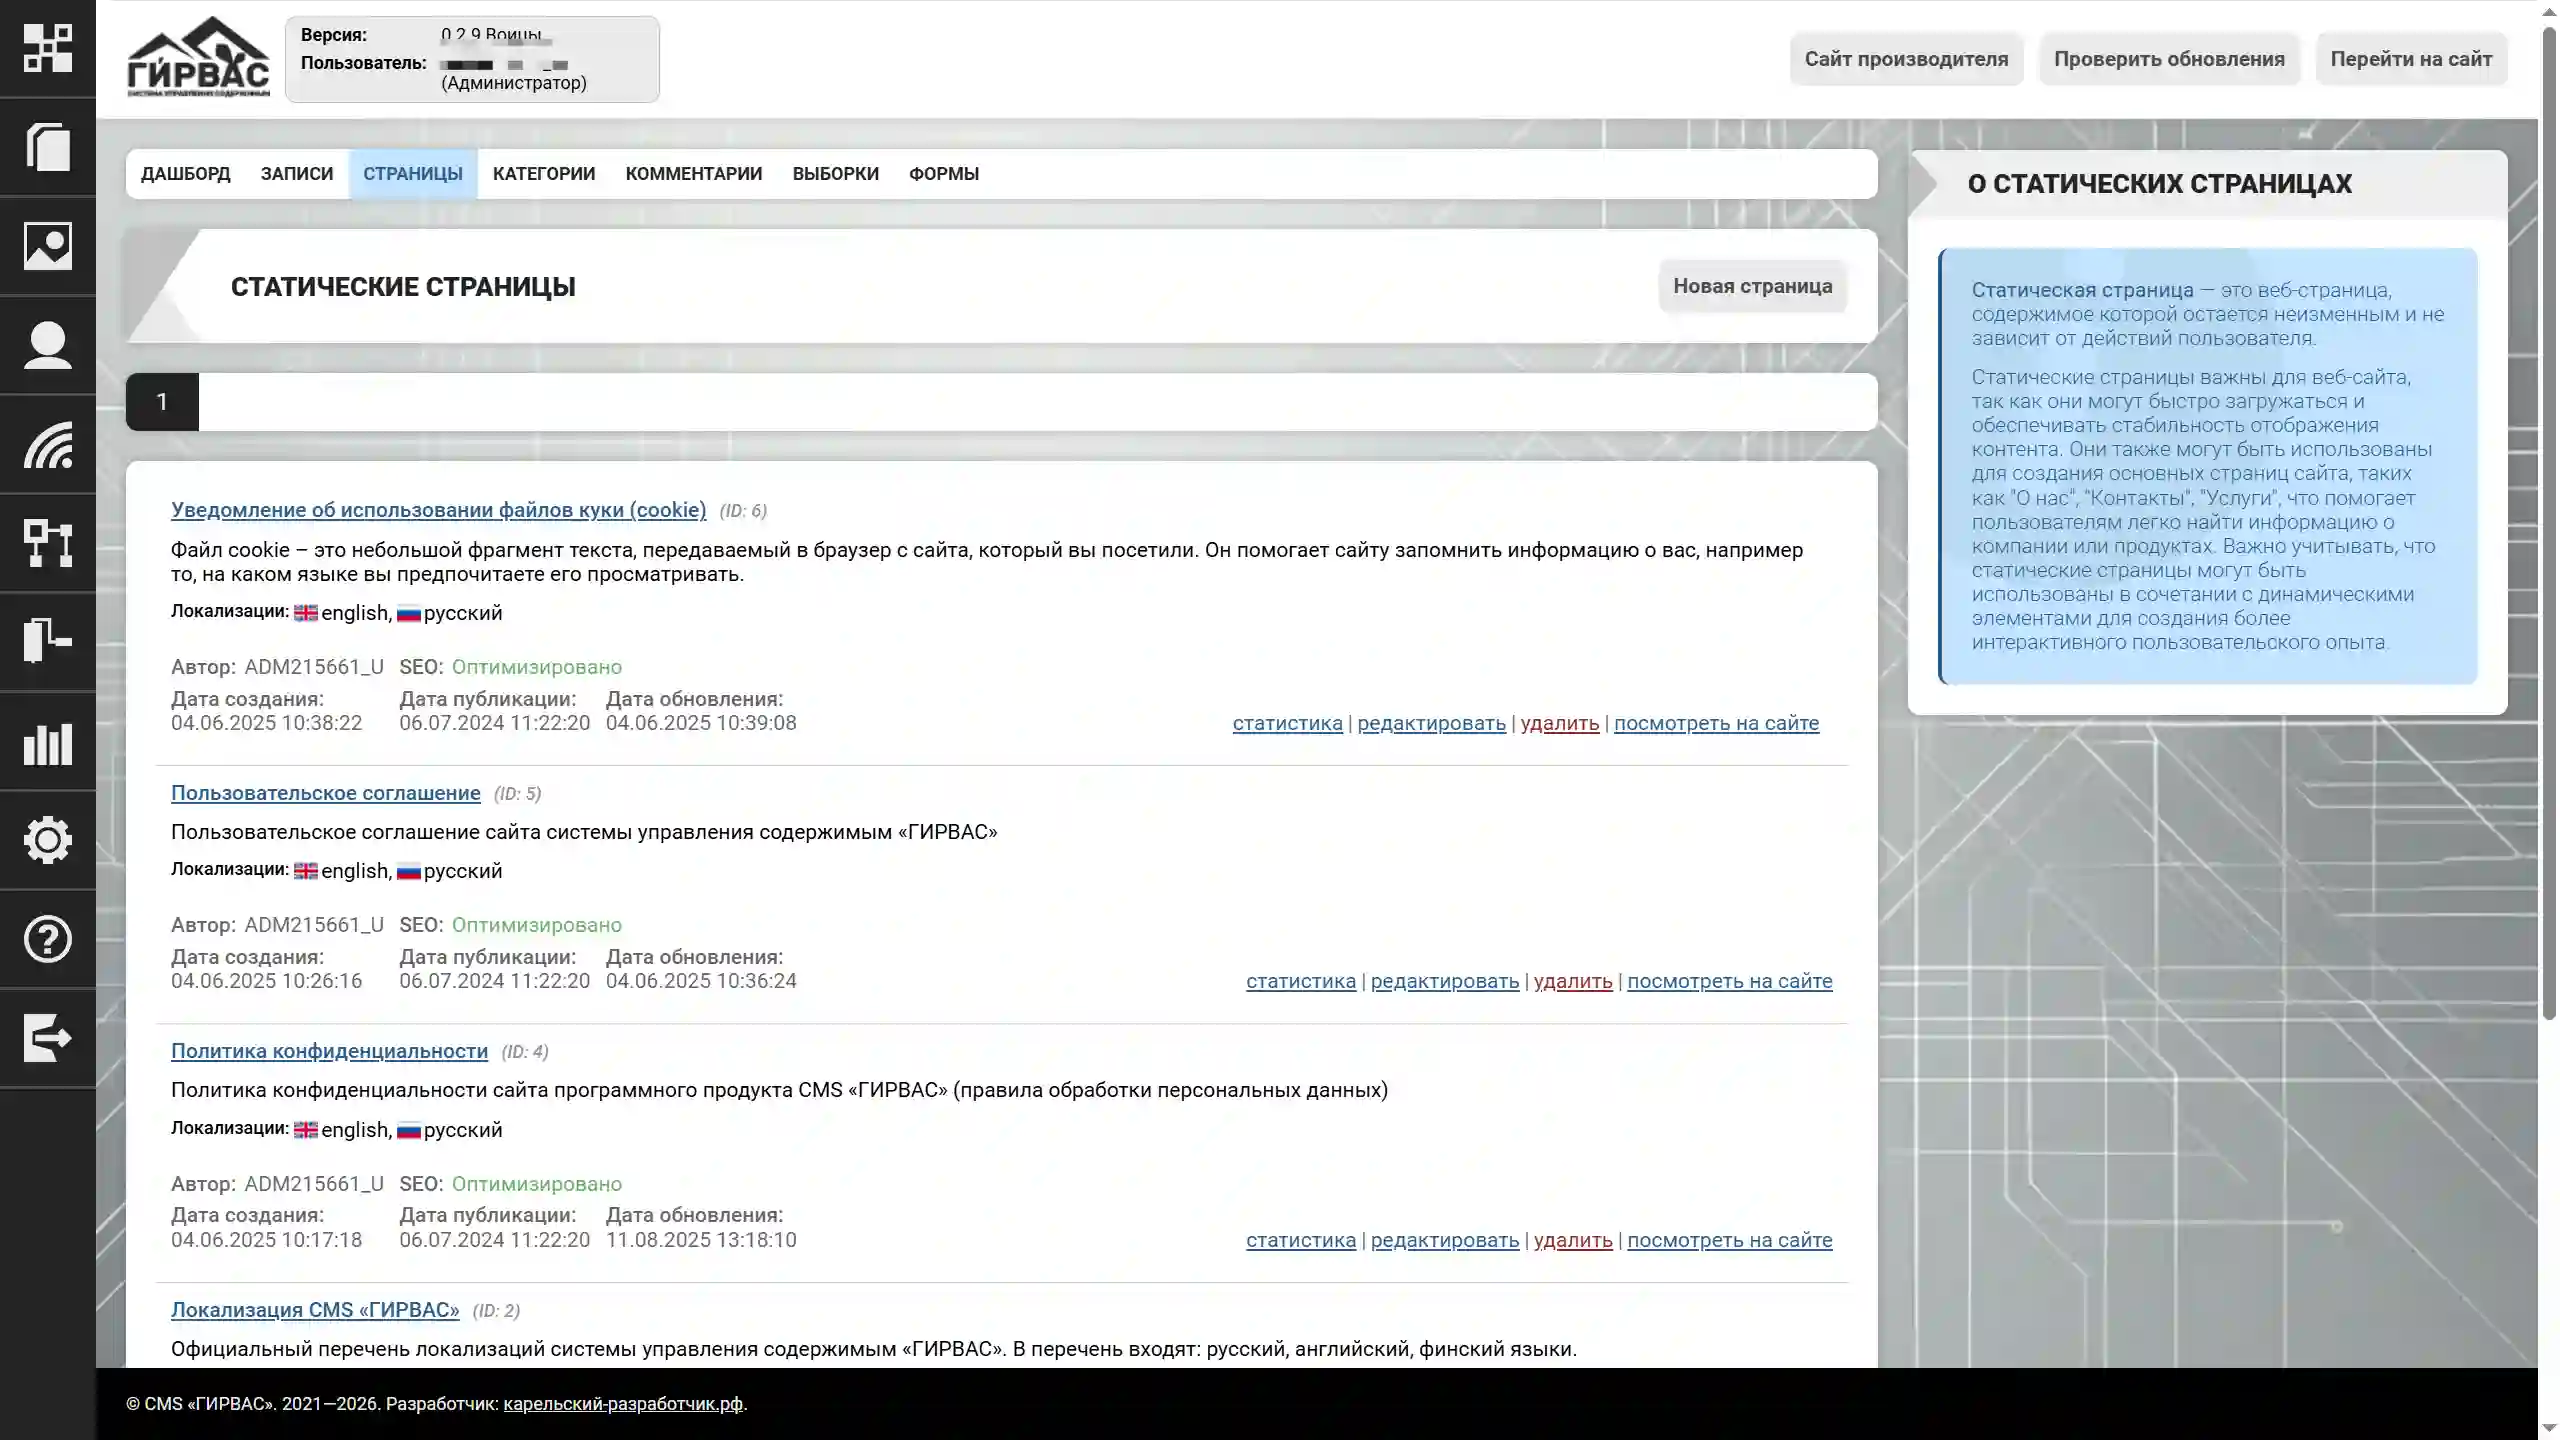
Static pages function similarly to posts, except they lack categories and comments.
Each post list item has a toolbar for interaction:
- Statistics – view page statistics;
- Edit – edit an existing page;
- Delete – delete a post;
- View on site – opens the page on the public section of the site.
Creating and editing a static page
Creating and editing is done through a single tool called "Editing a Static Page," which is a form for filling in data.
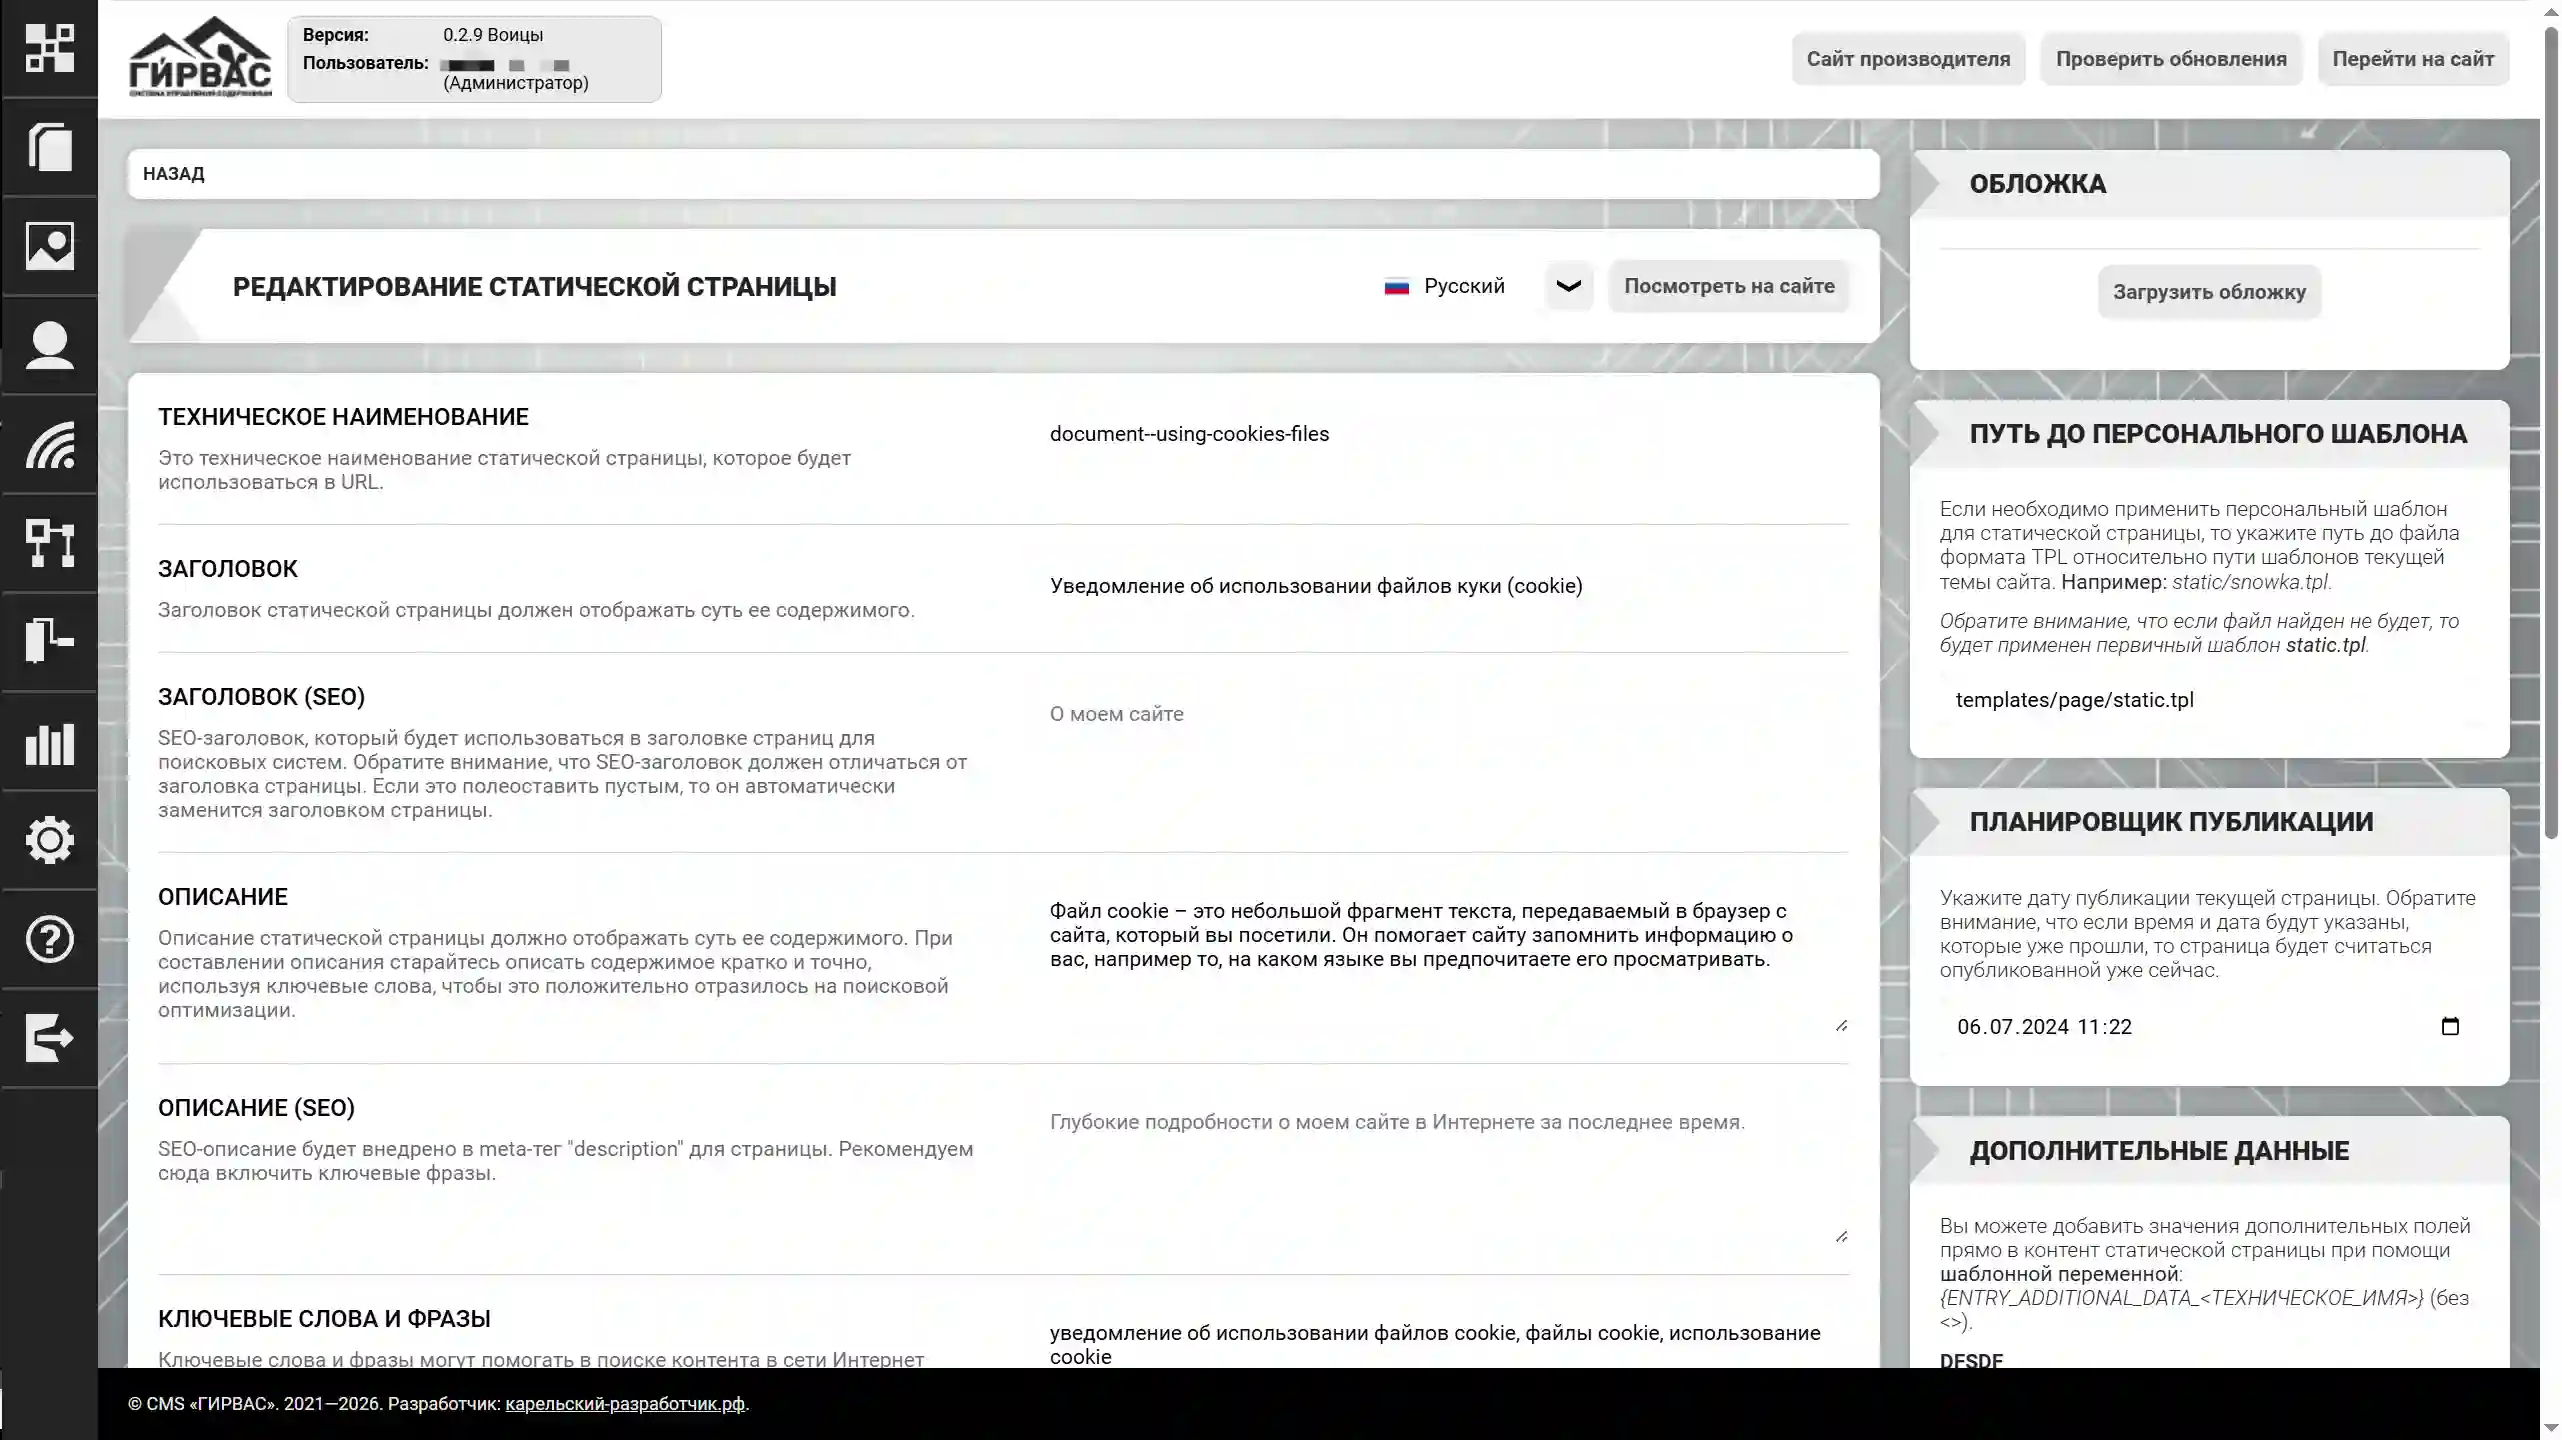
The form includes the following fields:
- Technical name – the name of the static page used to generate the URL. Only Latin characters are allowed in this field. Future versions may include the ability to work with Cyrillic URLs, given the presence of domains in Russia that support Cyrillic characters in the address bar.
- Title – the title of a static page, displayed on the page and also embedded in the HTML "title" tag of the web page;
- Title (SEO) – a special title for a static page, embedded in the HTML "title" tag of the web page. Note that an SEO title should be different from a regular title;
- Description – a brief description of the static page. Embedded in the meta "description" tag of the web page;
- Description (SEO) – a special description for a static page, embedded in the meta "description" tag of the web page. Note that an SEO description should be different from a regular description;
- Keywords and Phrases – words and phrases that describe the content of the static page. It is recommended to use terms included in the description and page content. Embedded in the web page's "keywords" meta tag;
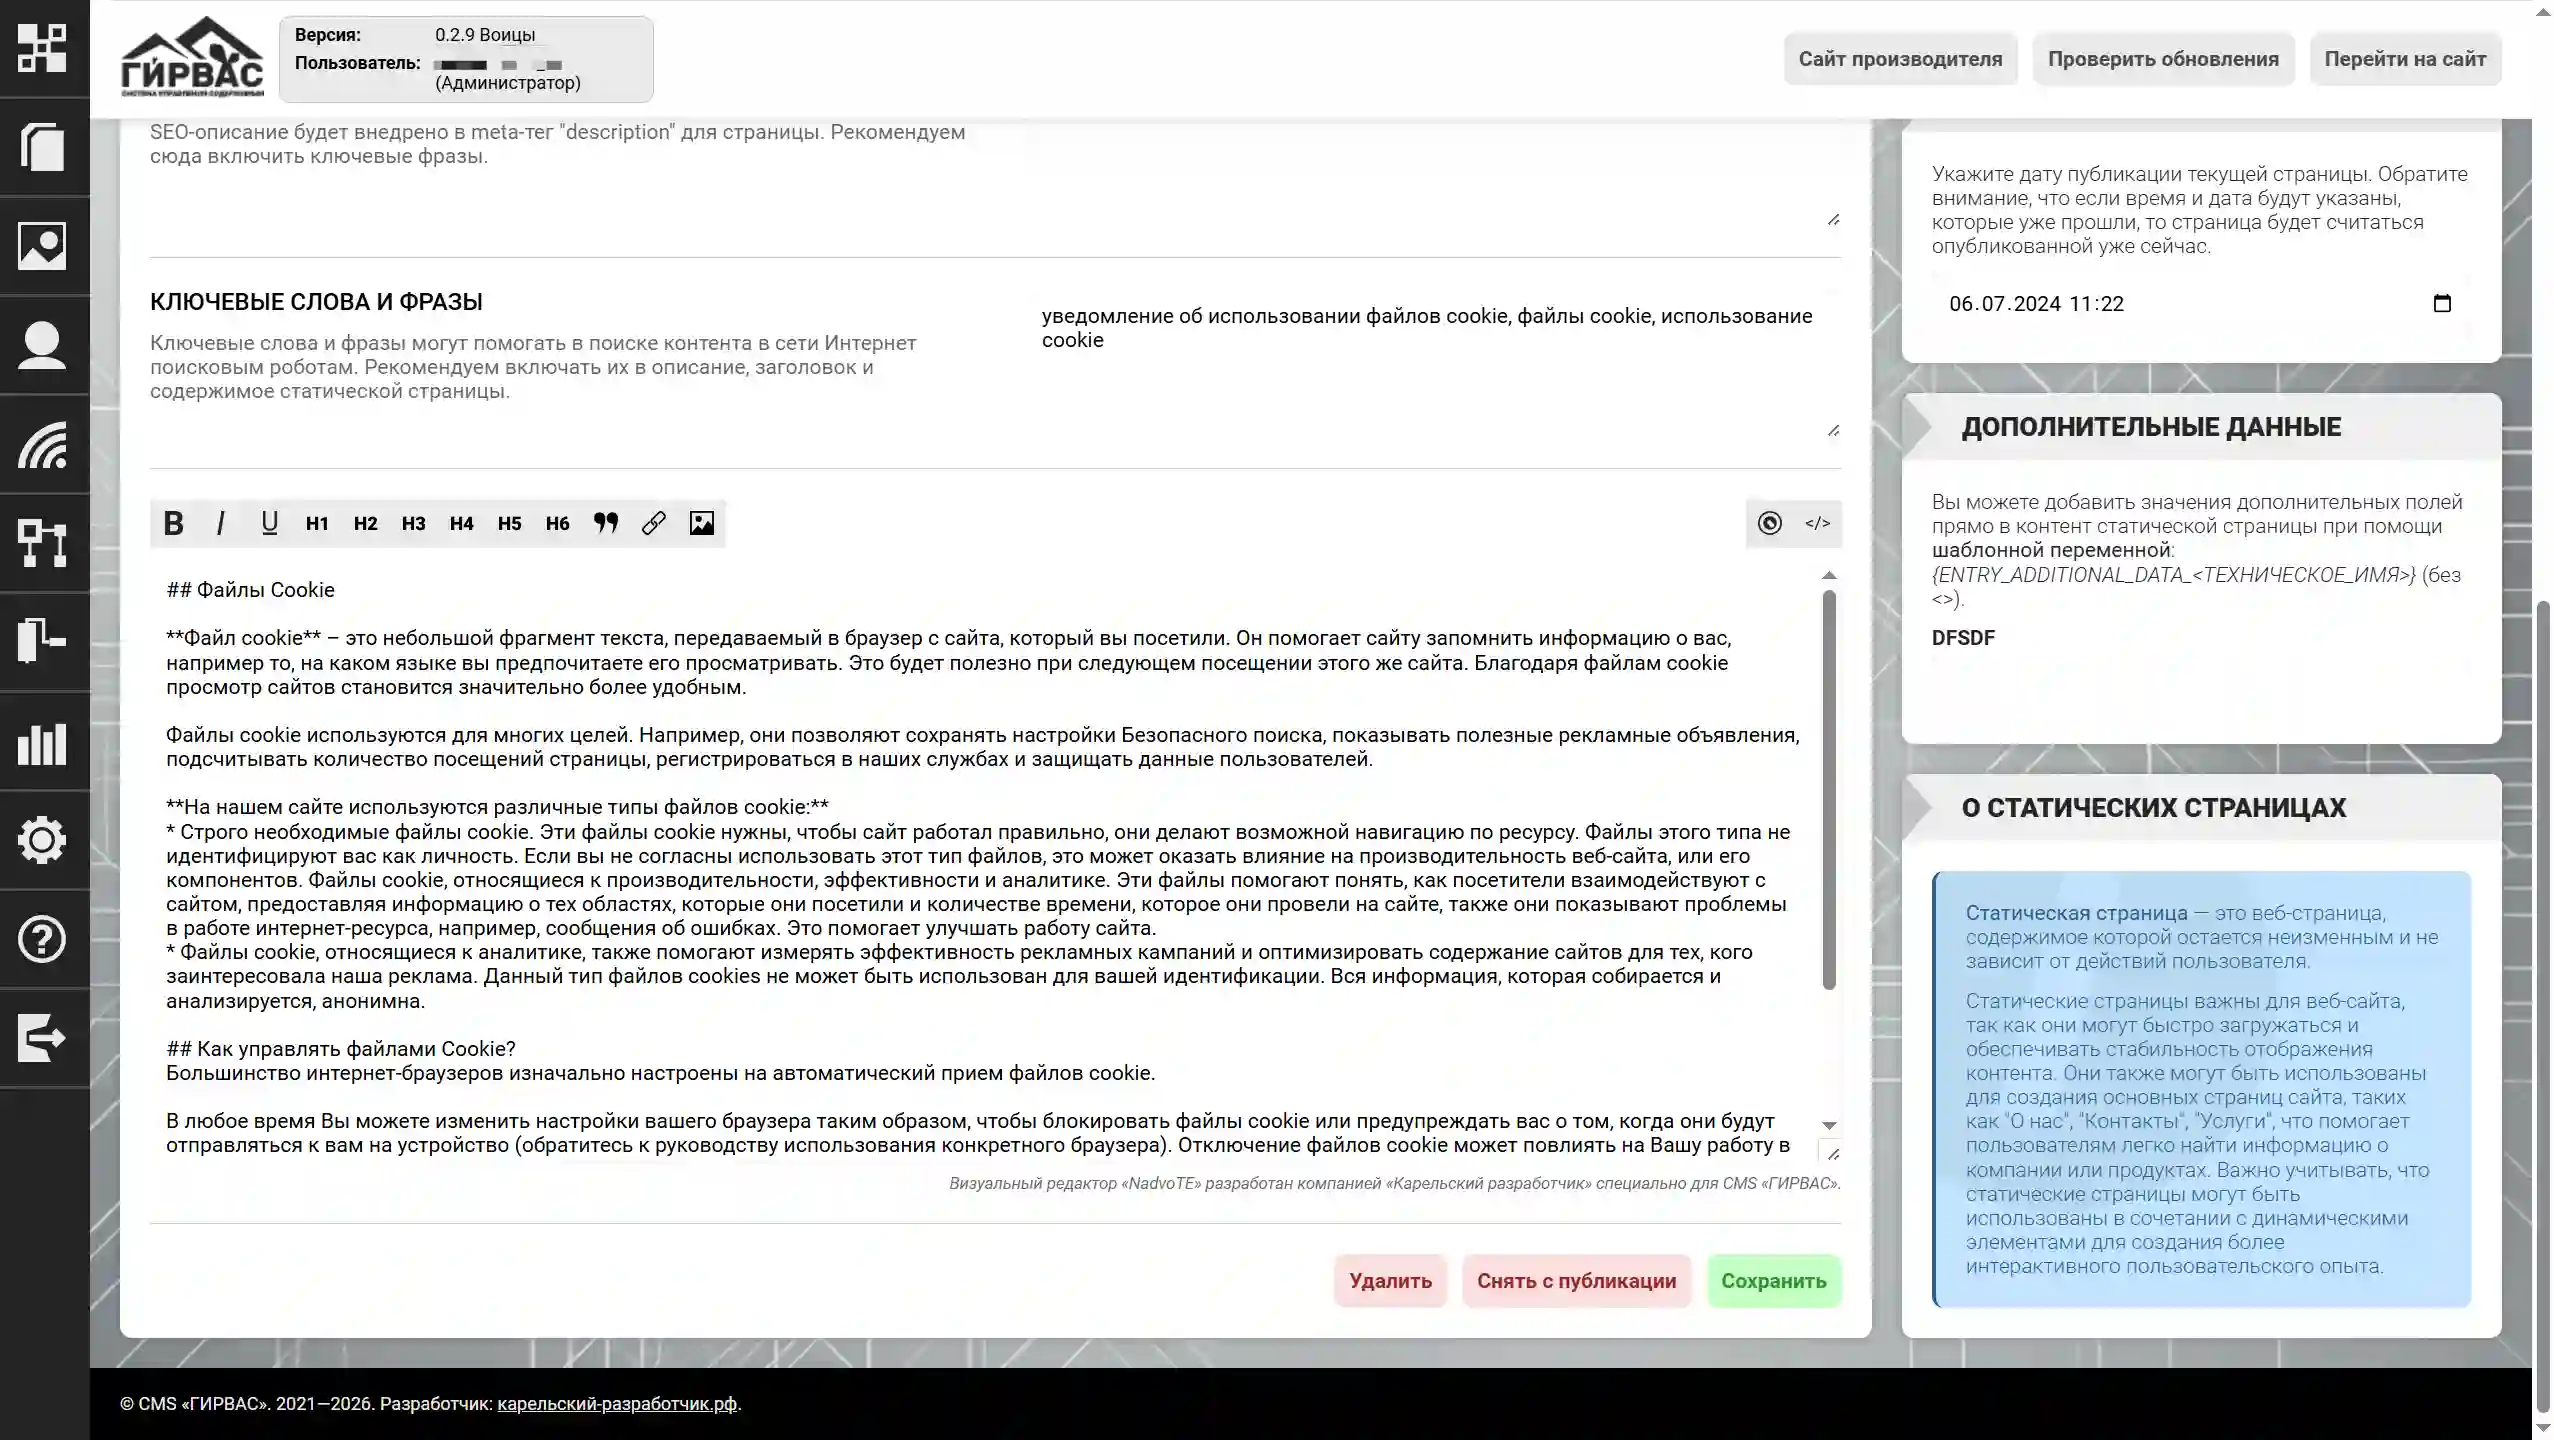
- Content – the main field, equipped with the built-in "NadvoTE" editor for working with text. It is intended for placing the main content of a static page.
After filling out the form, click the "Save" button. After saving the entry, the following functionality becomes available:
- Cover – a graphic image serving as an illustration for a static page. ATTENTION! Images uploaded via the "Cover" feature are also available in the "Media Files" section.
- Path to Personal Template – a special block that allows you to specify the path to a personal TPL template for using an alternative page layout. This is useful if you need to create pages with custom layout elements.
- Scheduler – a special feature for scheduling publications. If you select a future date, the page will automatically be considered published, but will become viewable by regular users only after the selected date.
- Additional Data – a special block that allows you to fill in data for additional fields created for static pages in the admin panel. Please note that to display values, you must embed the template variables
{PAGE_STATIC_ADDITIONAL_DATA_(without <>) in the appropriate place in the theme.} - Publish – a feature that manages public access to a static page. By default, a created static page is unpublished, allowing editing and approval. To make it publicly viewable, click the "Publish" button. To revoke public access, click the "Unpublish" button.
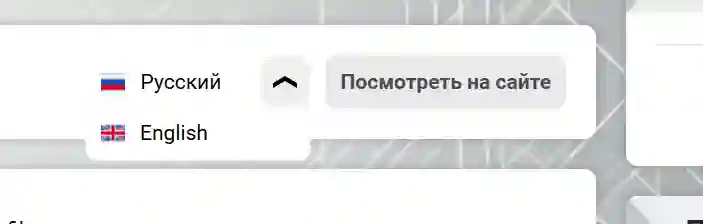
The "Editing a Static Page" tool supports multilingual CMS systems. To change the language of a static page, select the appropriate value from the drop-down list located to the right of the tool's title.
Deleting a Static Page
A static page can be deleted by clicking the delete button on the static pages list page in the "Static Pages" section. Deletion is also available by clicking the "Delete" button on the static page editing page.
When attempting to delete a page, the system displays a pop-up window asking for confirmation. If you confirm, the static page is permanently deleted; if you decline, the action is canceled.
Record Selections
The "Record Selections" subsection of the "Content" section provides tools for managing record selections on the site, allowing you to subsequently display a set of records included in that selection.
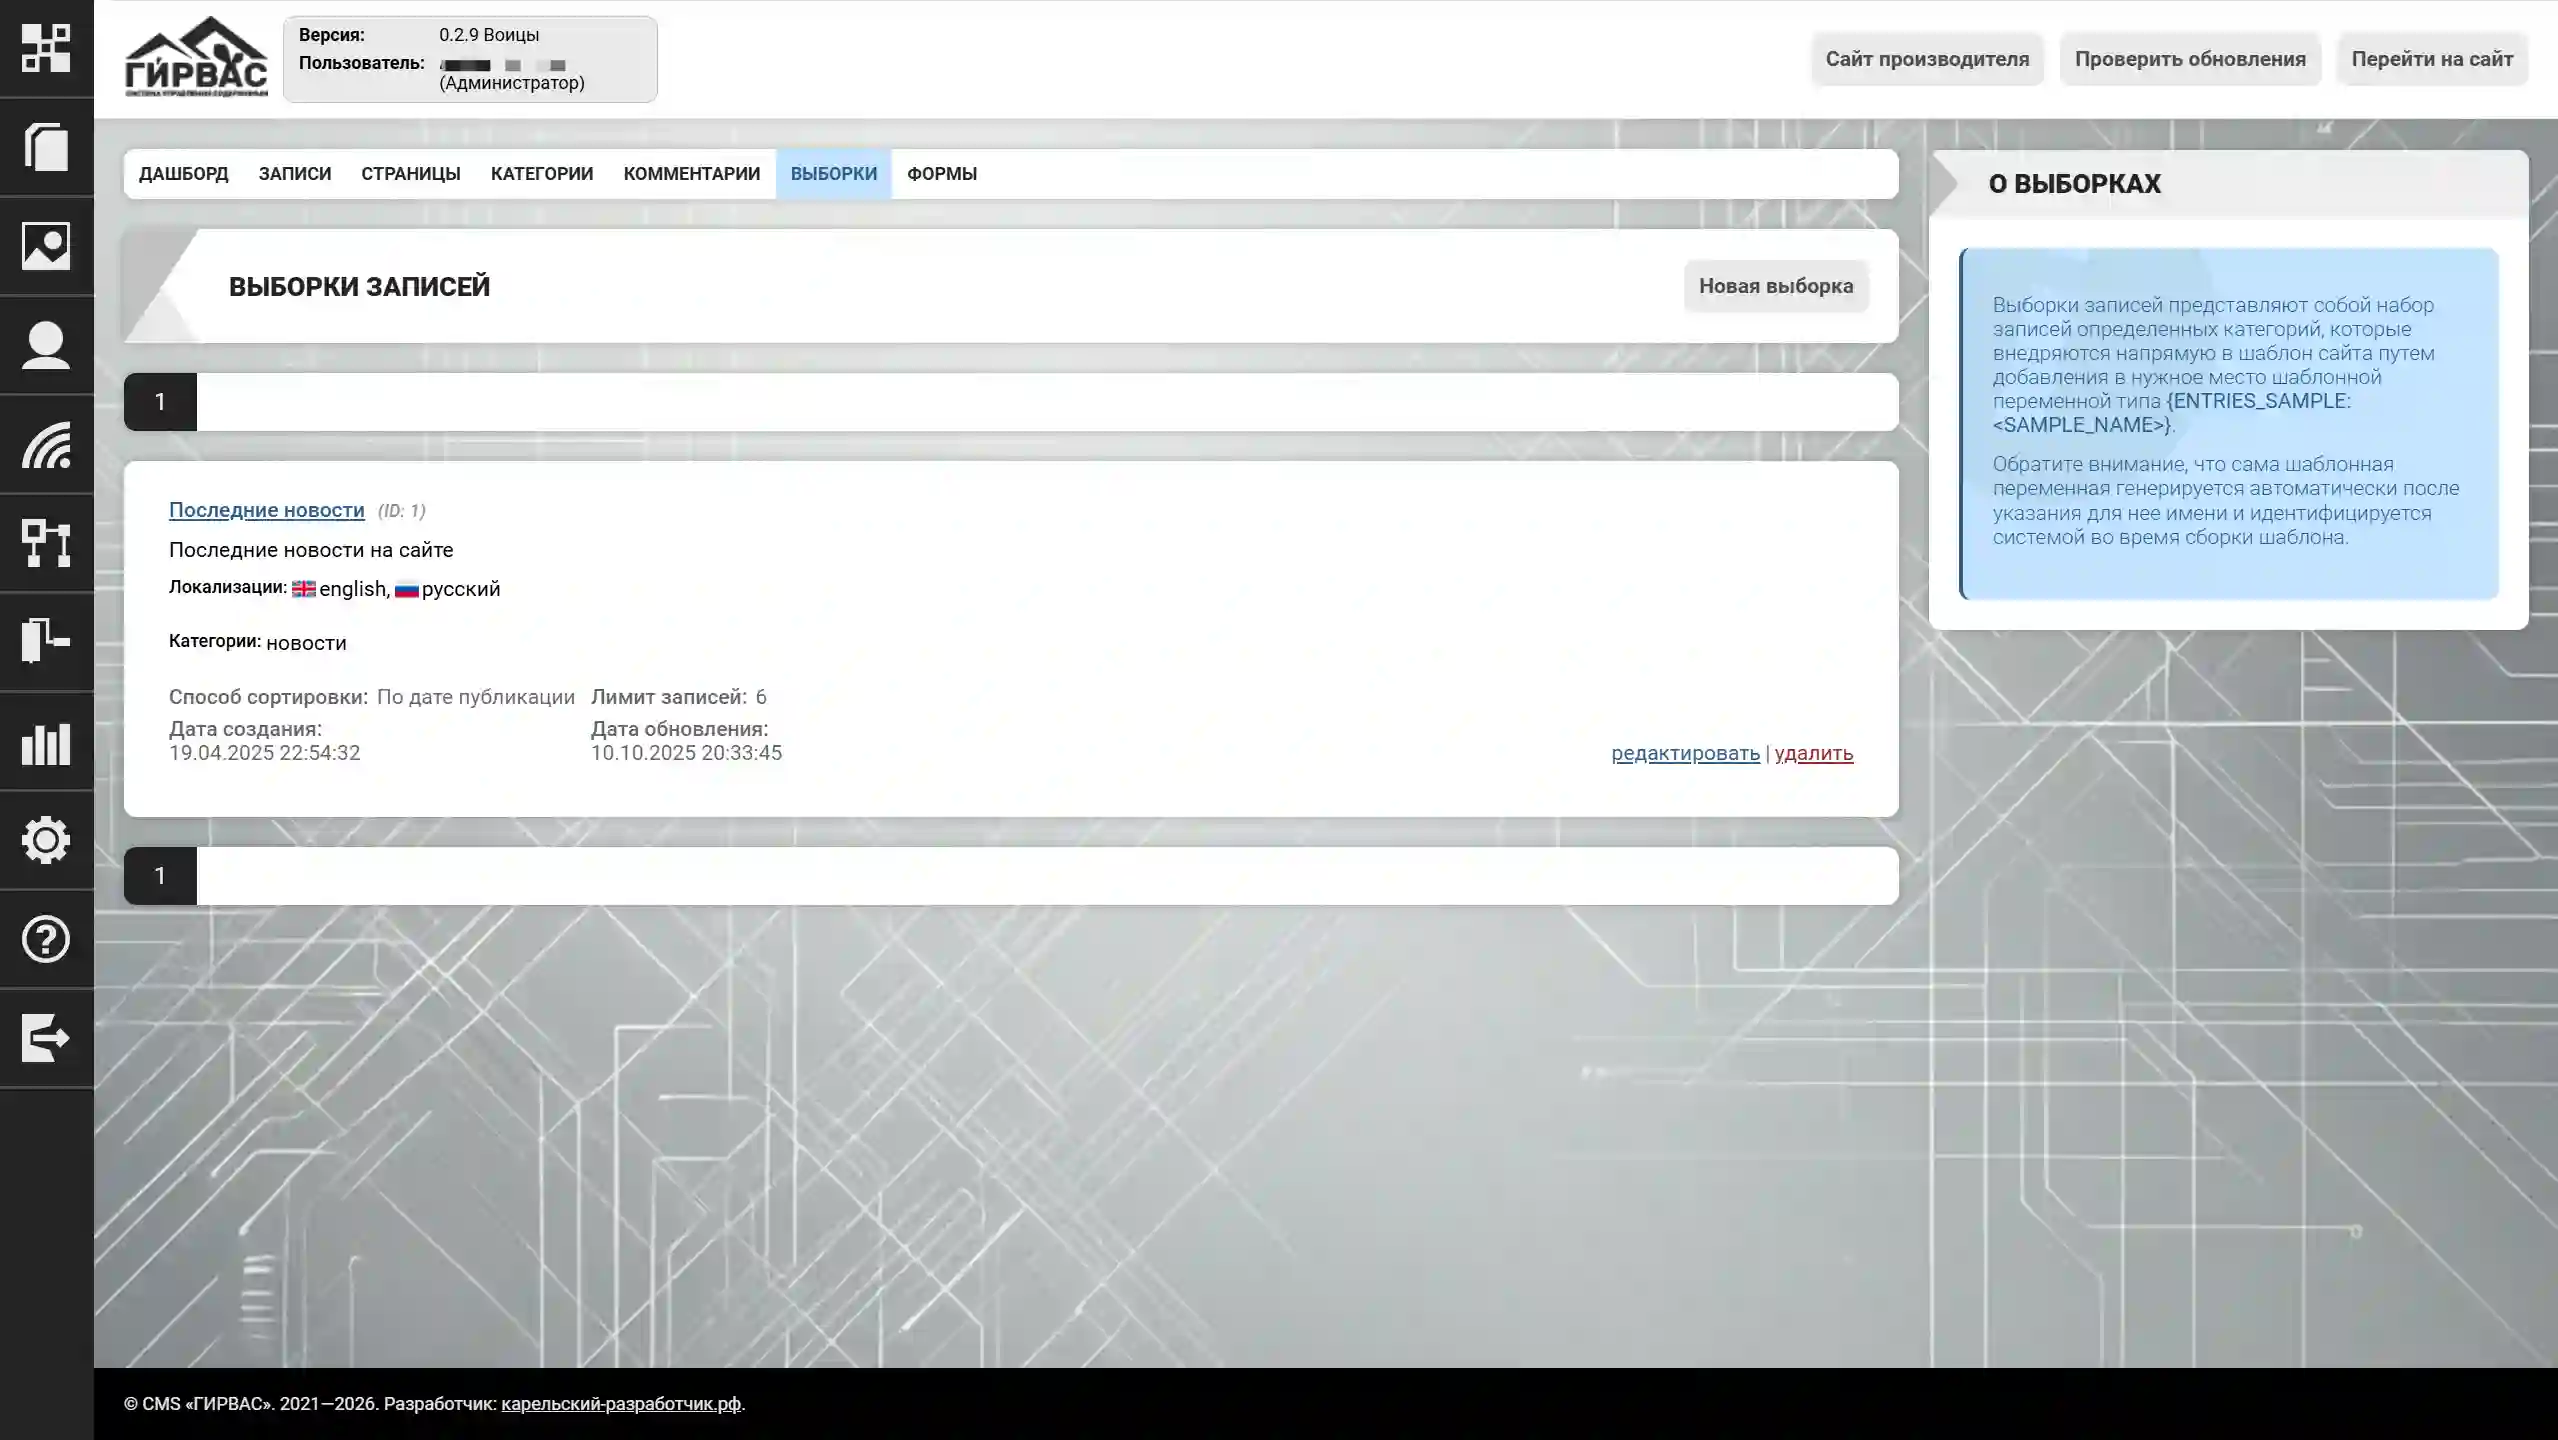
To create a new selection, click the "New Selection" button. Each element in the selection list is equipped with a toolbar for interaction:
- Edit – edit the element;
- Delete – delete the element.
Creating and Editing a Selection
Creating and editing is done through a single "Edit Selection" toolbar, which is a form for filling in data.
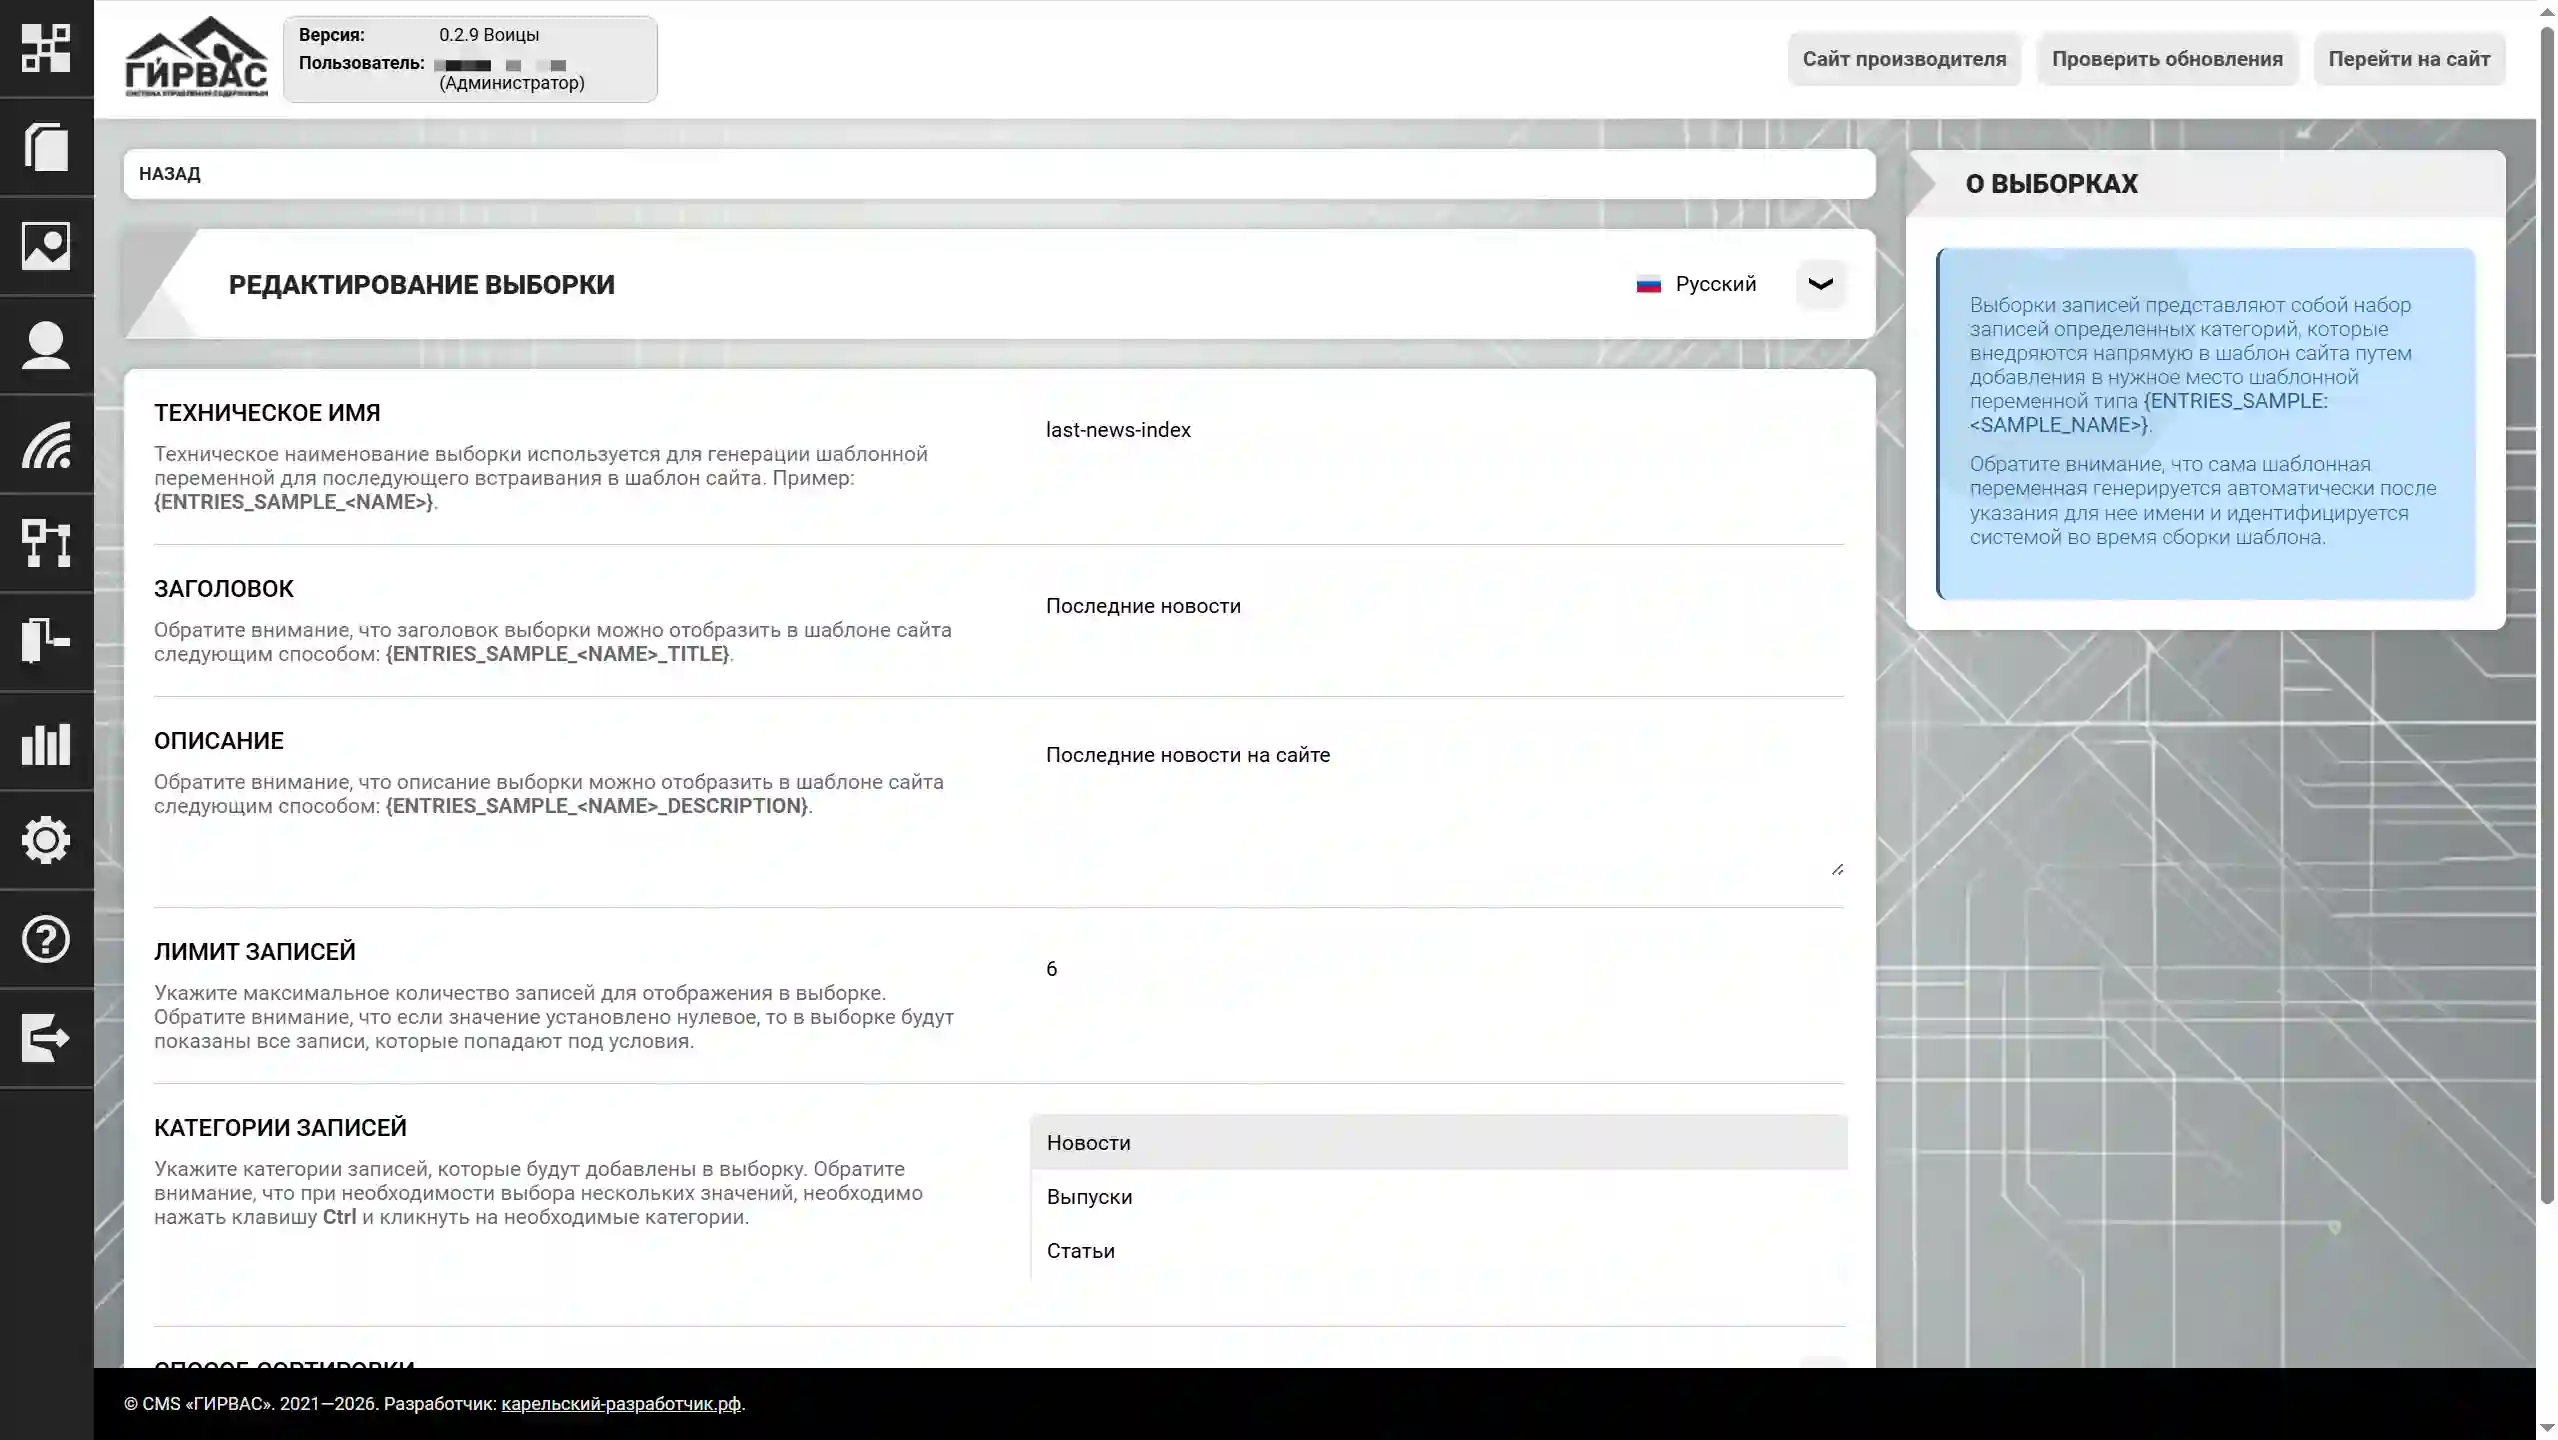
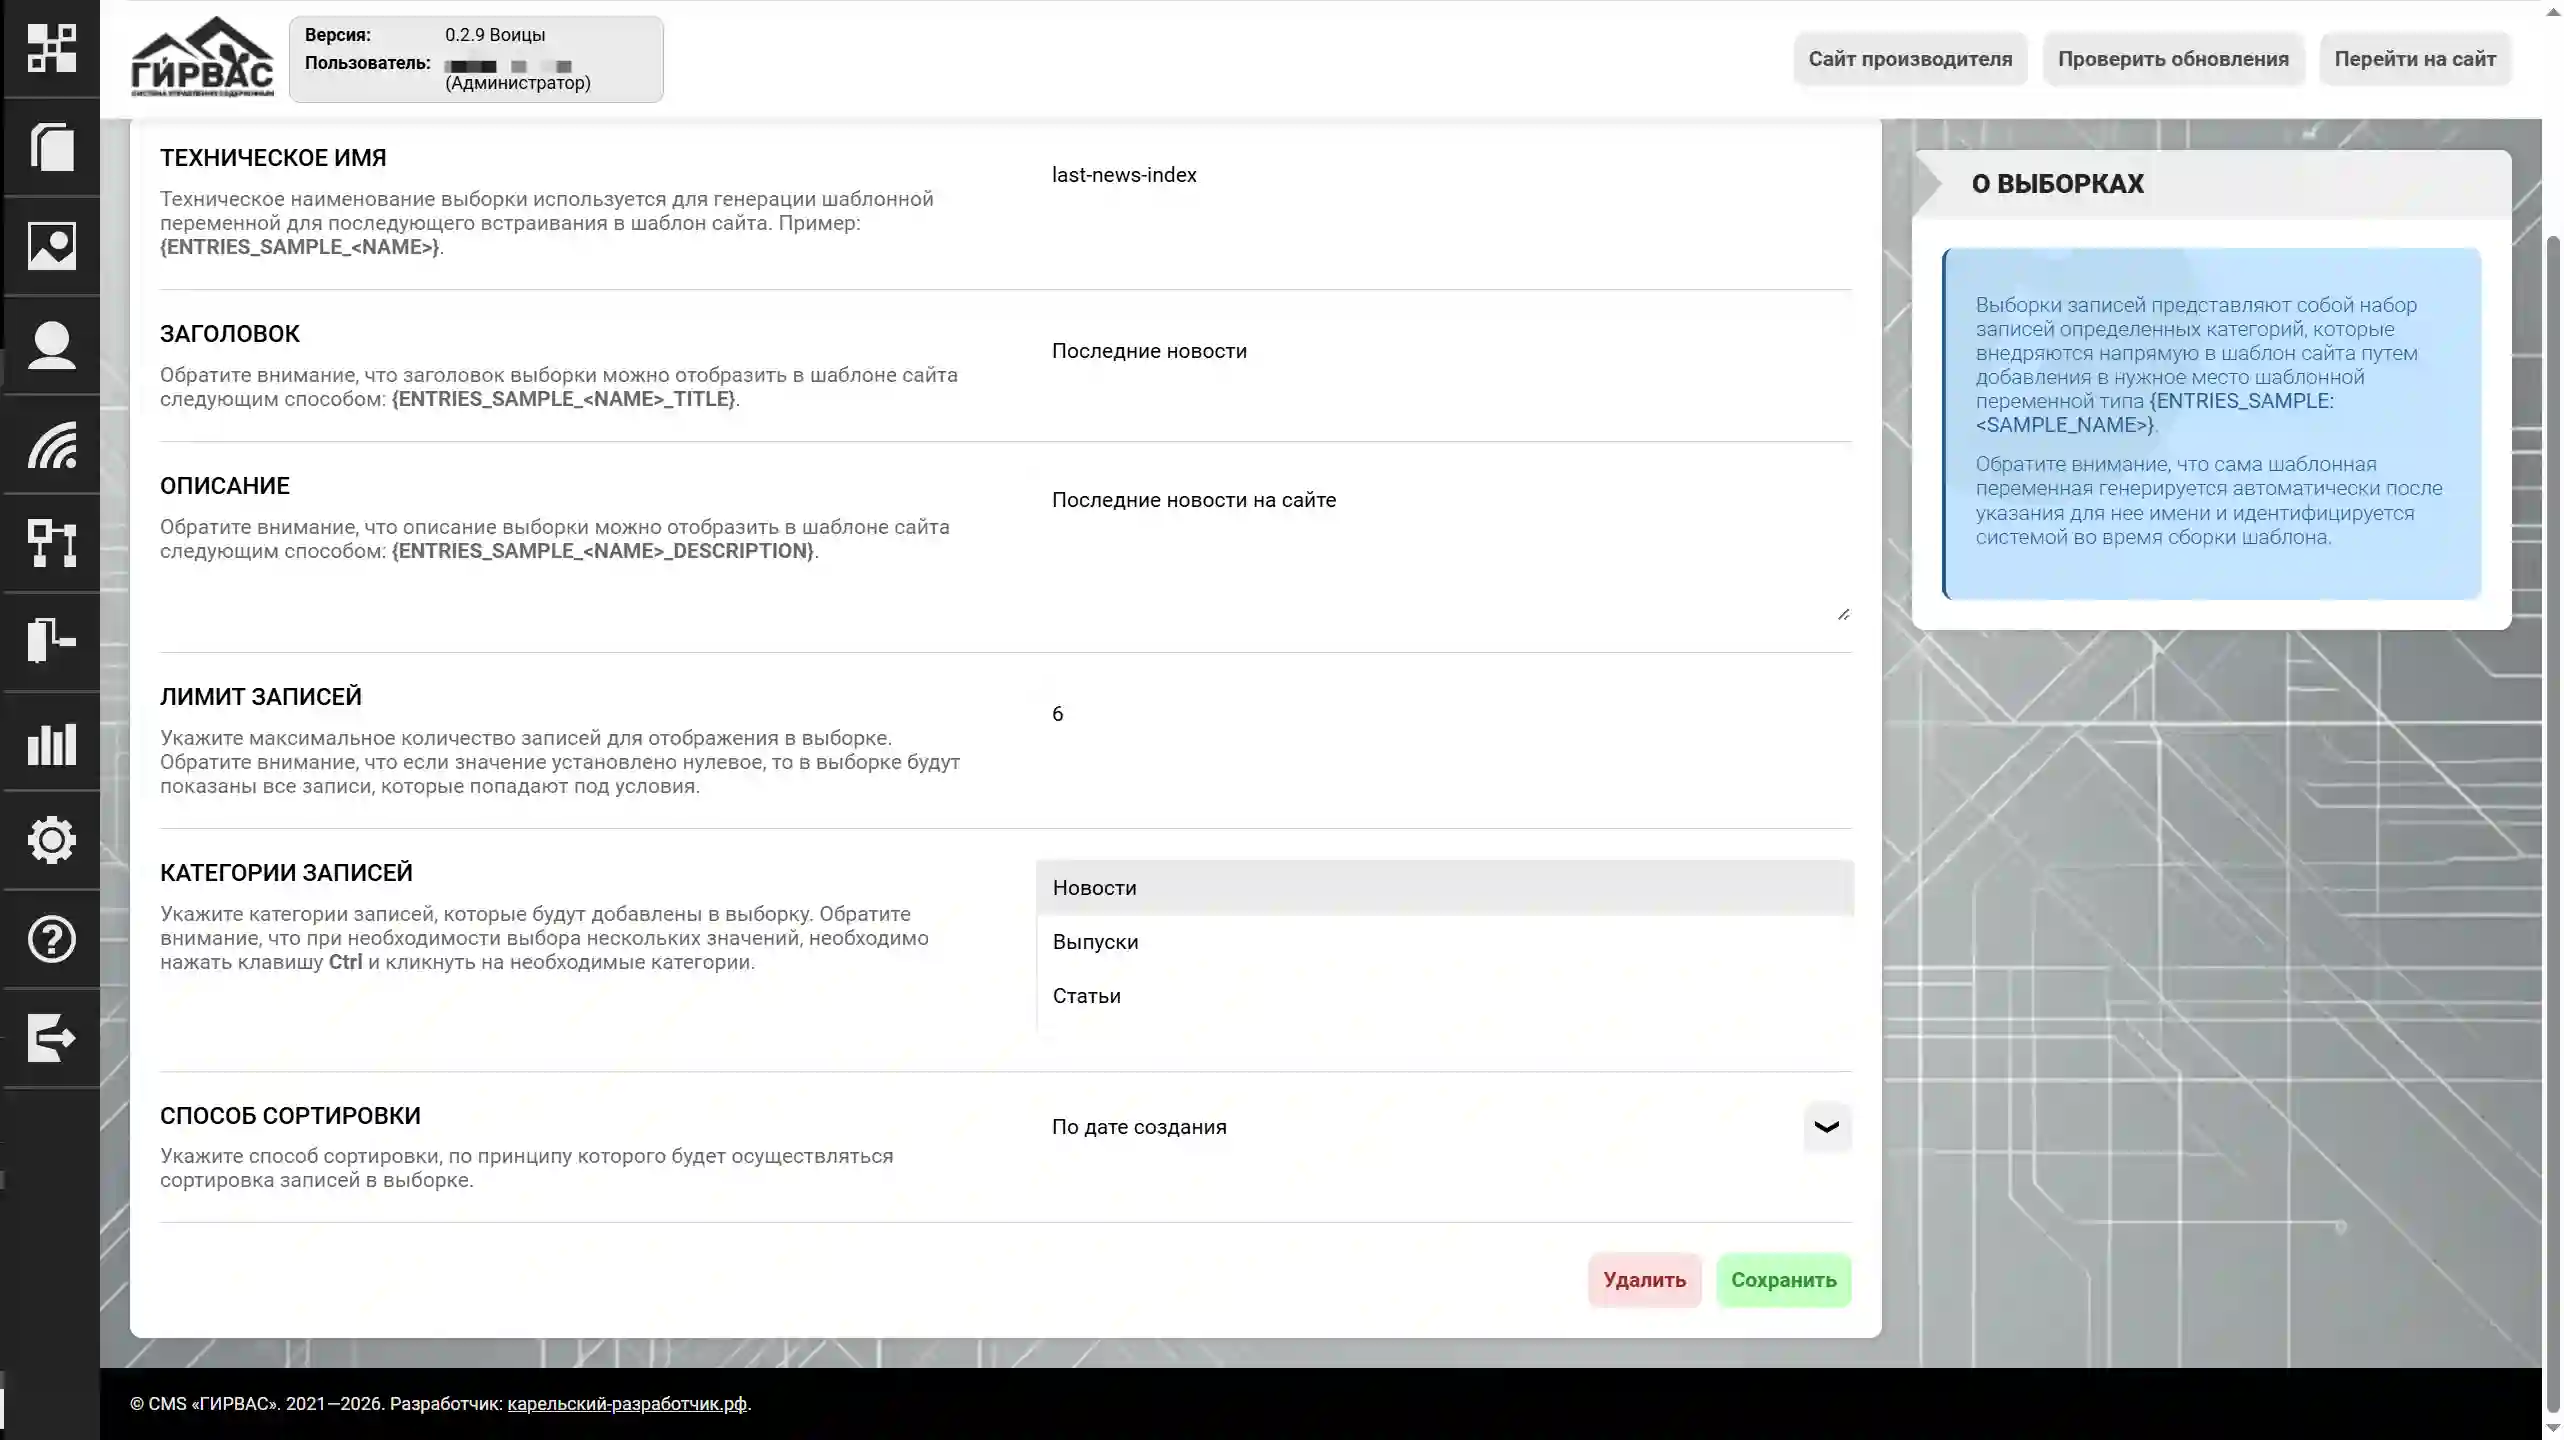
The form includes the following fields:
- Technical name – the name of the record selection, used to form part of the template variable, which ultimately takes the form:
{ENTRIES_SAMPLE_(without <>). Only Latin characters are allowed in this field;} - Title – the title of the record selection, which can be displayed within the selection template;
- Description – a brief description of the record selection, which can be displayed within the selection template;
- Record Limit – the maximum number of records that can be displayed within its template;
- Record Categories – the categories of records to be included in the current selection;
- Sort Method – the sorting method for records in the selection;
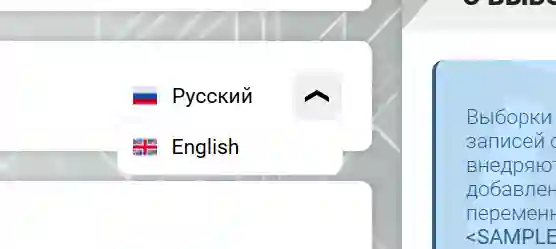
The "Edit Selection" tool supports the CMS multilingual system. To change the language of the selected record, select the appropriate value from the drop-down list located to the right of the tool's title.
Deleting a Selection
A record selection can be deleted by clicking the "Delete" button on the selection list page in the "Record Selections" section. Deletion is also available by clicking the "Delete" button on the selection edit page.
When attempting to delete, the system displays a pop-up window asking for confirmation. If confirmed, the selection is permanently deleted; if rejected, the action is canceled.
Forms
The "Forms" subsection of the "Content" section provides tools for managing personalized forms on your website, allowing you to create forms with a specific set of fields for collecting information.
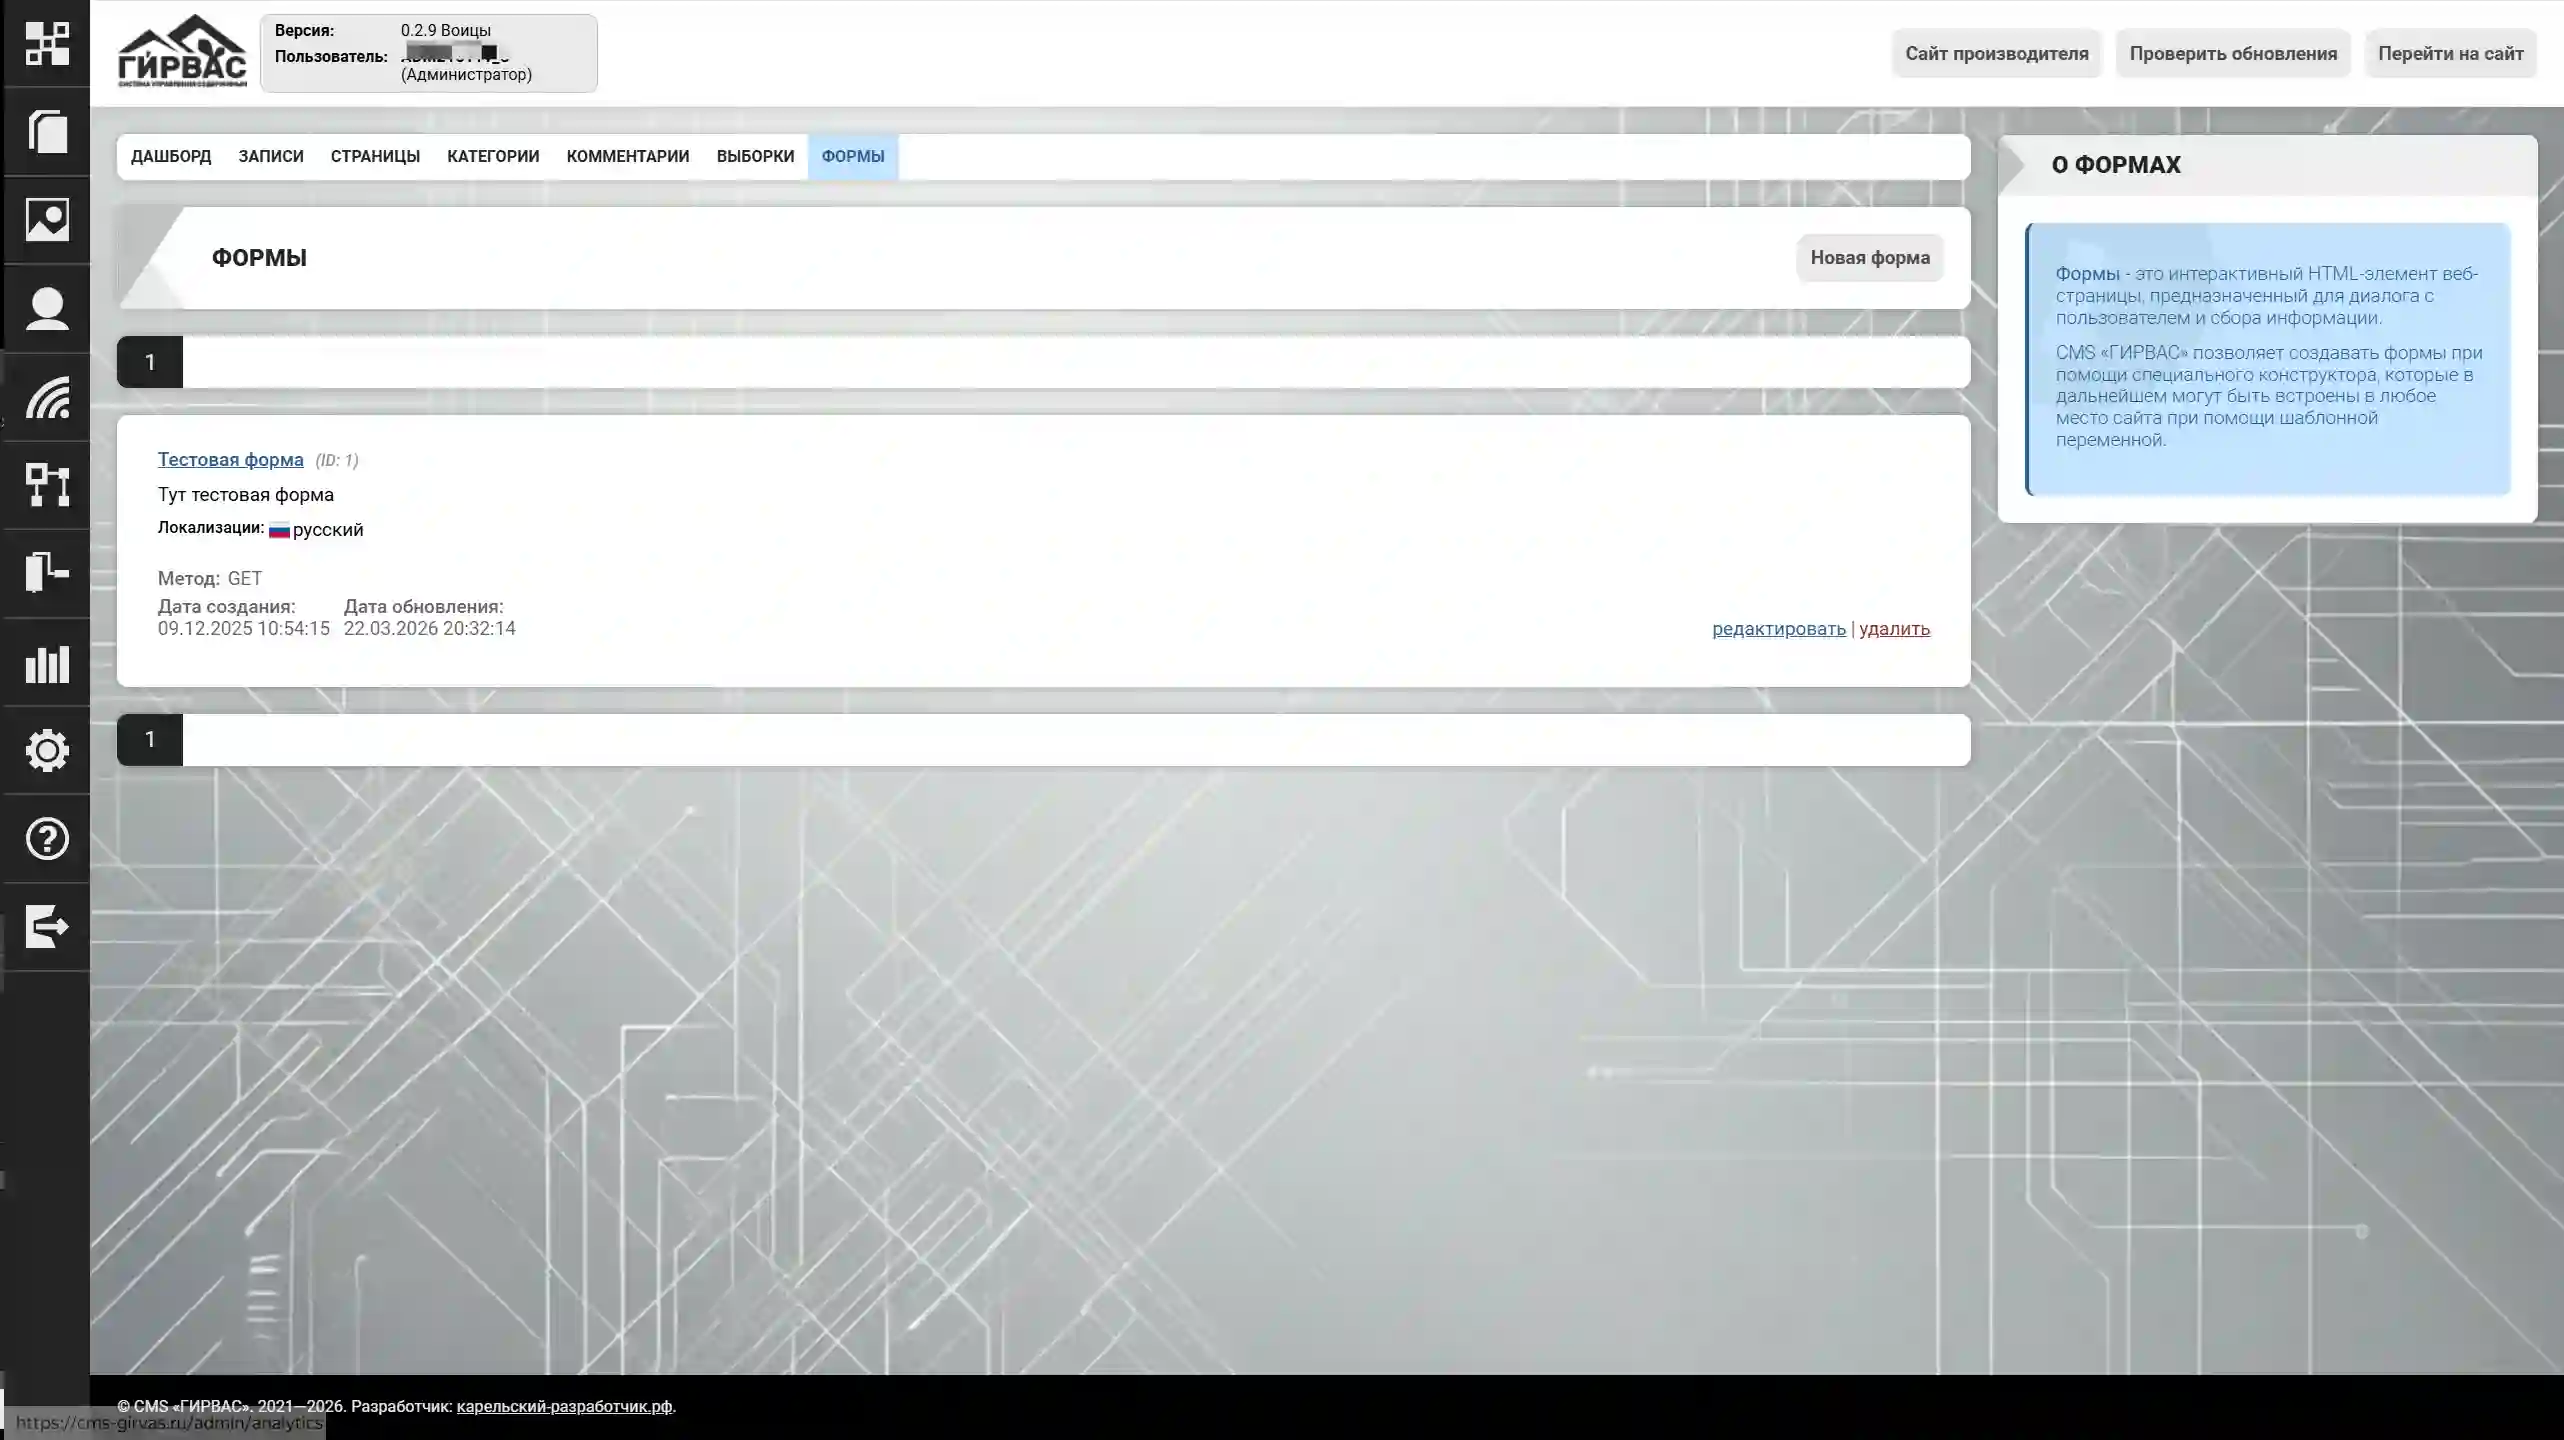
To create a new form, click the "New Form" button. Each element in the form list has a toolbar for interaction:
- Edit – edits an element;
- Delete – deletes an element.
Legal requirement for website owners in the Russian Federation
According to Federal Law No. 152-FZ "On Personal Data," consent to the processing of personal data (SOPD) is required from the subject completing a personalized form if it involves the collection of such data. To do this, a checkbox must be added with a signature confirming consent to the processing and a link to the terms of personal data processing. Furthermore, if the website owner is directly involved in the processing of personal data, they must be included in the Register of Personal Data Operators. If the owner is not a personal data operator, they must notify the Federal Service for Supervision of Communications, Information Technology, and Mass Media (Roskomnadzor) via a special notification form on the agency's website.
Processing personal data without registering it in the Registry and obtaining the subject's consent may result in a fine, including criminal liability, for the actual data controller.
Form Creation and Editing
Form creation and editing are performed through the unified "Form Editing" tool, which is a form for filling in data.
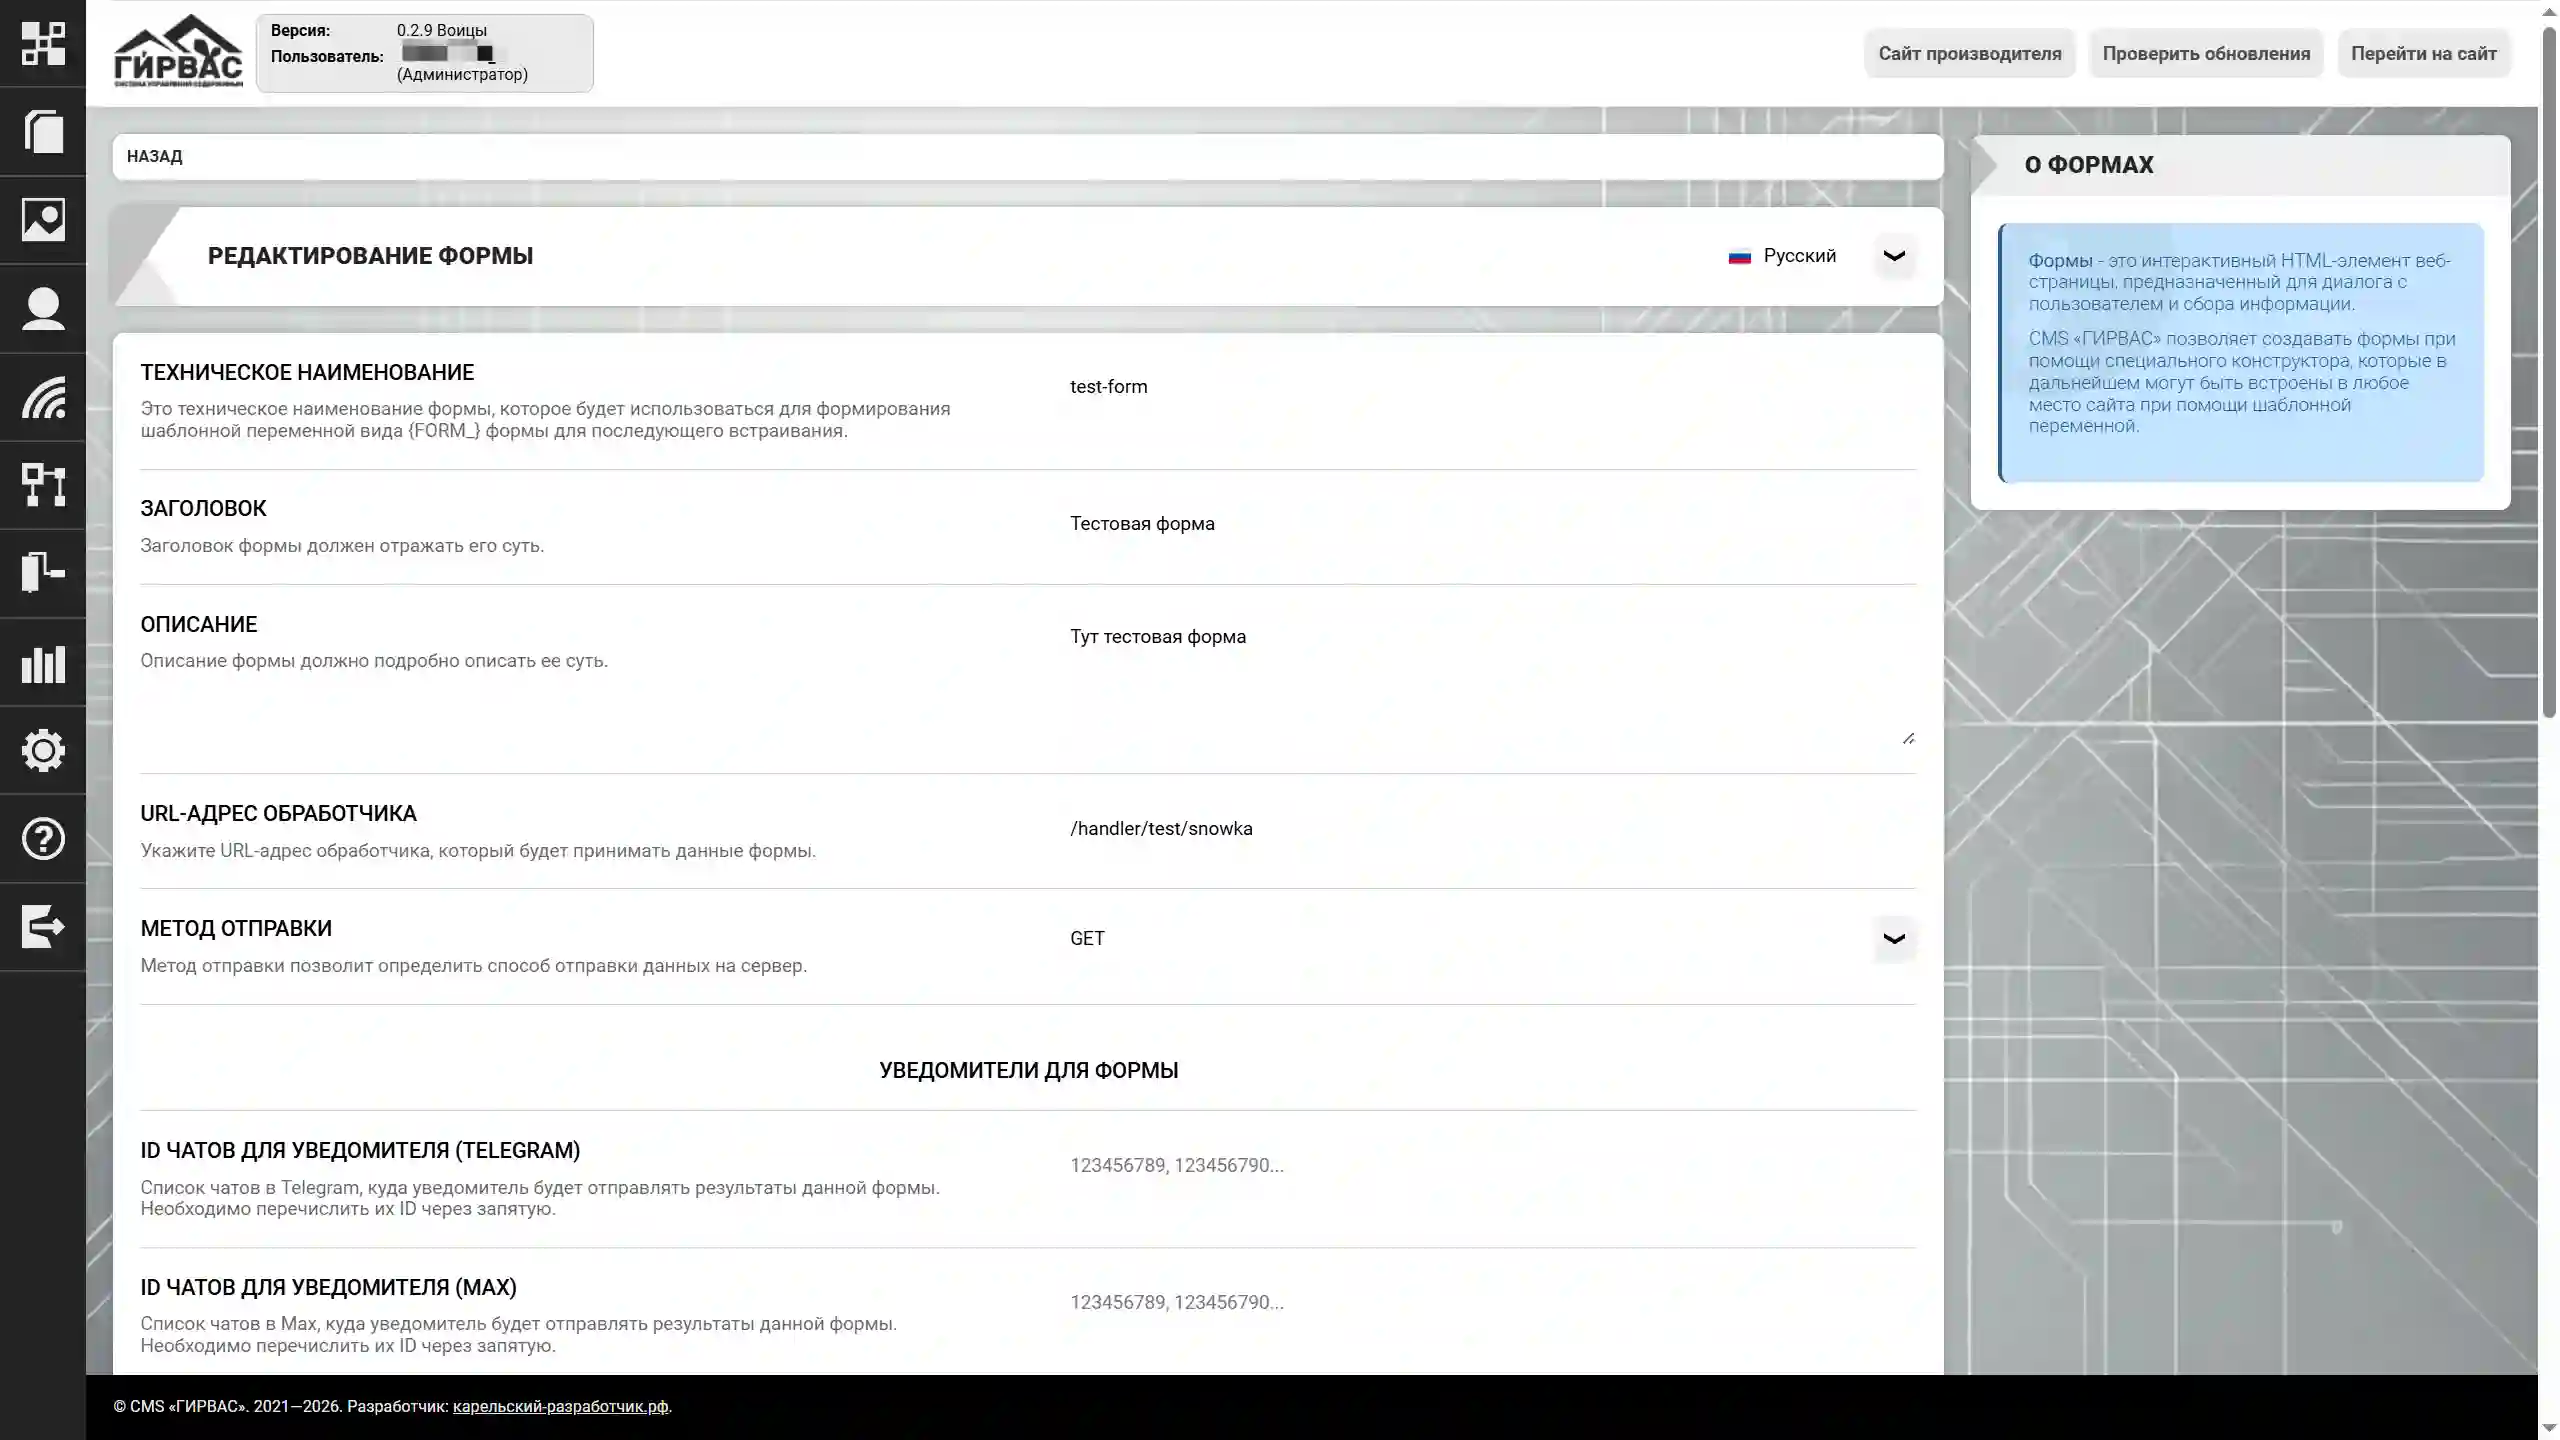
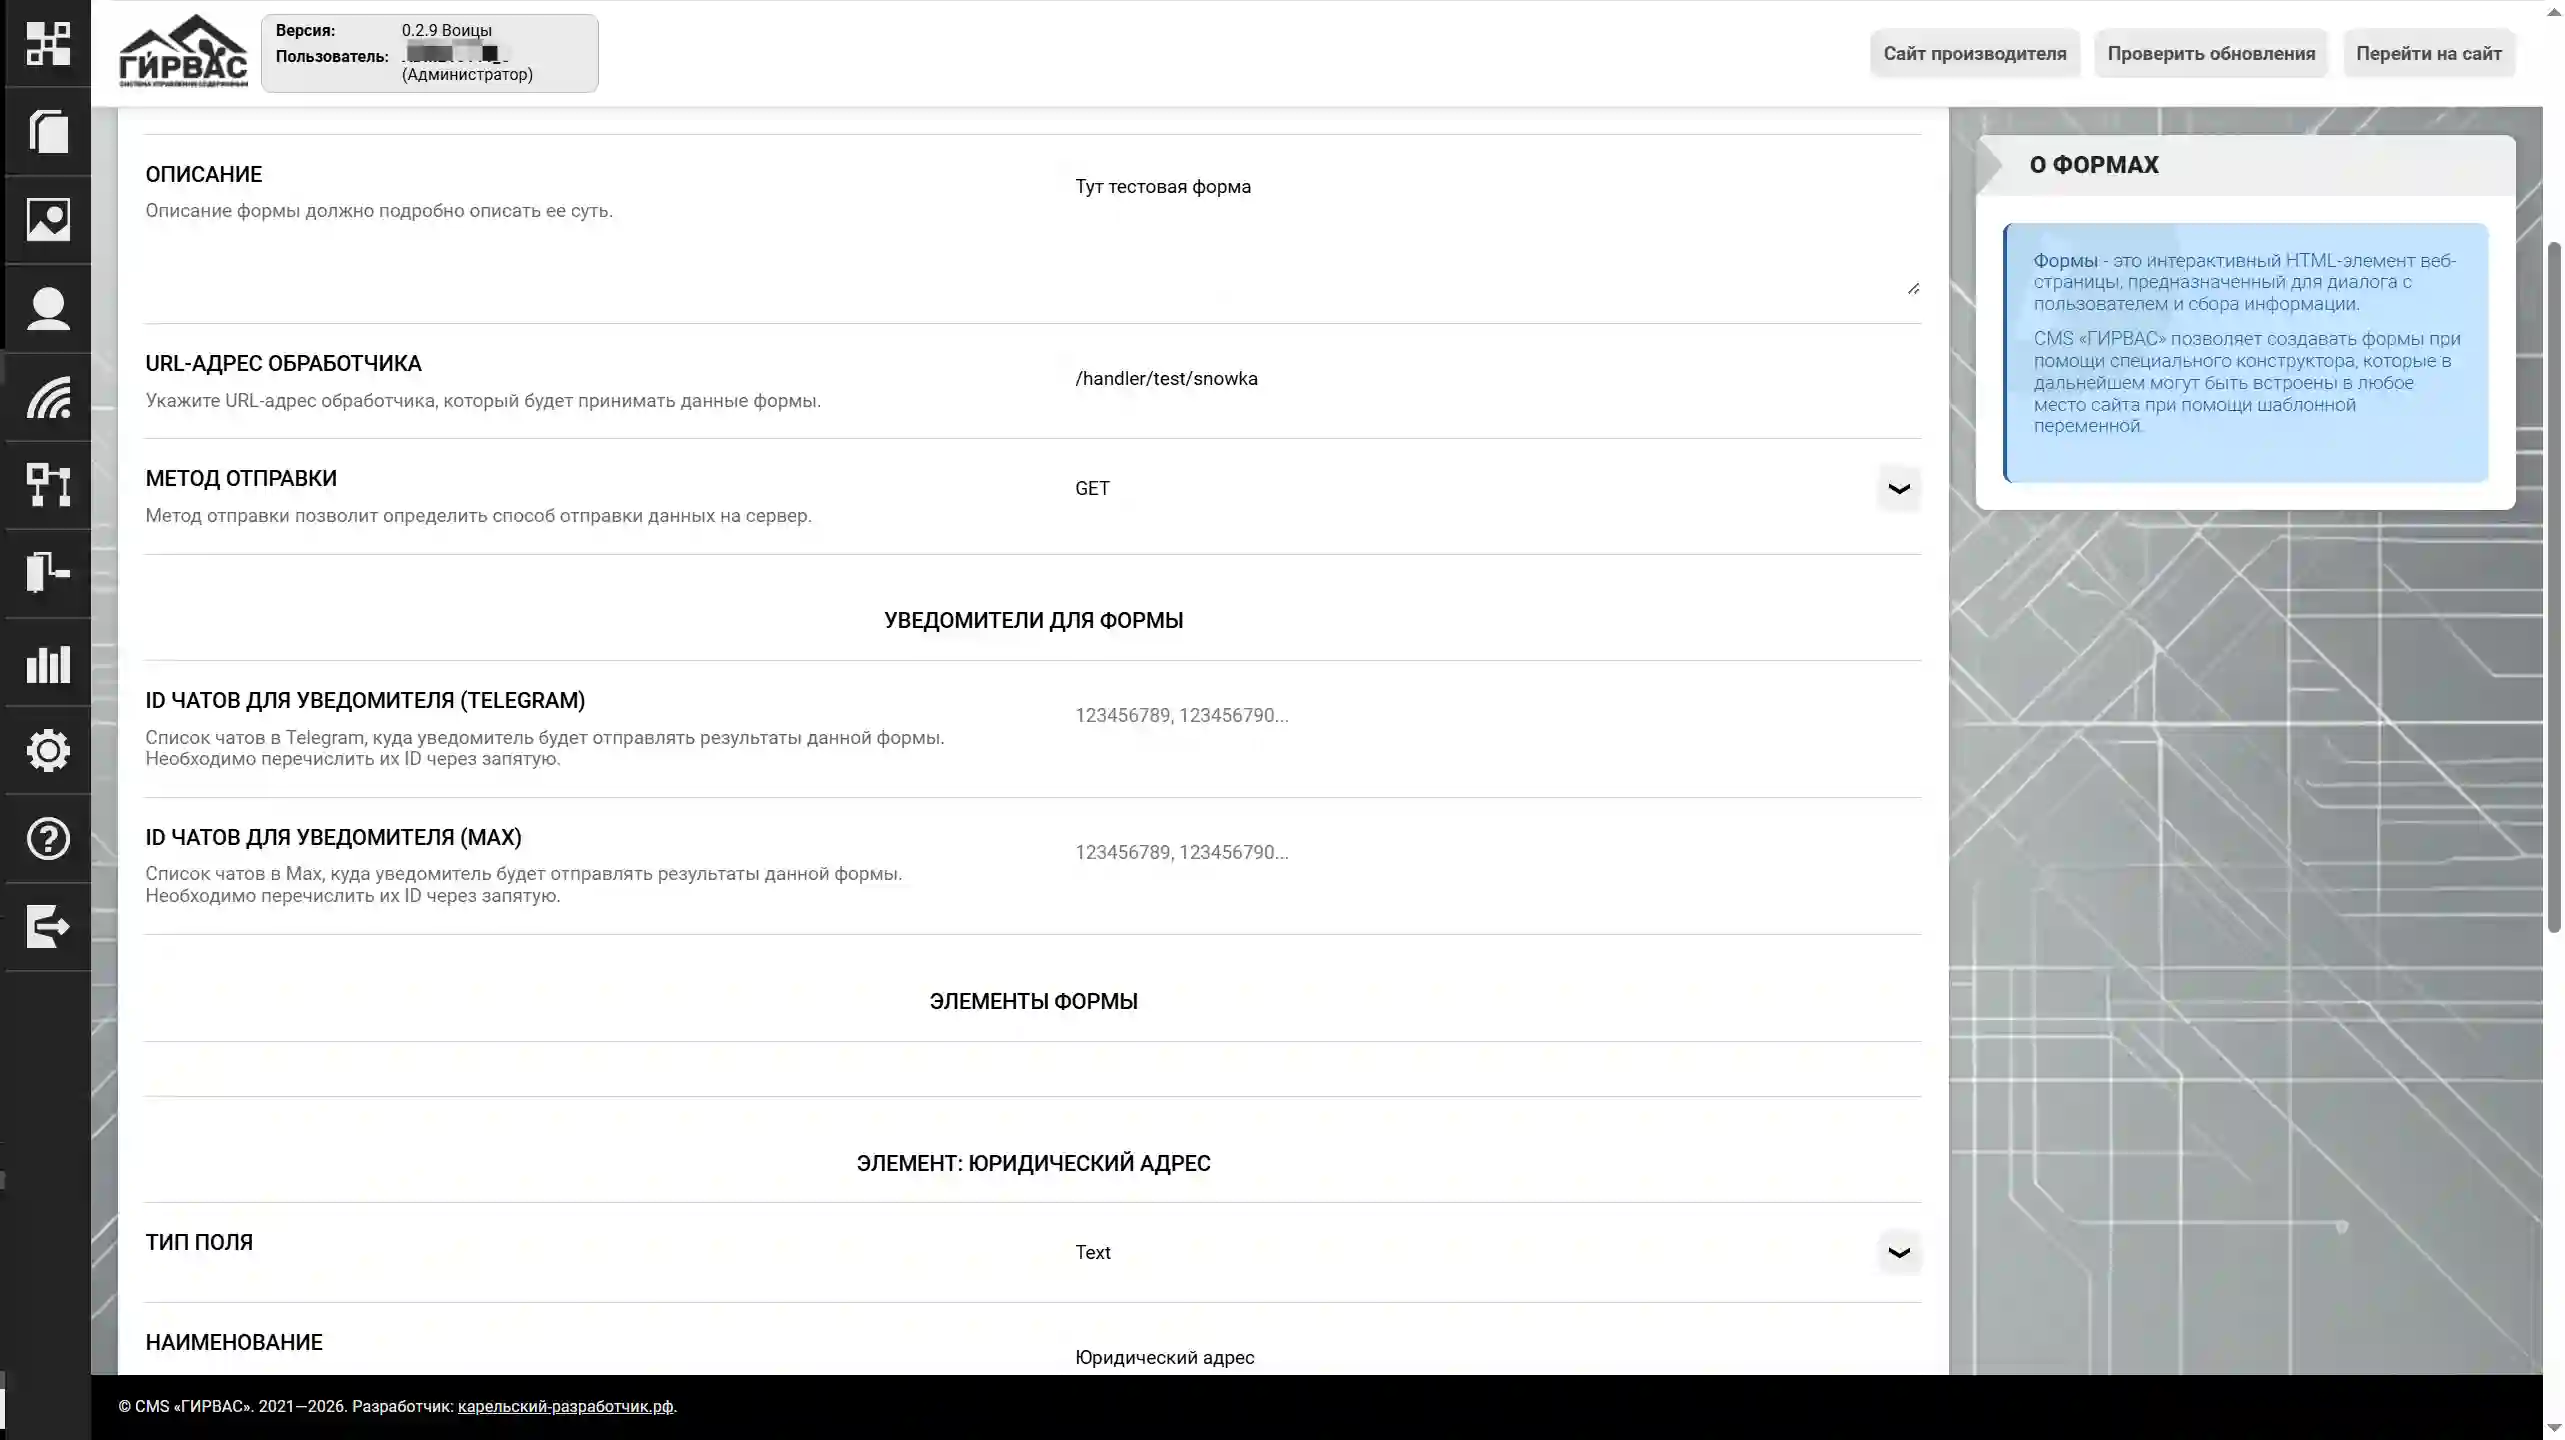
The form includes the following fields:
- Technical Name – the form name used to form part of the template variable, which ultimately takes the form:
{FORM_(without <>). Only Latin characters are allowed in this field;} - Title – the form title, which can be displayed in the desired location in the template;
- Description – a brief description of the form, which can be displayed in the desired location in the template;
- Handler URL – the absolute path to the handler (GET, POST, PUT, DELETE, PATCH) for submitting form data;
- Submission Method – the method by which the form will submit the collected data. Currently, forms support the following methods: GET, POST, PUT, DELETE, PATCH;
- Chat IDs for Notifier (Telegram) – a comma-separated list of Telegram messenger chat IDs for sending notifications based on form data collection results;
- Chat IDs for Notifier (MAX) – a comma-separated list of MAX messenger chat IDs for sending notifications based on form data collection results;
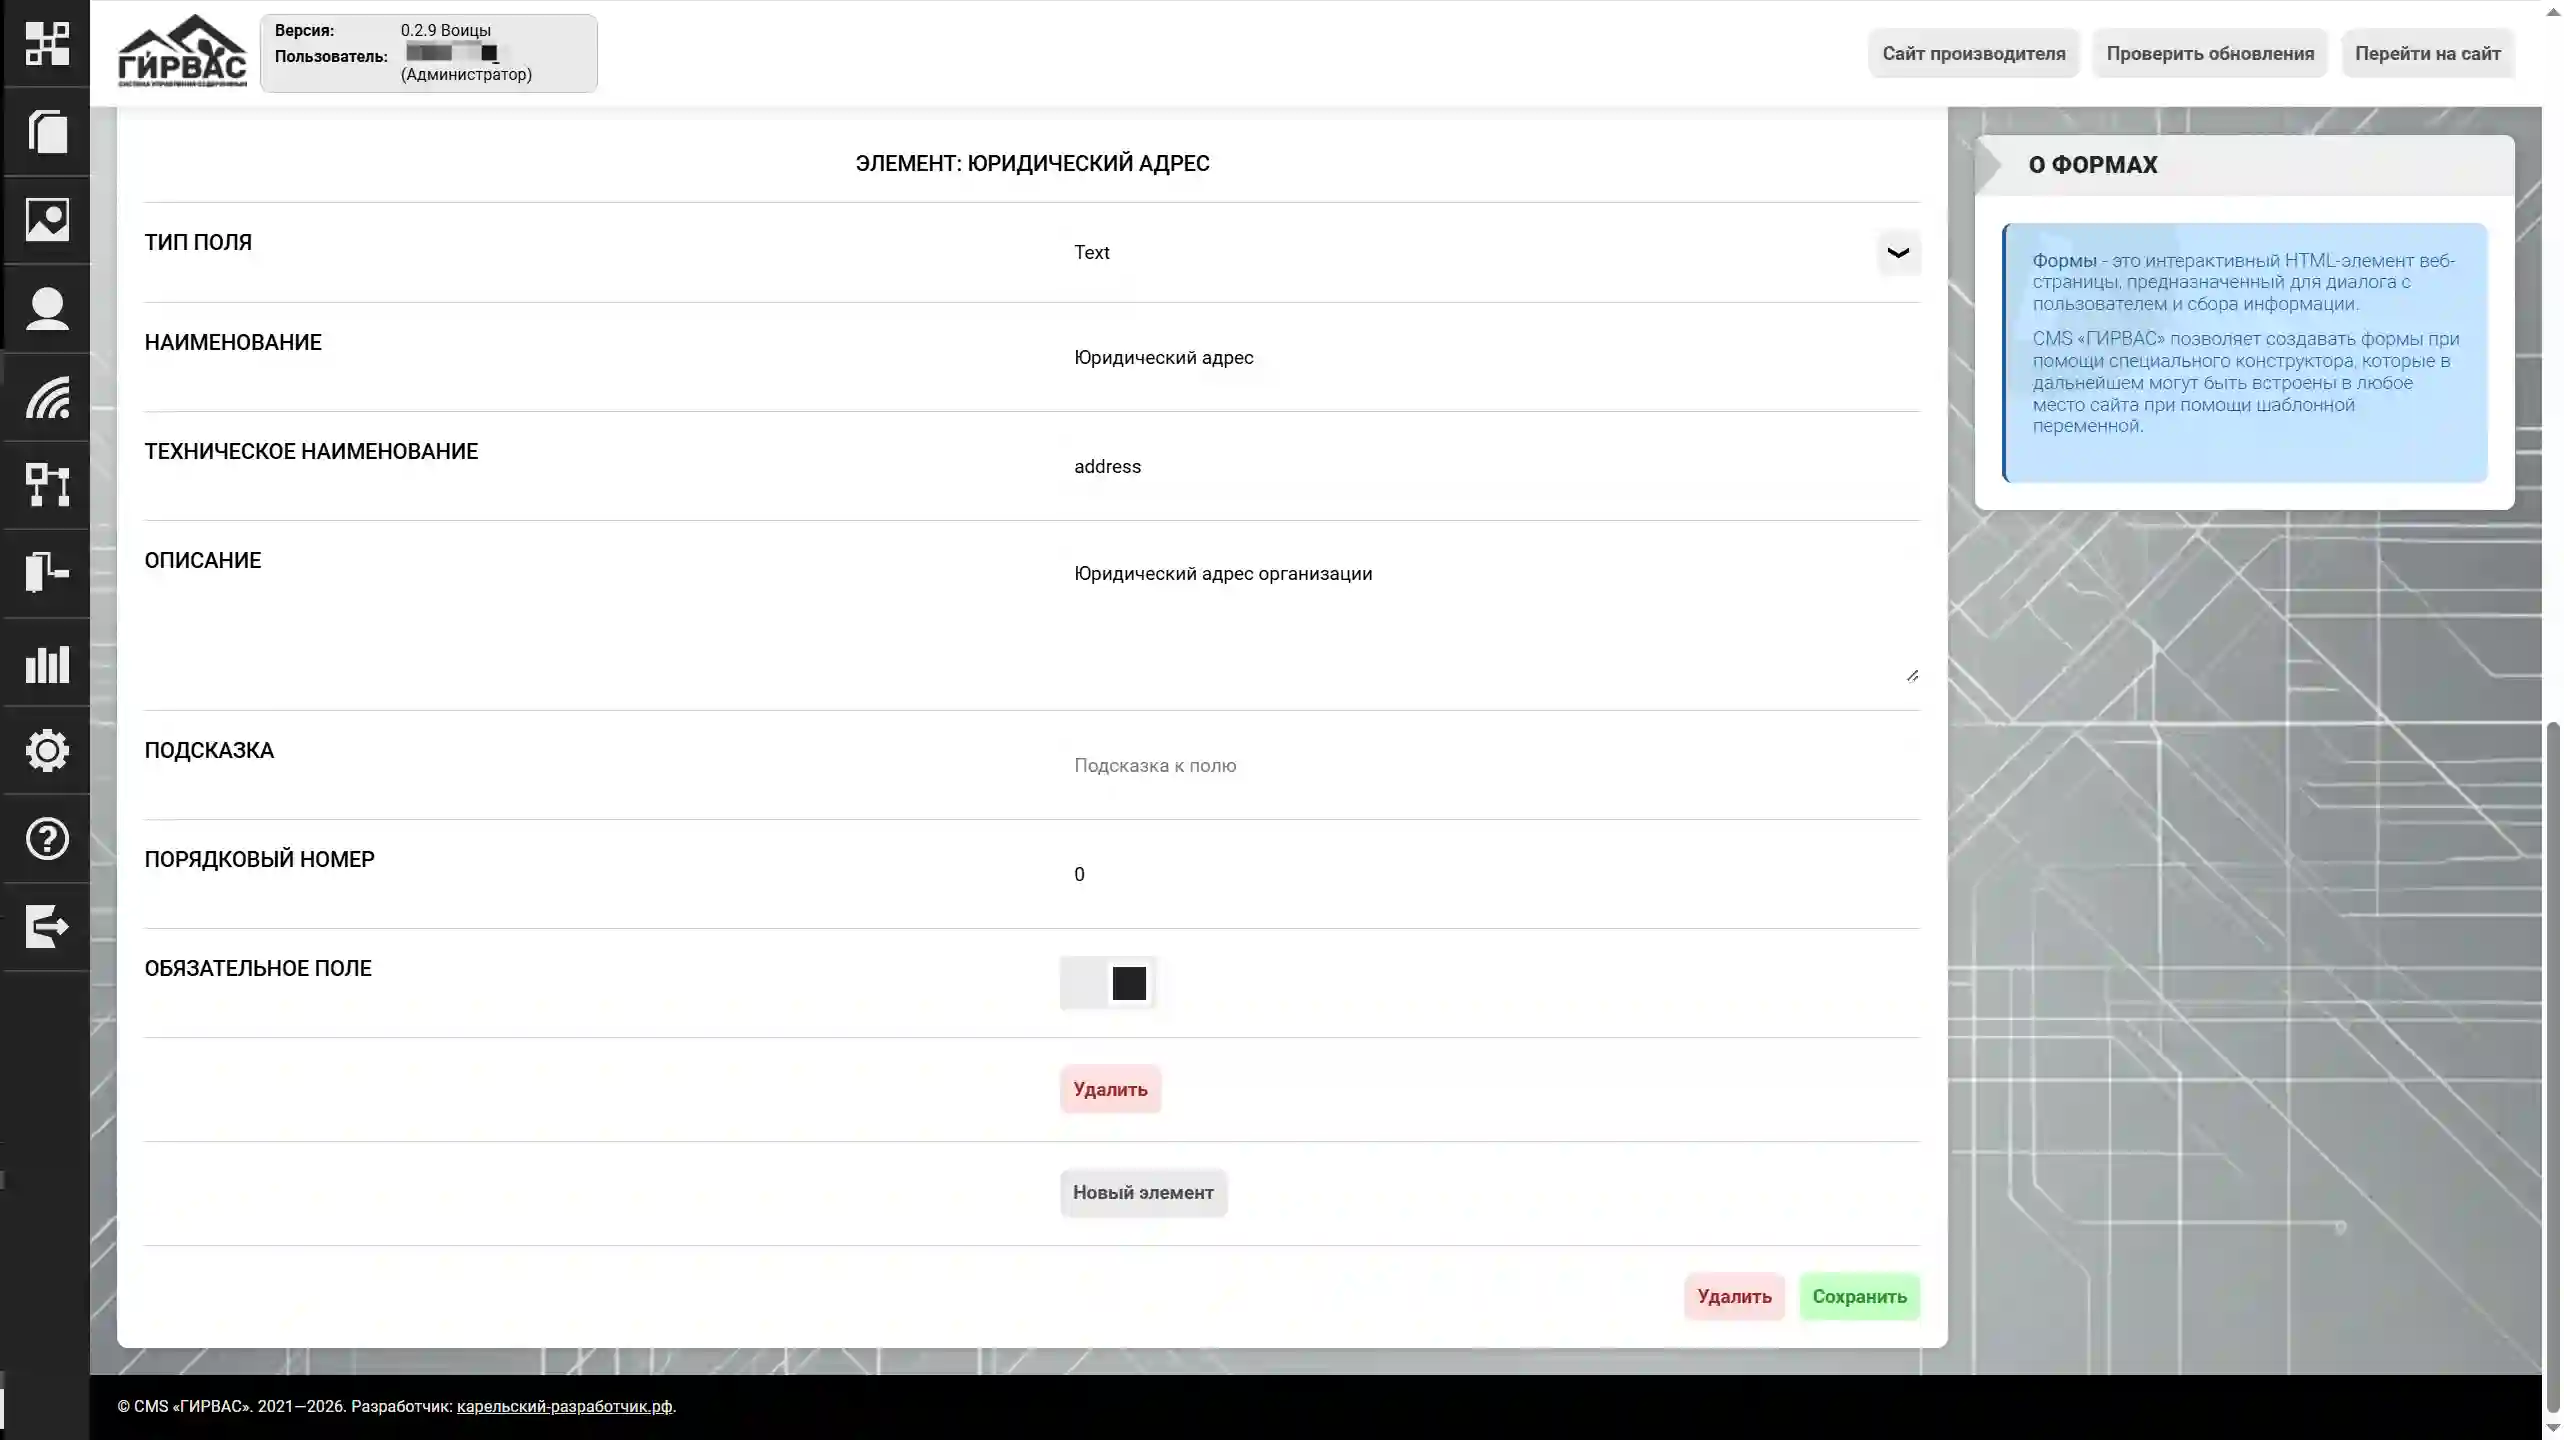
- Form Elements
- Field Type – one of the possible form field types: text, multi-line text, number, date, email, phone, checkbox, submit, or reset;
- Name – the name of the form element, which will be displayed next to the form element field;
- Technical Name – the technical name of the form element. Only Latin characters are allowed in this field. Will be embedded in the "name" attribute of the HTML element;
- Description – a brief description of the form element, which can be displayed next to the element's name;
- Hint – a hint for filling out the form element field, which will be embedded in the "placeholder" attribute;
- Sequence Number – an integer that tells the system the order in which to display the form element. If you want to display all elements "as they are in the system," leave this field at "0."
- Required Field – Indicate to the system that this field is required, if required. Submission will not be possible if the field is empty. Recommended for use with a checkbox indicating personal data processing.
When working with form elements, use the following toolbar controls: "Delete" to delete a form element, "New Element" to add a new form element. After completing all necessary manipulations, be sure to click the "Save" button in the bottom toolbar.
The "Form Editing" tool supports the CMS's multilingual system. To change the language of the form being filled in, select the appropriate value from the drop-down list located to the right of the tool's header.
Note on working with notifiers
The notifier operates using private tokens, which can only be obtained by directly requesting technical support from the Karelian Developer ecosystem at support@karelian-developer.ru. The subject line should read: "Getting a token for the notifier <Messenger name>."
Deleting a Form
You can delete a form by clicking the "Delete" button on the form list page in the "Forms" section. You can also delete a form by clicking the "Delete" button on the form editing page.
When attempting to delete a form, the system displays a pop-up window asking you to confirm the deletion. If you confirm, the form is permanently deleted; if you decline, the action is canceled.