
Navigating the documentation
- Back
- Administrative Panel Main Page (Dashboard)
- Content (posts, pages, categories, comments, selections, forms)
- Media files (File Manager)
- Users, their groups, and permissions
- Feeds (Content Distribution)
- Modules
- Themes
- Analytics
- CMS Settings
- About the System
Managing System Settings via the GIRVAS CMS Administrative Panel
CMS Settings is a key section of the admin panel, providing full configuration of the management system (except for database connection parameters). This section includes eight subsections.
Main
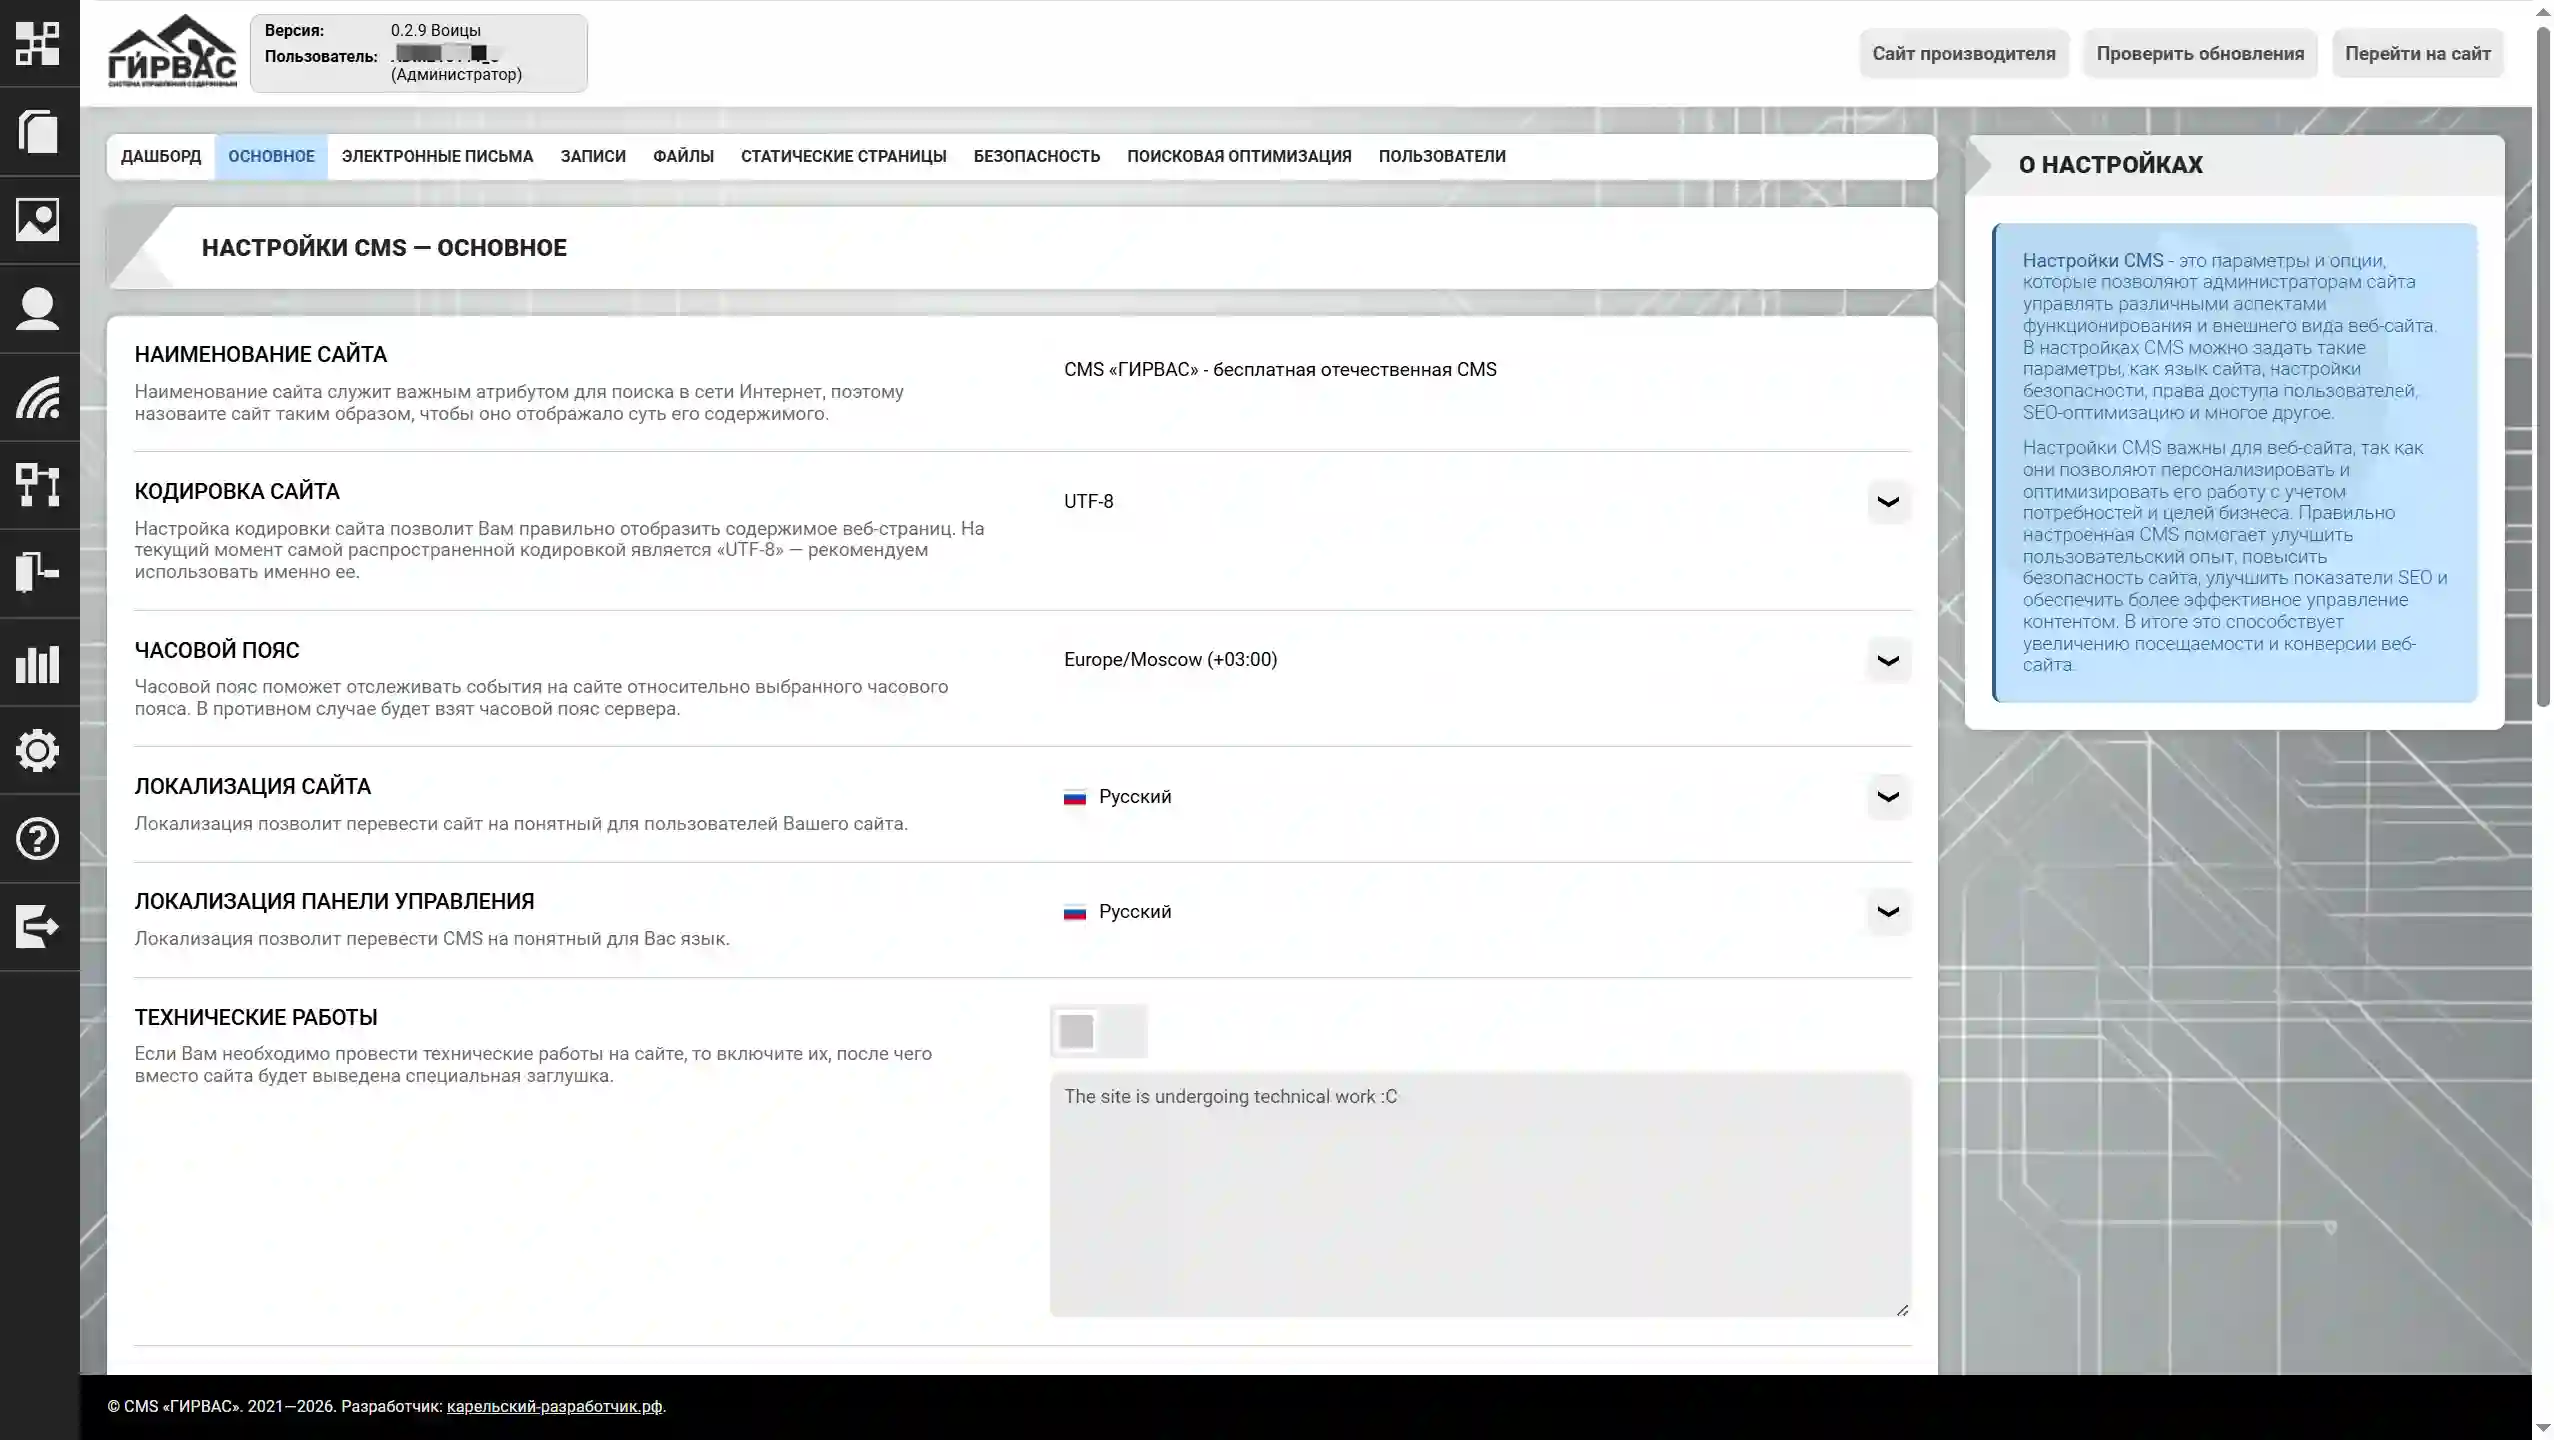
The "Main" subsection is the section's start page. Basic settings include managing the language of the admin panel and website, as well as configuring technical settings, the site name, encoding, and time zone.
Emails
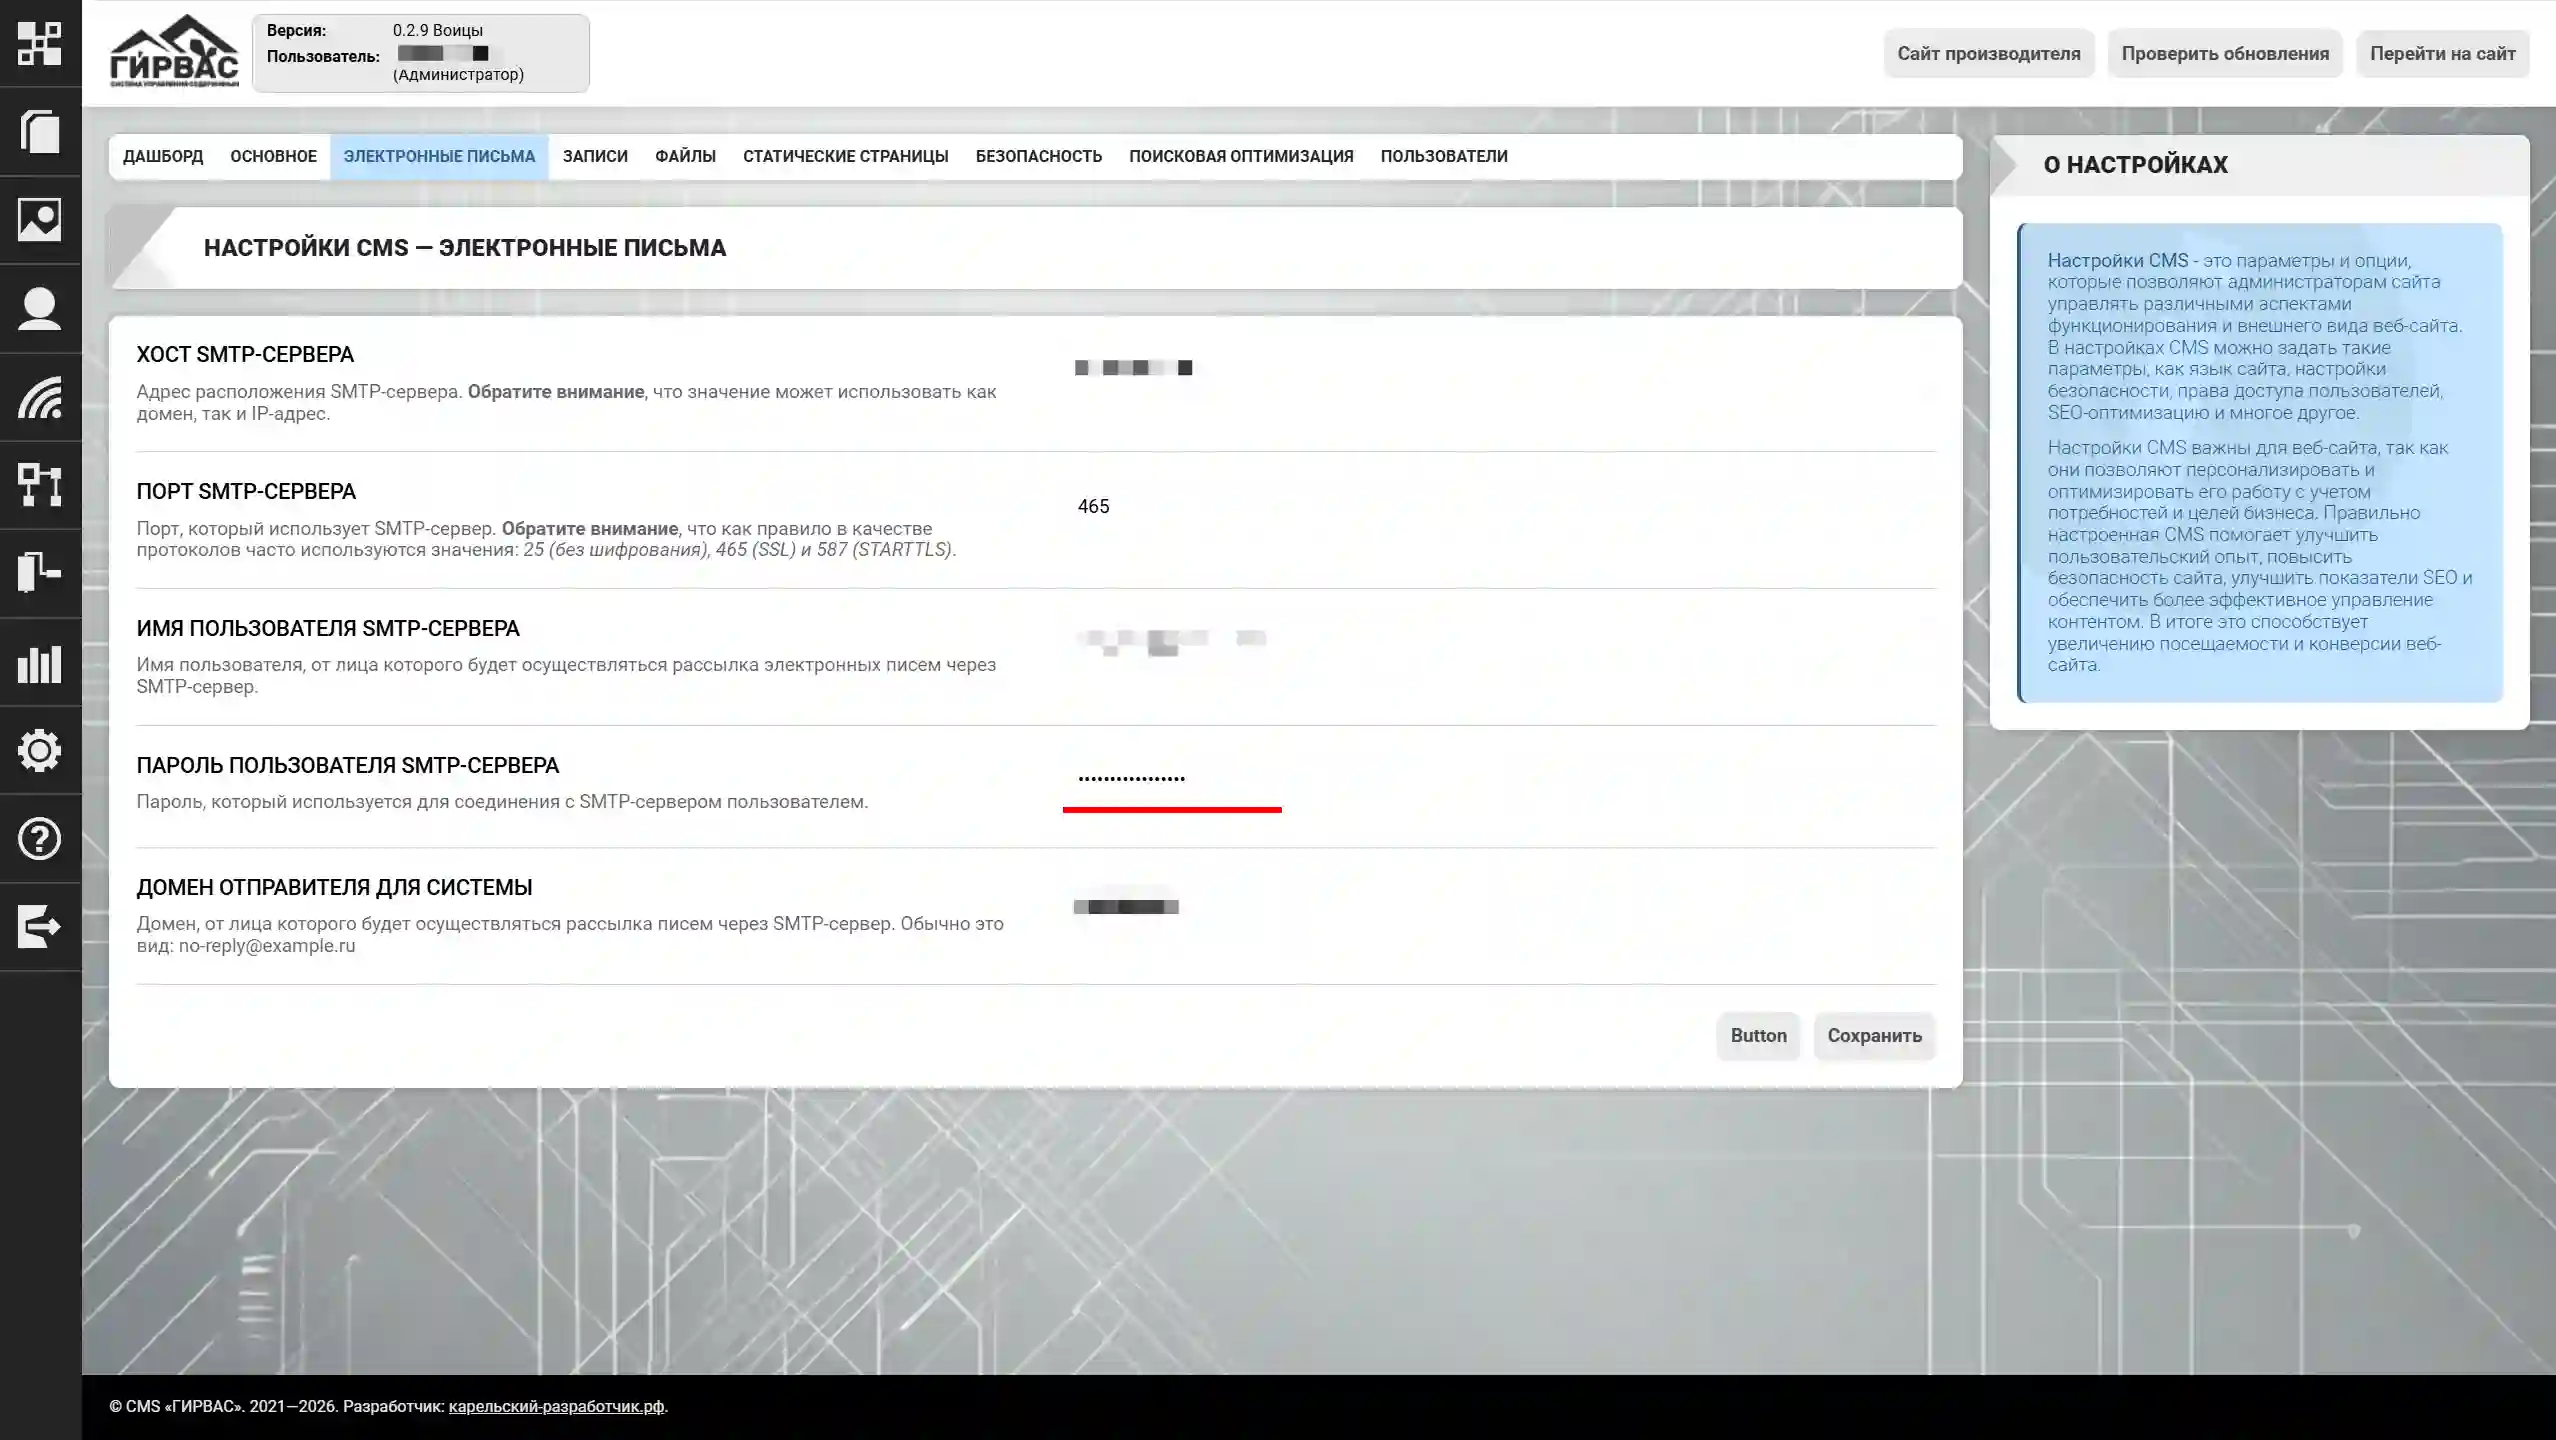
The "Emails" subsection is responsible for working with the mail server and sending emails generated by the GIRVAS CMS. Please note that if this section is configured incorrectly, sending emails to confirm user registration or recover passwords will be impossible.
The "Emails" subsection includes the following parameters:
- SMTP server host – the address of the SMTP server. Please note that this value can be either a domain or an IP address;
- SMTP Server Port – The port used by the SMTP server. Note that commonly used protocol values are: 25 (no encryption), 465 (SSL), and 587 (STARTTLS);
- SMTP Server Username – The username that will be used to send emails via the SMTP server;
- SMTP Server Password – The password used to connect to the SMTP server by the user;
- Sender Domain for the System – The domain that will be used to send emails via the SMTP server. This is typically of the form: no-reply@example.ru.
Posts
The "Posts" subsection allows you to add additional fields to your site posts, allowing you to display additional information on the full post view page (e.g., author's full name, source address, etc.).
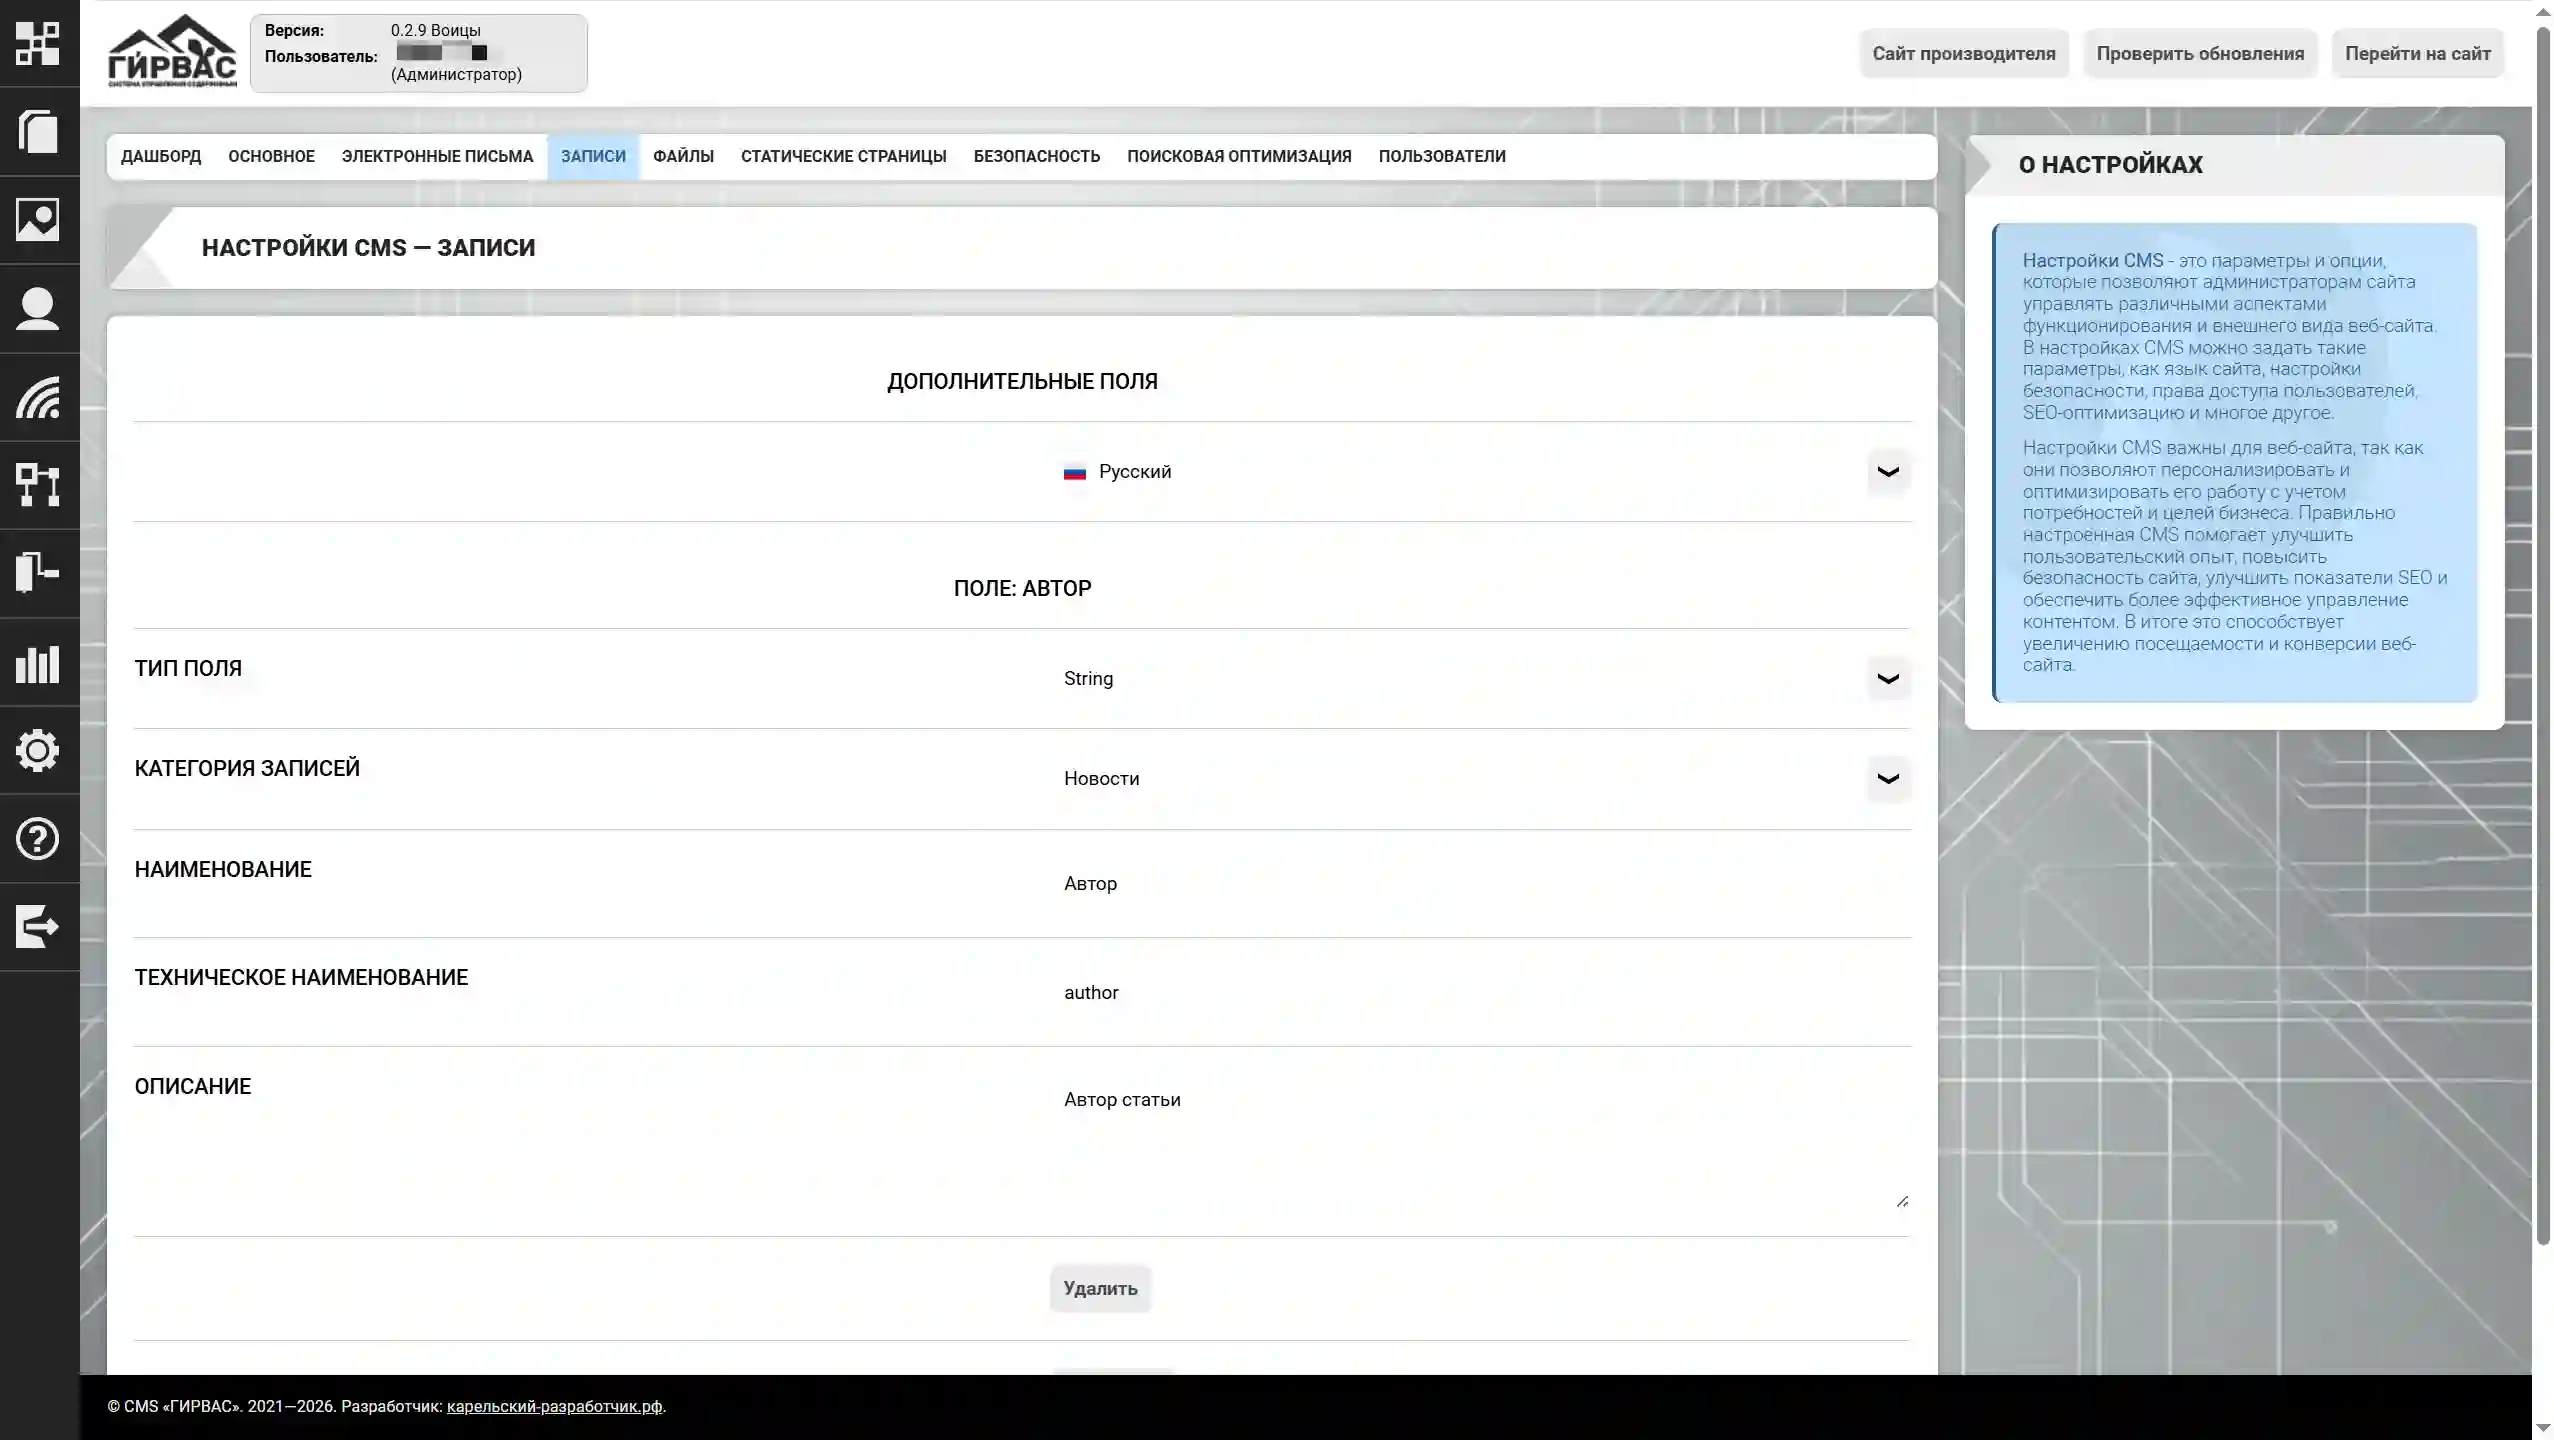
The form includes the following parameters for additional fields:
- Field Type – one of the possible field types: text (text), multiline text (textarea), number (Number), date (Date), email (email), phone number (phone), checkbox (checkbox), submit button (button submit), reset button (button reset);
- Post Category – the post category for which the additional field will be available;
- Name – the element name, which will be displayed next to the element field;
- Technical Name – the technical name of the element. Only Latin characters are allowed in this field. It will be embedded in the "name" attribute of the HTML element;
- Description – a brief description of the element, which can be displayed next to the element name;
When working with additional fields, use the following tools: "Delete" to delete an element, "New Element" to add a new element. After completing all the necessary manipulations, be sure to click the "Save" button in the bottom toolbar.
Files
The "Files" subsection allows you to configure how you work with uploaded files in the GIRVAS content management system directory.
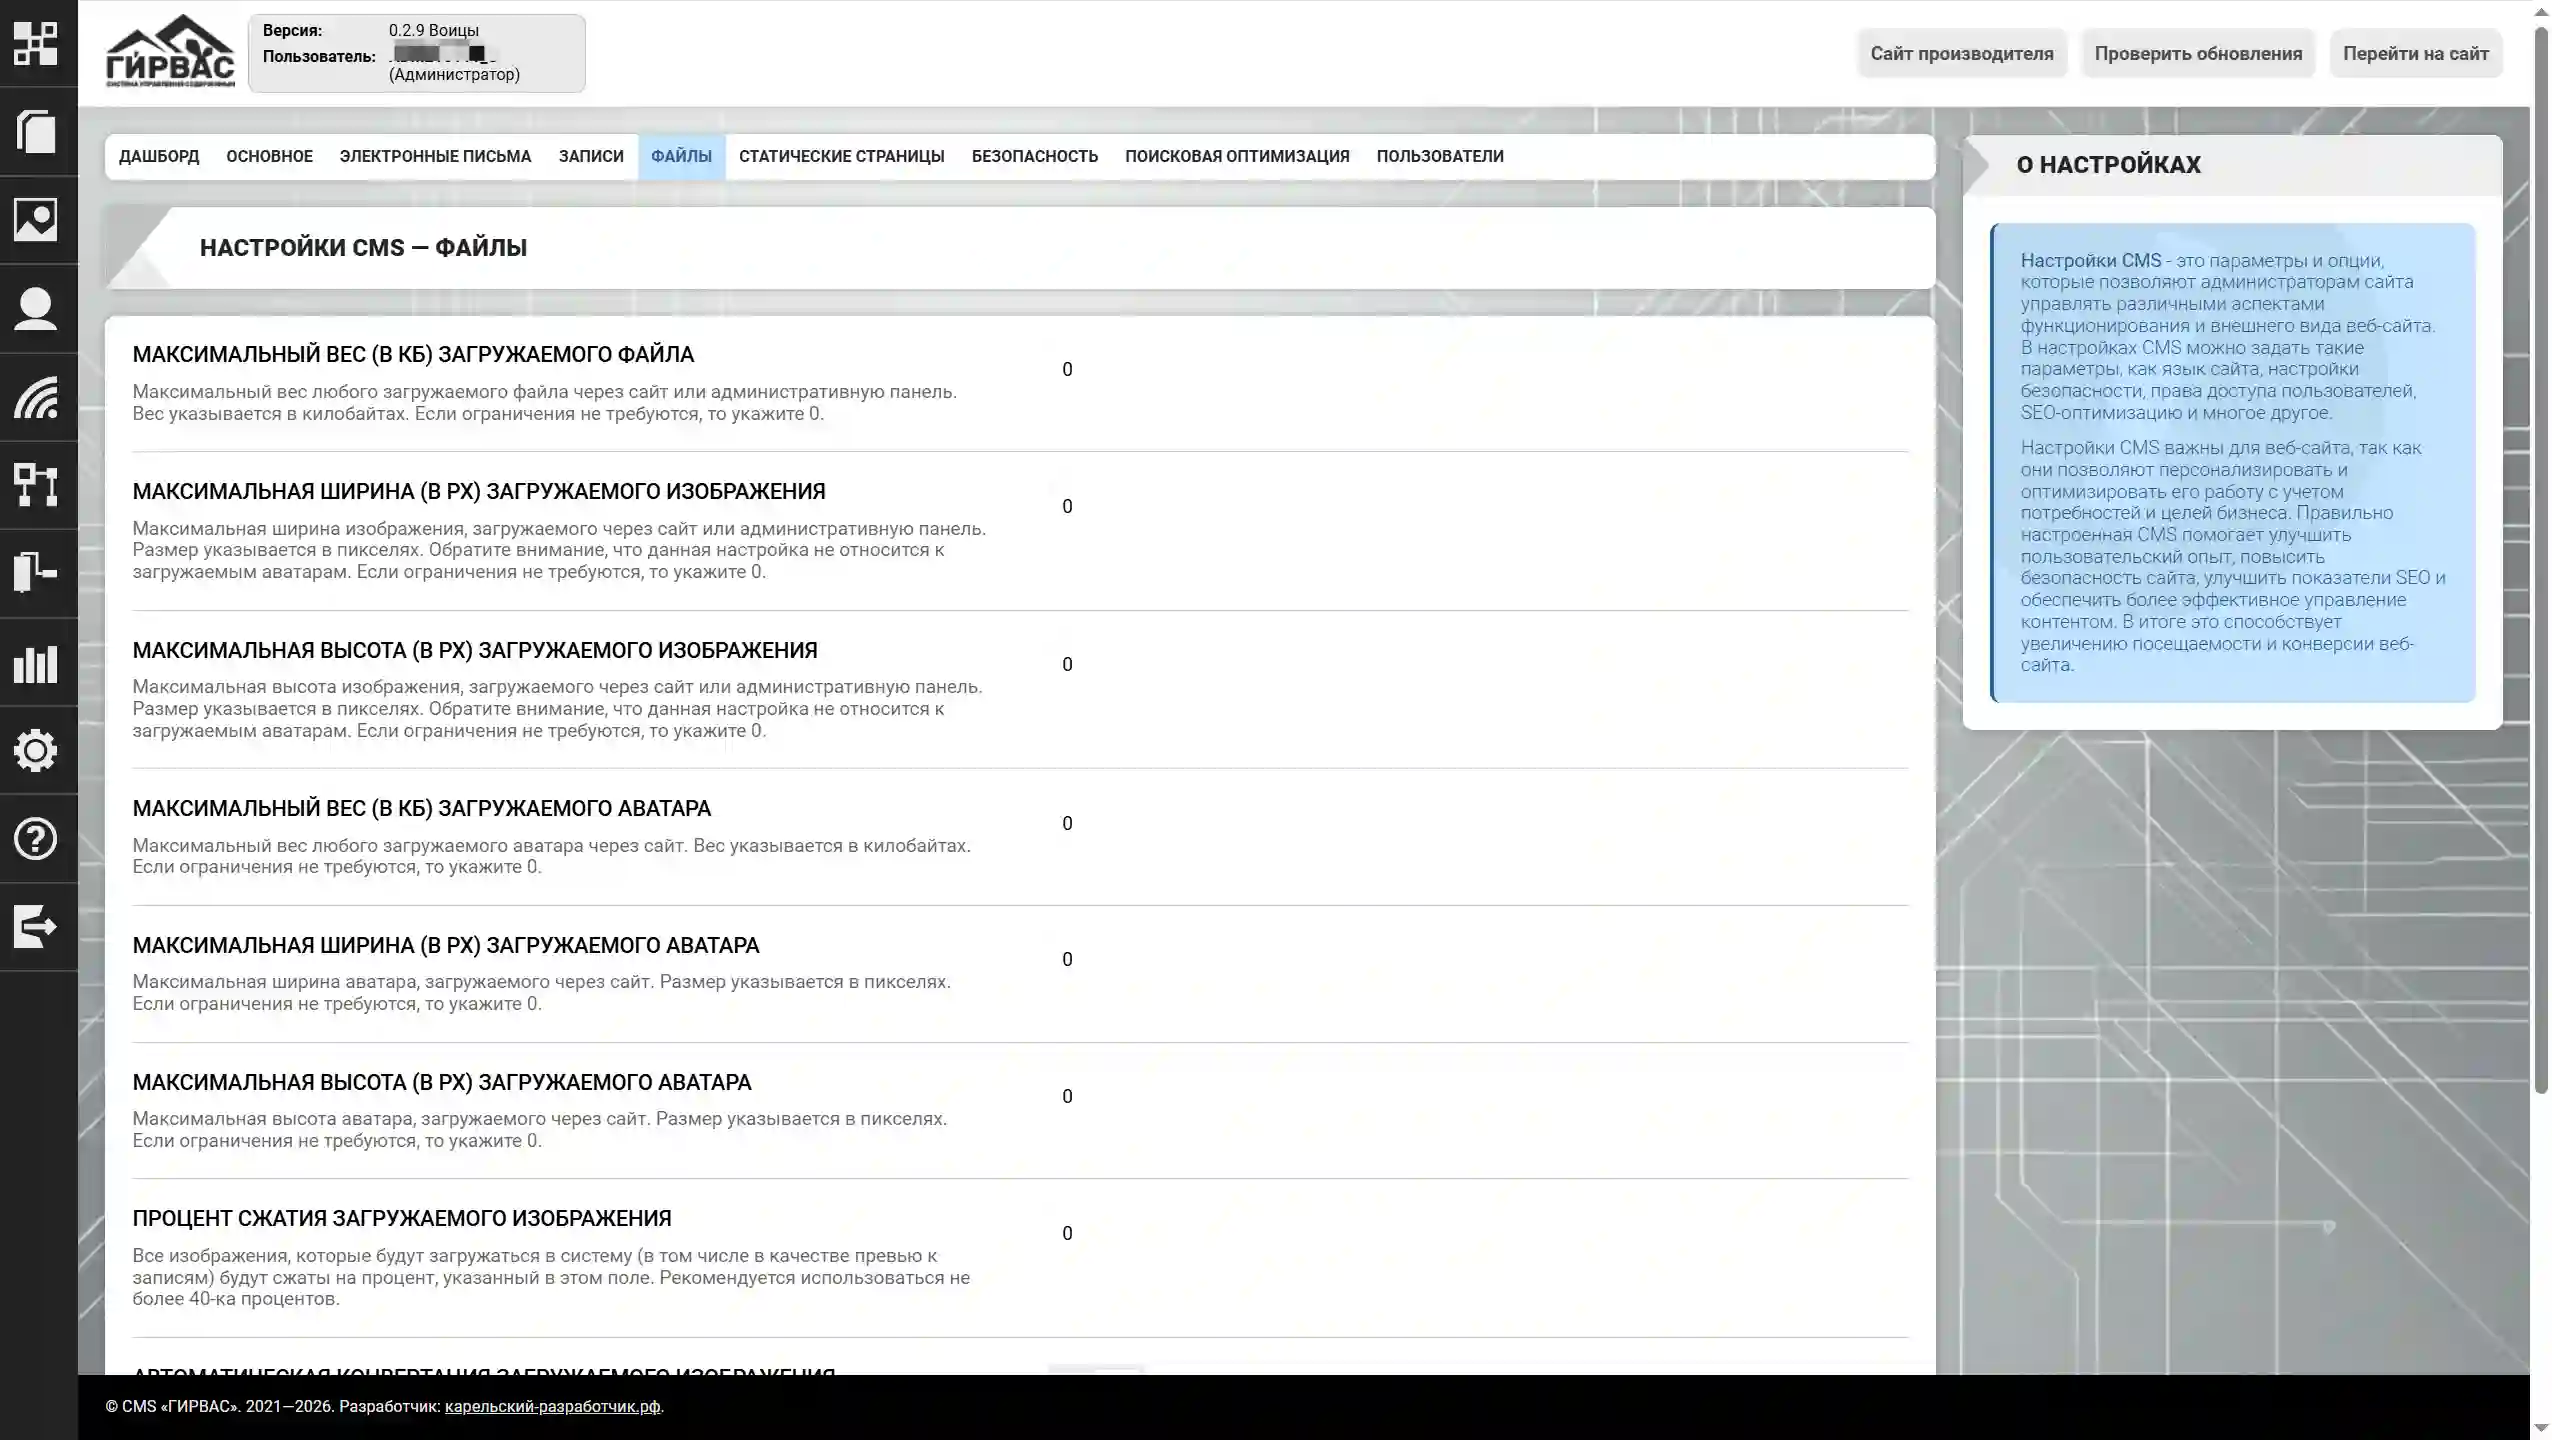
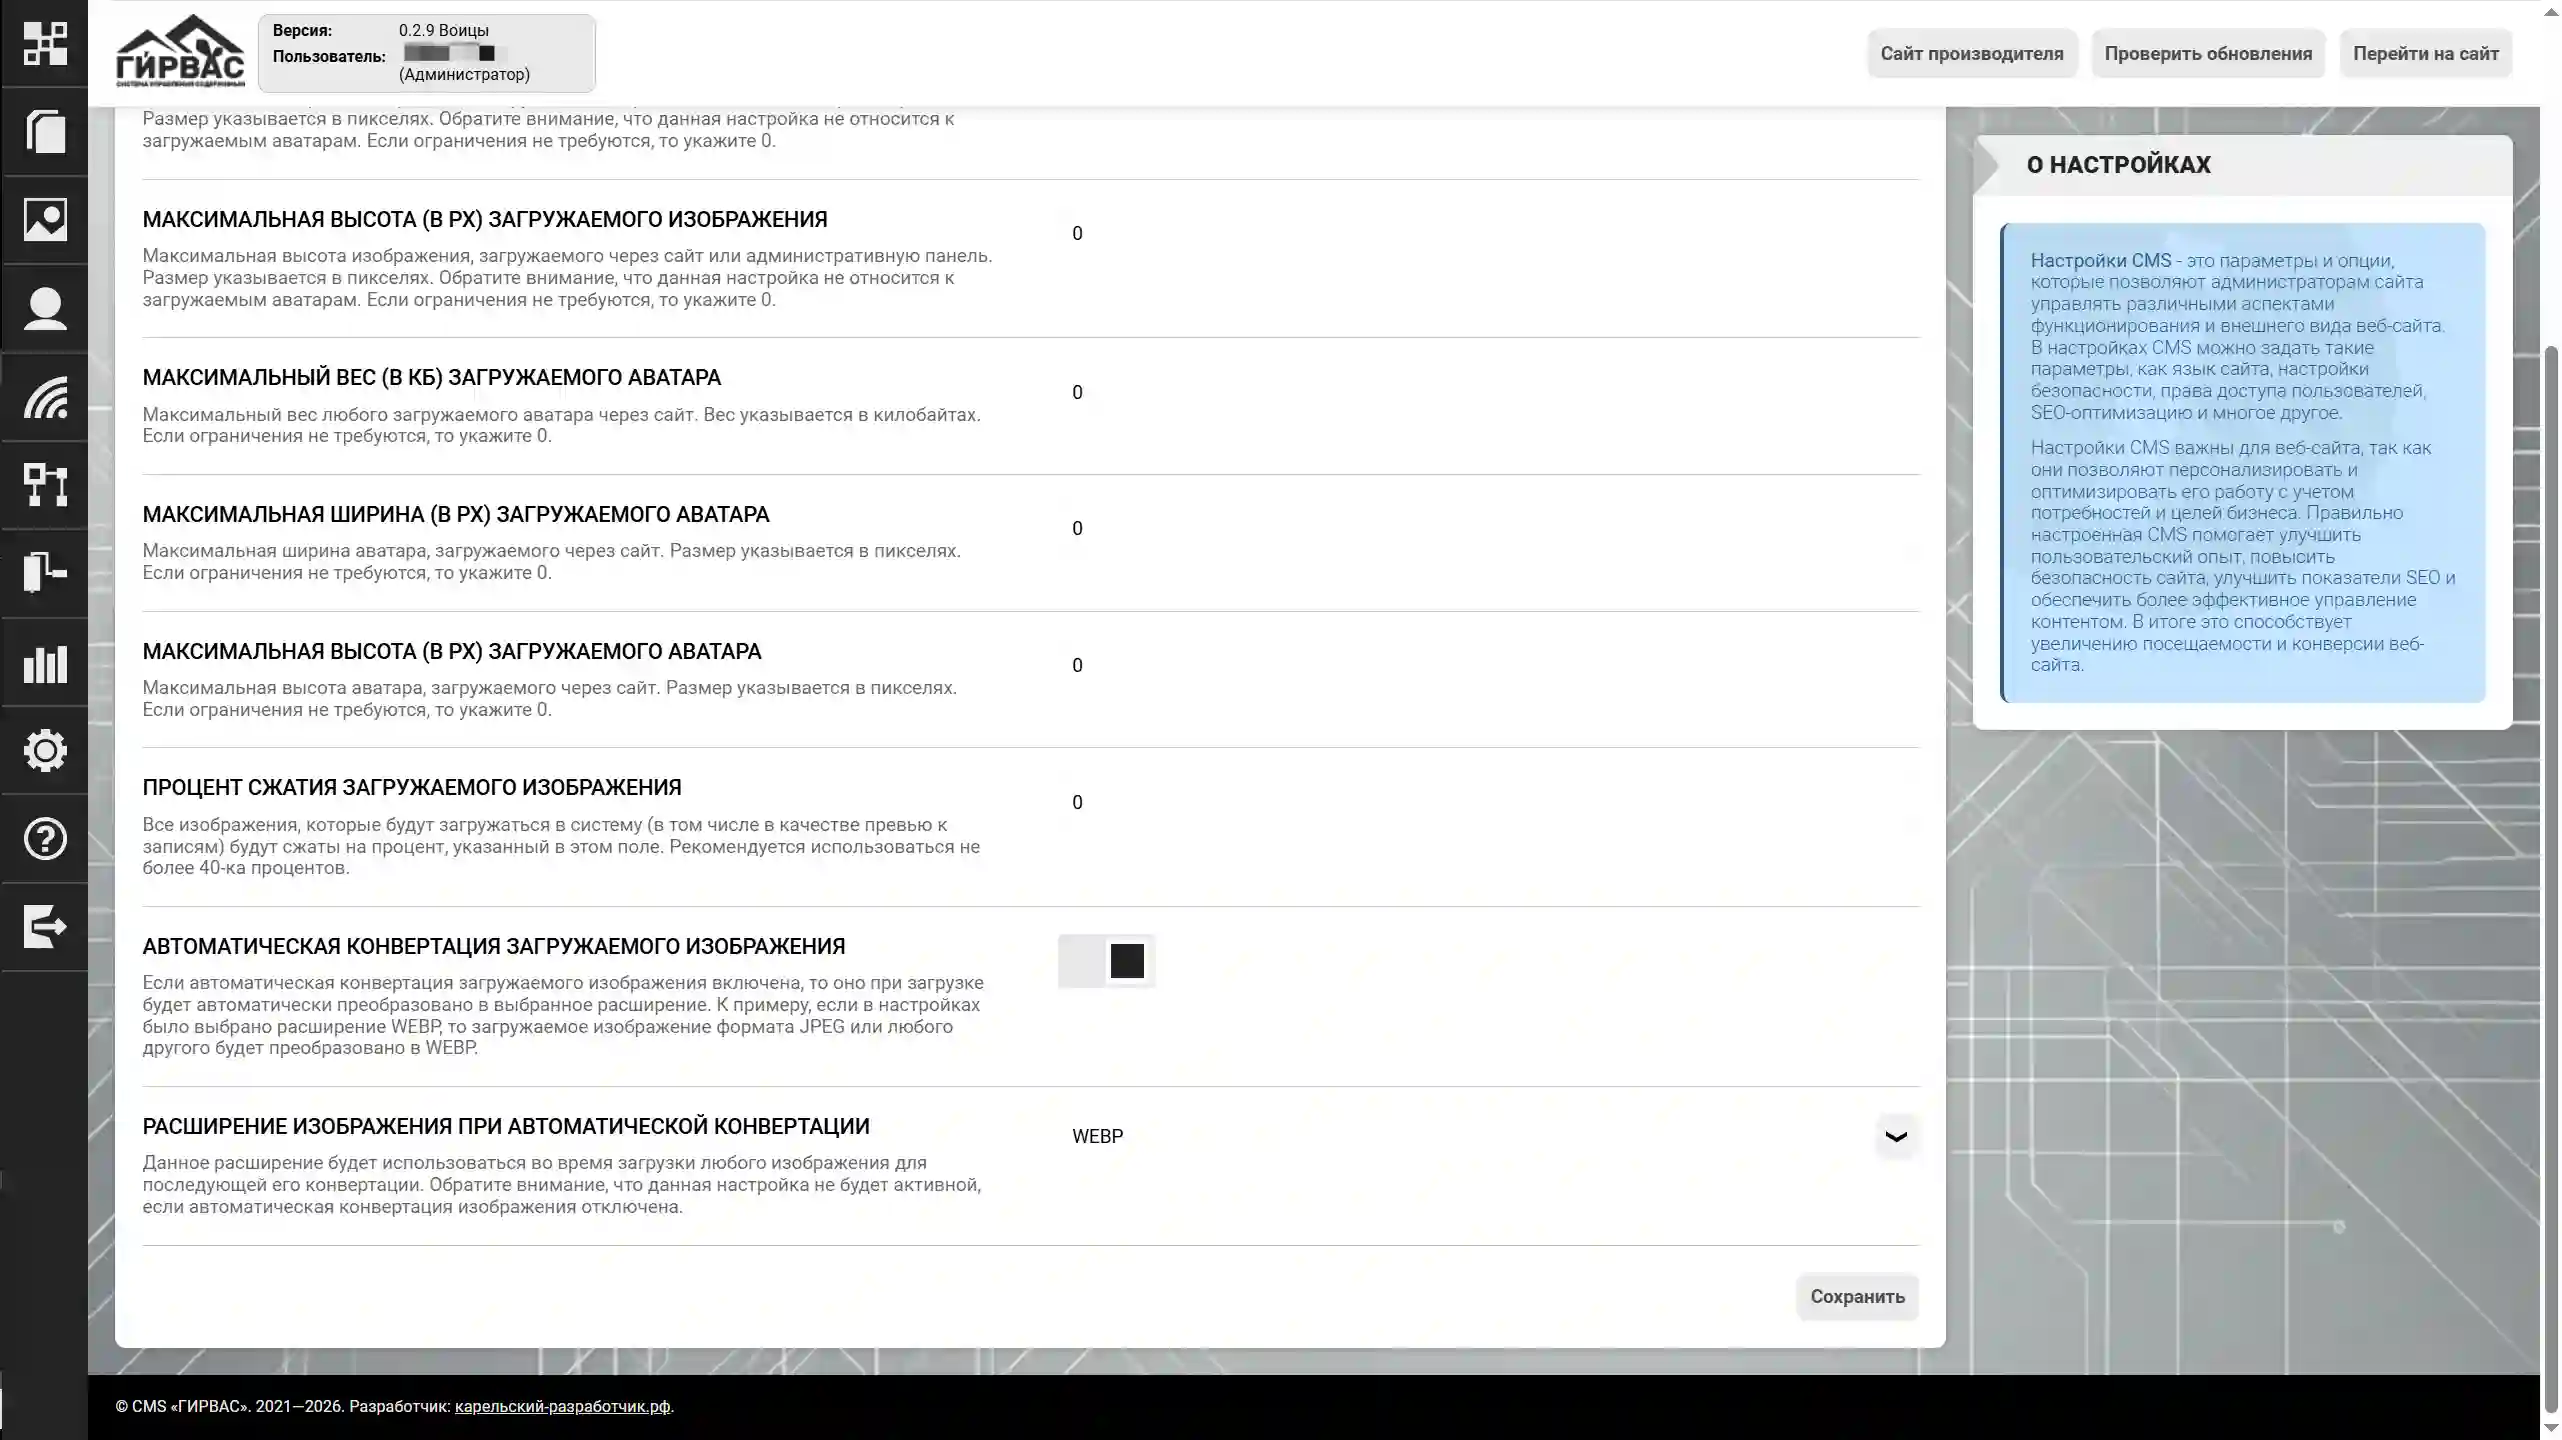
The "Files" subsection includes the following parameters:
- Maximum size (in KB) of uploaded file – the maximum size of any file uploaded via the website or admin panel. The size is specified in kilobytes. If no restrictions are required, enter 0.
- Maximum width (in px) of uploaded image – The maximum width of the image uploaded through the website or admin panel. The size is specified in pixels. Please note that this setting does not apply to uploaded avatars. If no restrictions are required, enter 0.
- Maximum height (in px) of uploaded image – The maximum height of the image uploaded through the website or admin panel. The size is specified in pixels. Please note that this setting does not apply to uploaded avatars. If no restrictions are required, enter 0.
- Maximum weight (in KB) of uploaded avatar – The maximum weight of any avatar uploaded through the website. The weight is specified in kilobytes. If no restrictions are required, enter 0.
- Maximum width (in px) of uploaded avatar – The maximum width of an avatar uploaded through the website. The size is specified in pixels. If no restrictions are required, enter 0.
- Maximum height (in pixels) of uploaded avatar – The maximum height of an avatar uploaded through the website. The size is specified in pixels. If no restrictions are required, enter 0.
- Uploaded image compression percentage – The percentage by which images uploaded through the "Media Files" section or the tool for uploading post covers and static pages will be compressed. It is recommended to use no more than 40%.
- Automatic conversion of uploaded image – This parameter is responsible for automatically converting uploaded images to one of the following formats: WEBP, AVIF.
- Image extension for automatic conversion – The extension to which the uploaded image extension will be converted.
Static Posts
The "Static Posts" subsection allows you to add additional fields for static pages on the website, allowing you to display additional information on the full post view page (e.g., author's full name, source address, etc.).
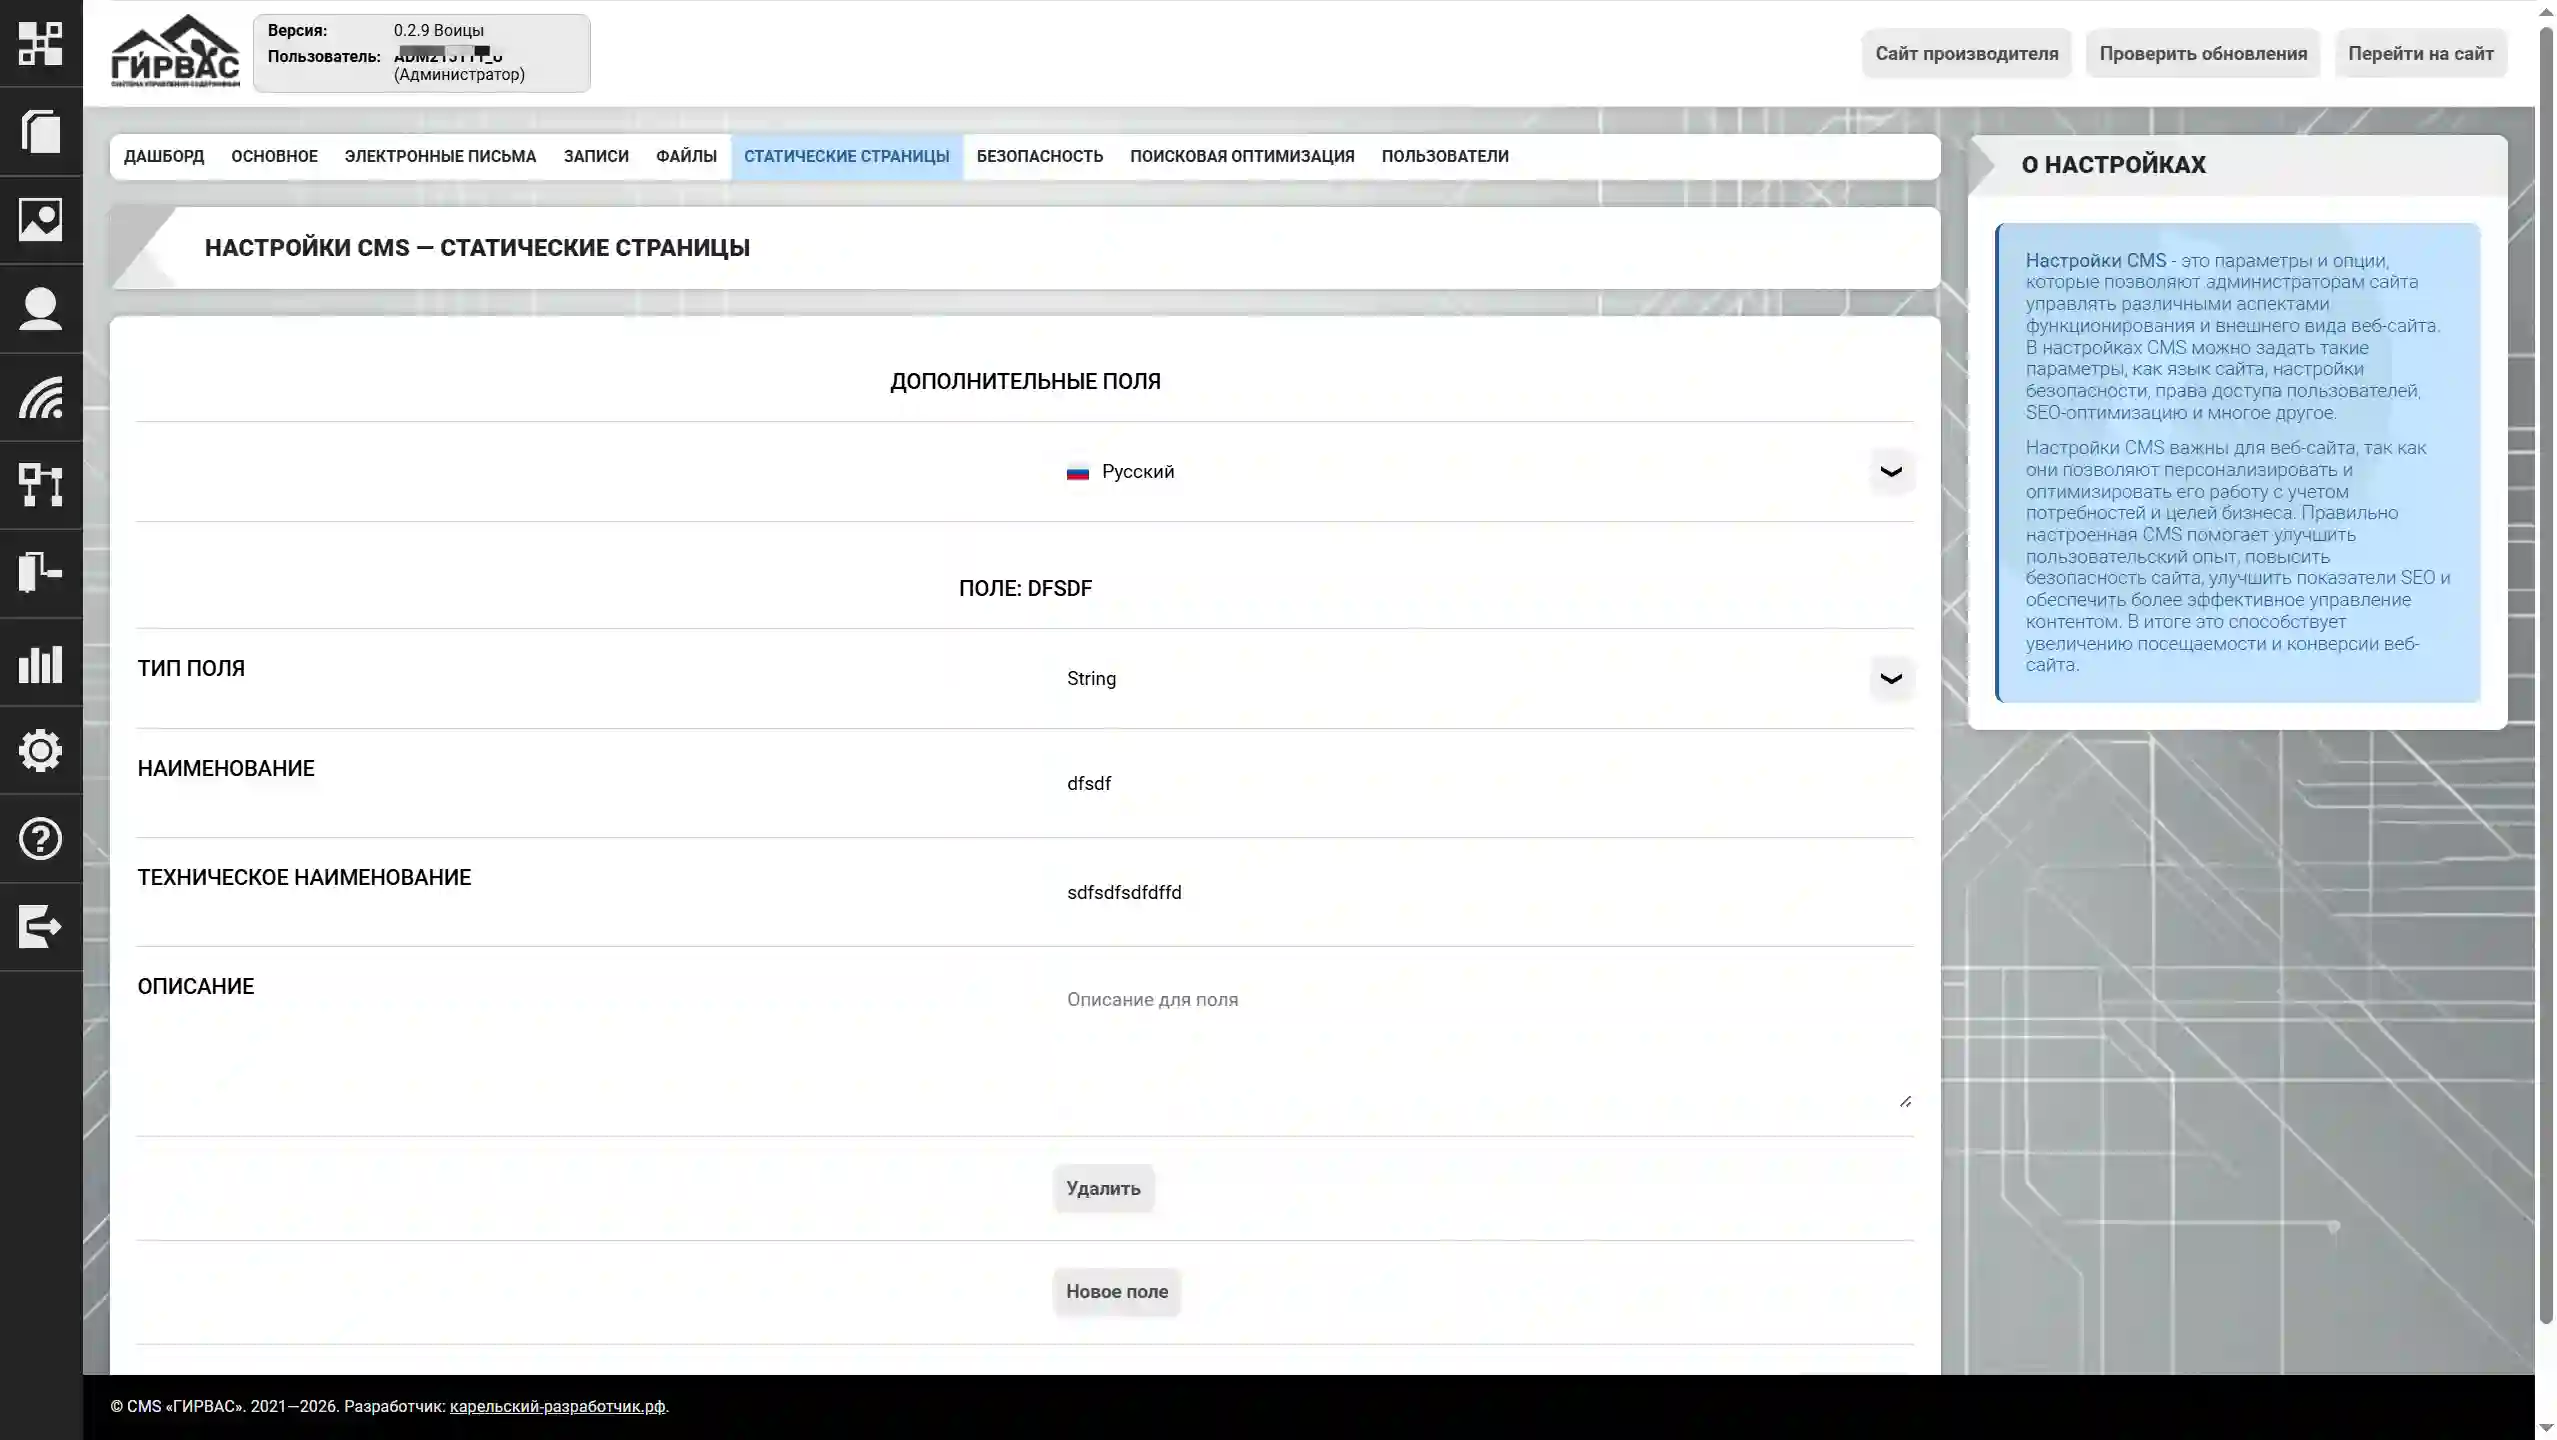
The form includes the following parameters for additional fields:
- Field Type – one of the possible field types: text (text), multiline text (textarea), number (Number), date (Date), email (email), phone (phone), checkbox (checkbox), submit button (button submit), reset button (button reset);
- Name – the name of the element, which will be displayed next to the element field;
- Technical Name – the technical name of the element. Only Latin characters are allowed in this field. It will be embedded in the "name" attribute of the HTML element;
- Description – a brief description of the element, which can be displayed next to the element name;
When working with additional fields, use the following tools: "Delete" to delete an element, "New Element" to add a new element. After completing all necessary manipulations, be sure to click the "Save" button in the bottom toolbar.
Security
The "Security" subsection contains a set of critical settings that determine the security level of the CMS and admin panel.
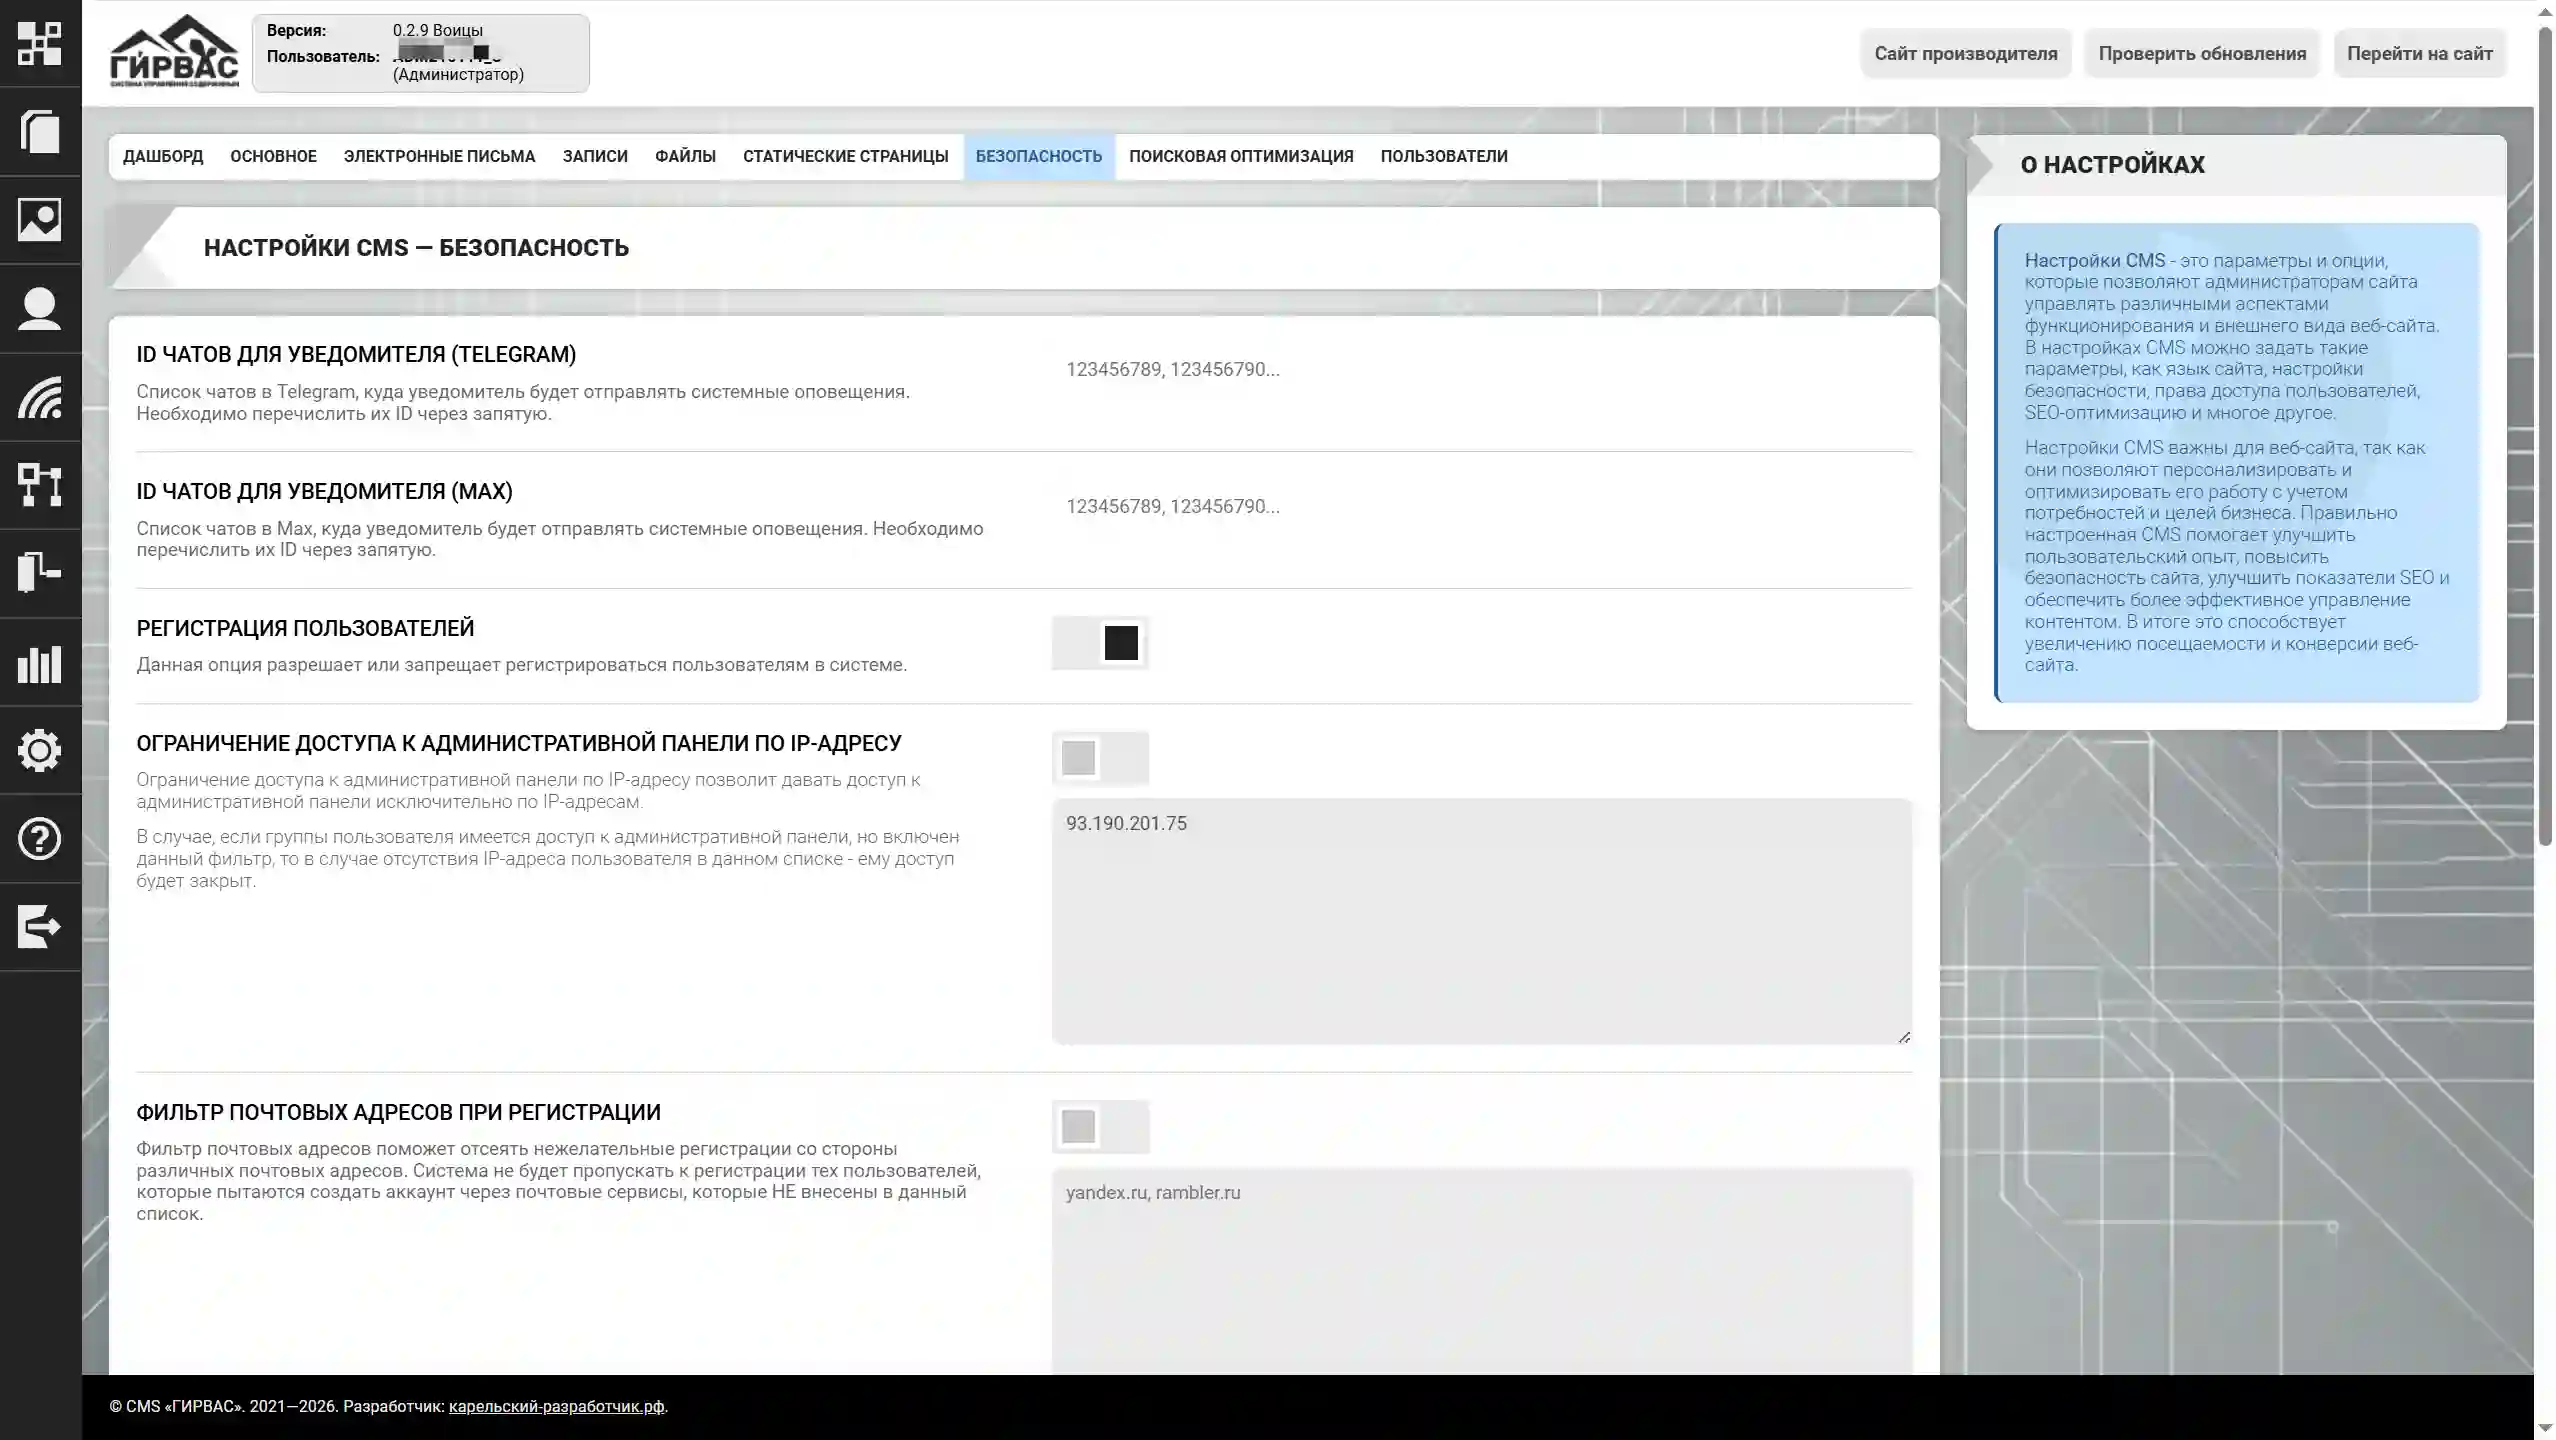
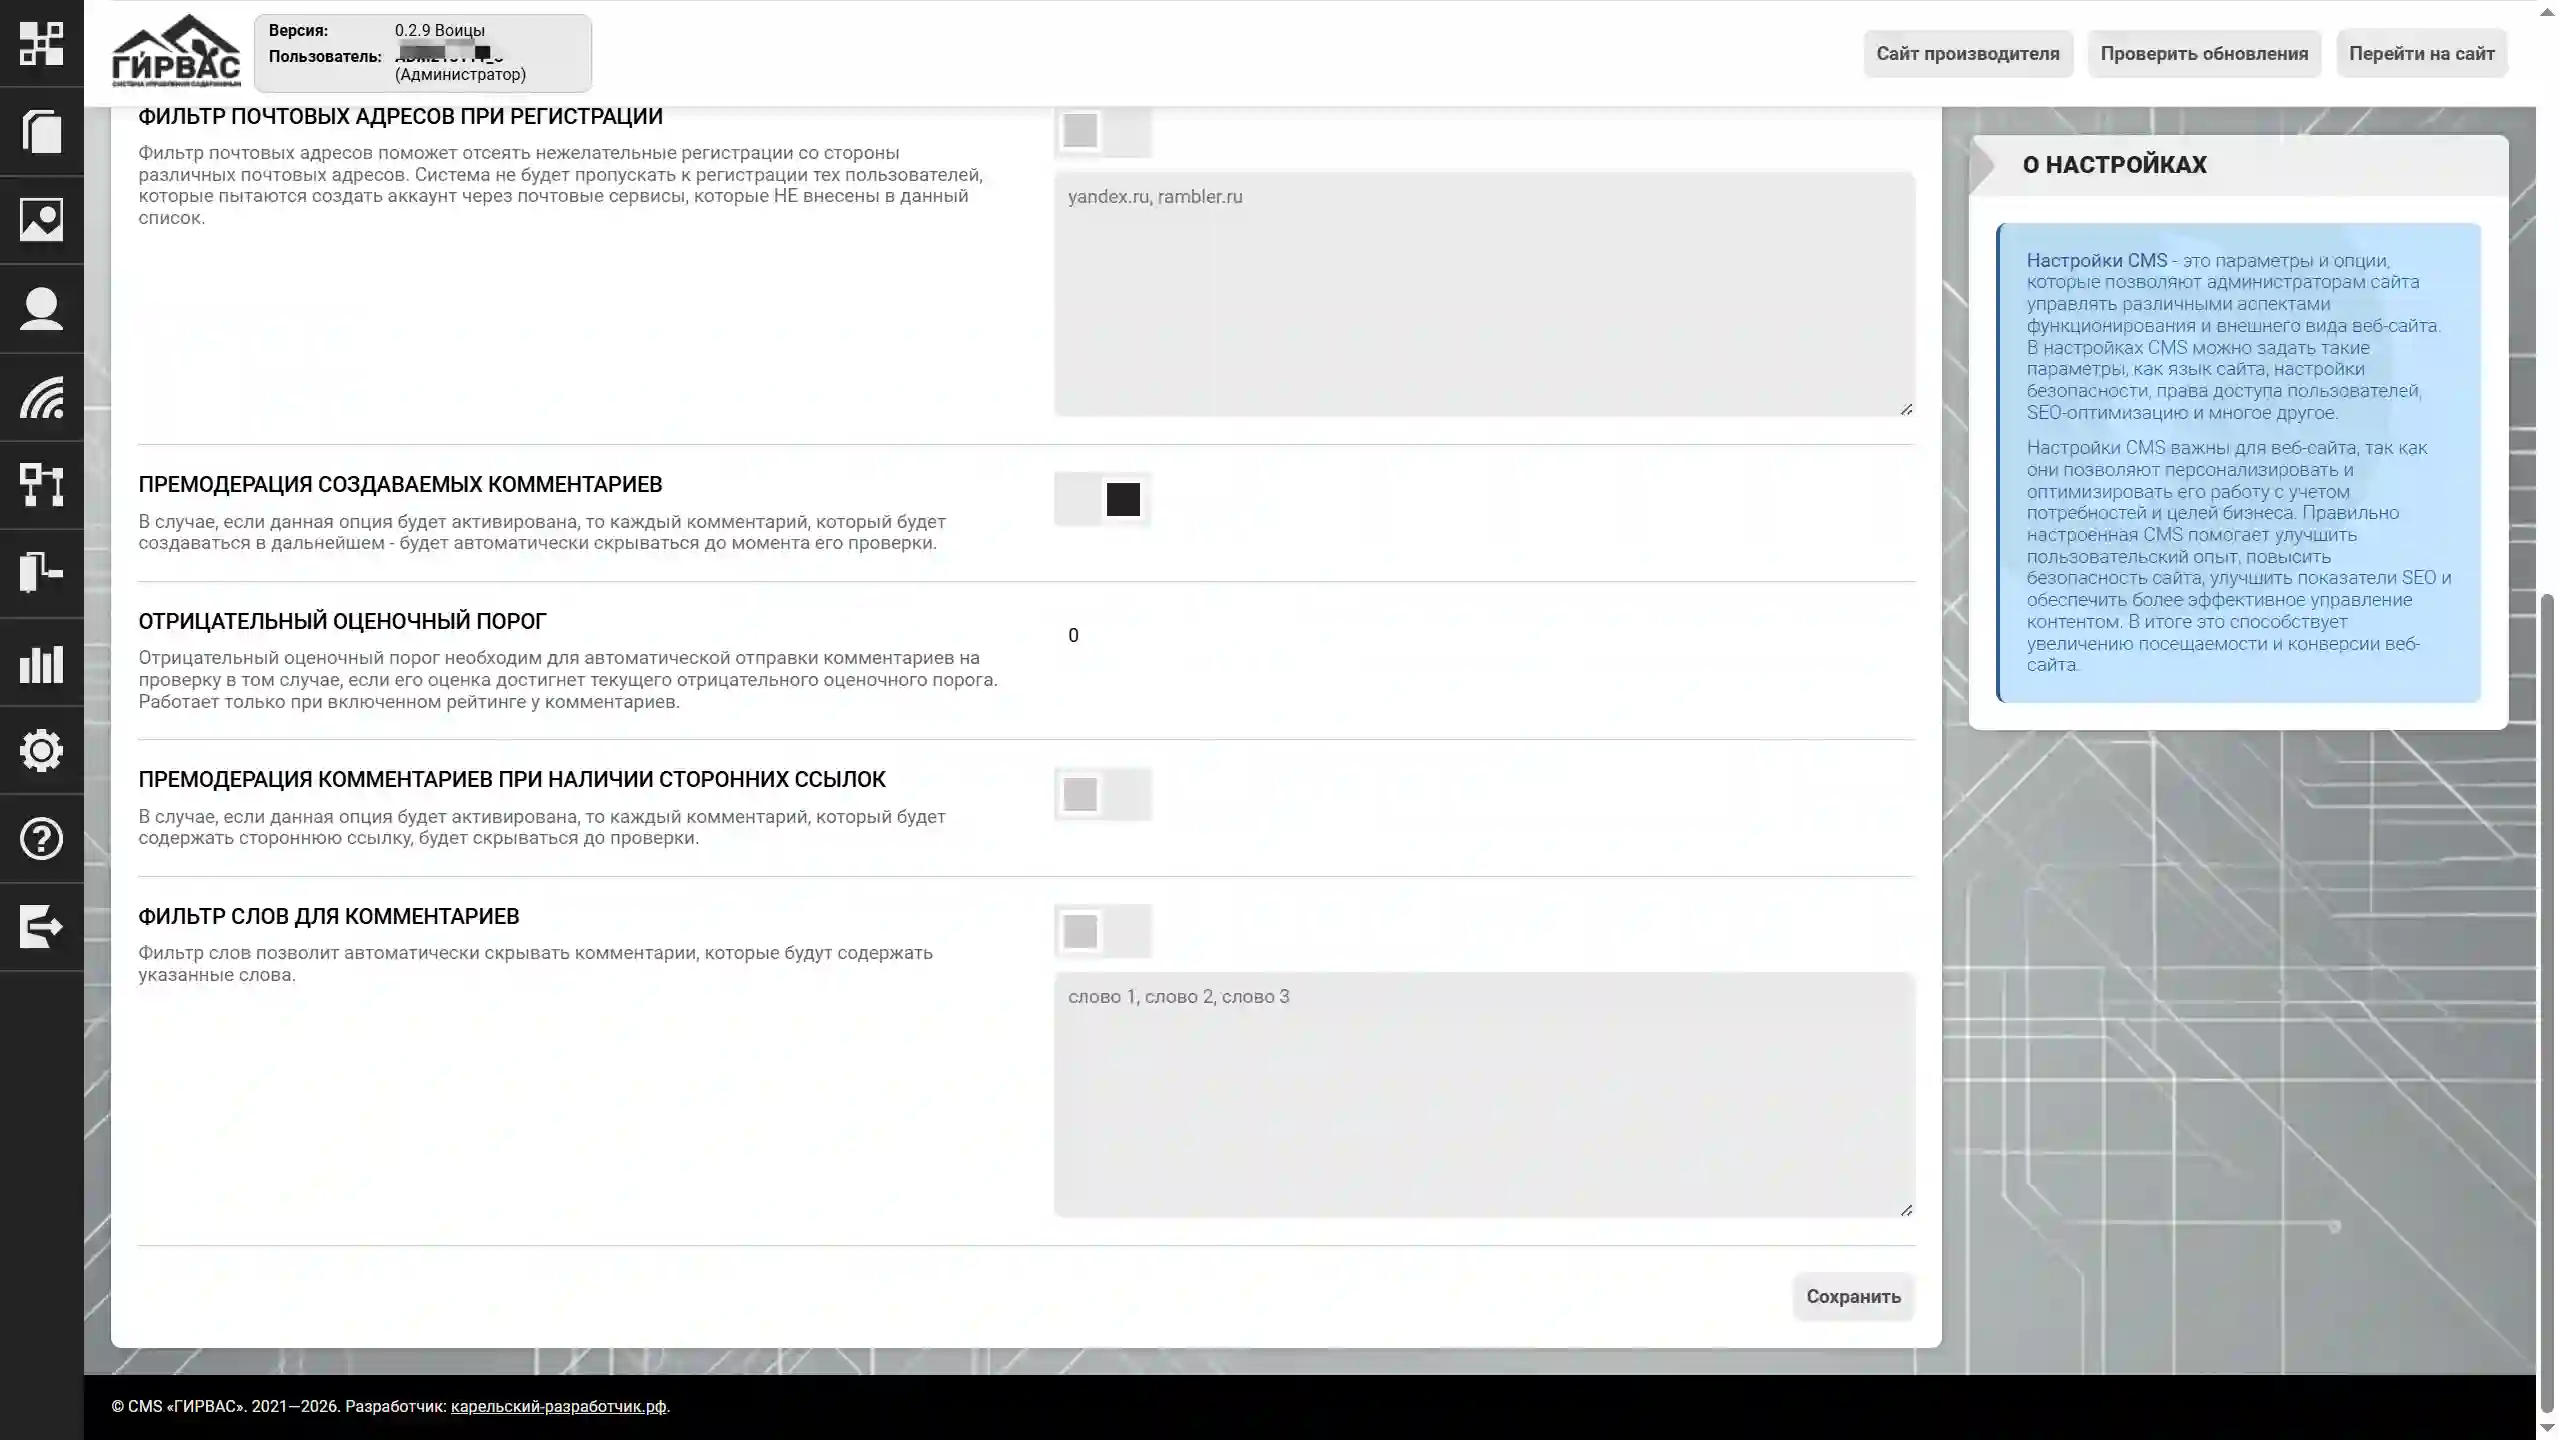
The "Security" subsection includes the following parameters:
- Chat IDs for Notifier (Telegram) – a comma-separated list of Telegram chat IDs for sending notifications based on the results of form data collection;
- Chat IDs for Notifier (MAX) – A comma-separated list of chat IDs in the "MAX" messenger for sending notifications based on the results of collecting information from the form;
- User Registration – Enable or Disable new user registration on the site;
- Restrict Access to the Administrative Panel by IP Address – Restrict access to the admin panel based on IP address verification;
- Email Address Filter during Registration – Restrict registration on the site by email domain. The system verifies the email address domain;
- Pre-Moderation of Created Comments – When this setting is enabled, each comment created is automatically hidden and sent for review. This is useful for maintaining censorship on the site;
- Negative Rating Threshold – The rating threshold for comments, upon reaching which they are automatically hidden from the public and sent for moderation;
- Pre-moderation of comments with third-party links – this setting hides comments containing links. Please note that if the "Pre-moderation of created comments" setting is enabled, this setting loses its functionality;
- Word filter for comments – this setting hides a comment and redirects it for review if the words specified in this setting are detected.
Search Engine Optimization (SEO)
The "Search Engine Optimization" subsection is an experimental set of settings designed for configuring search engine optimization for a web resource.
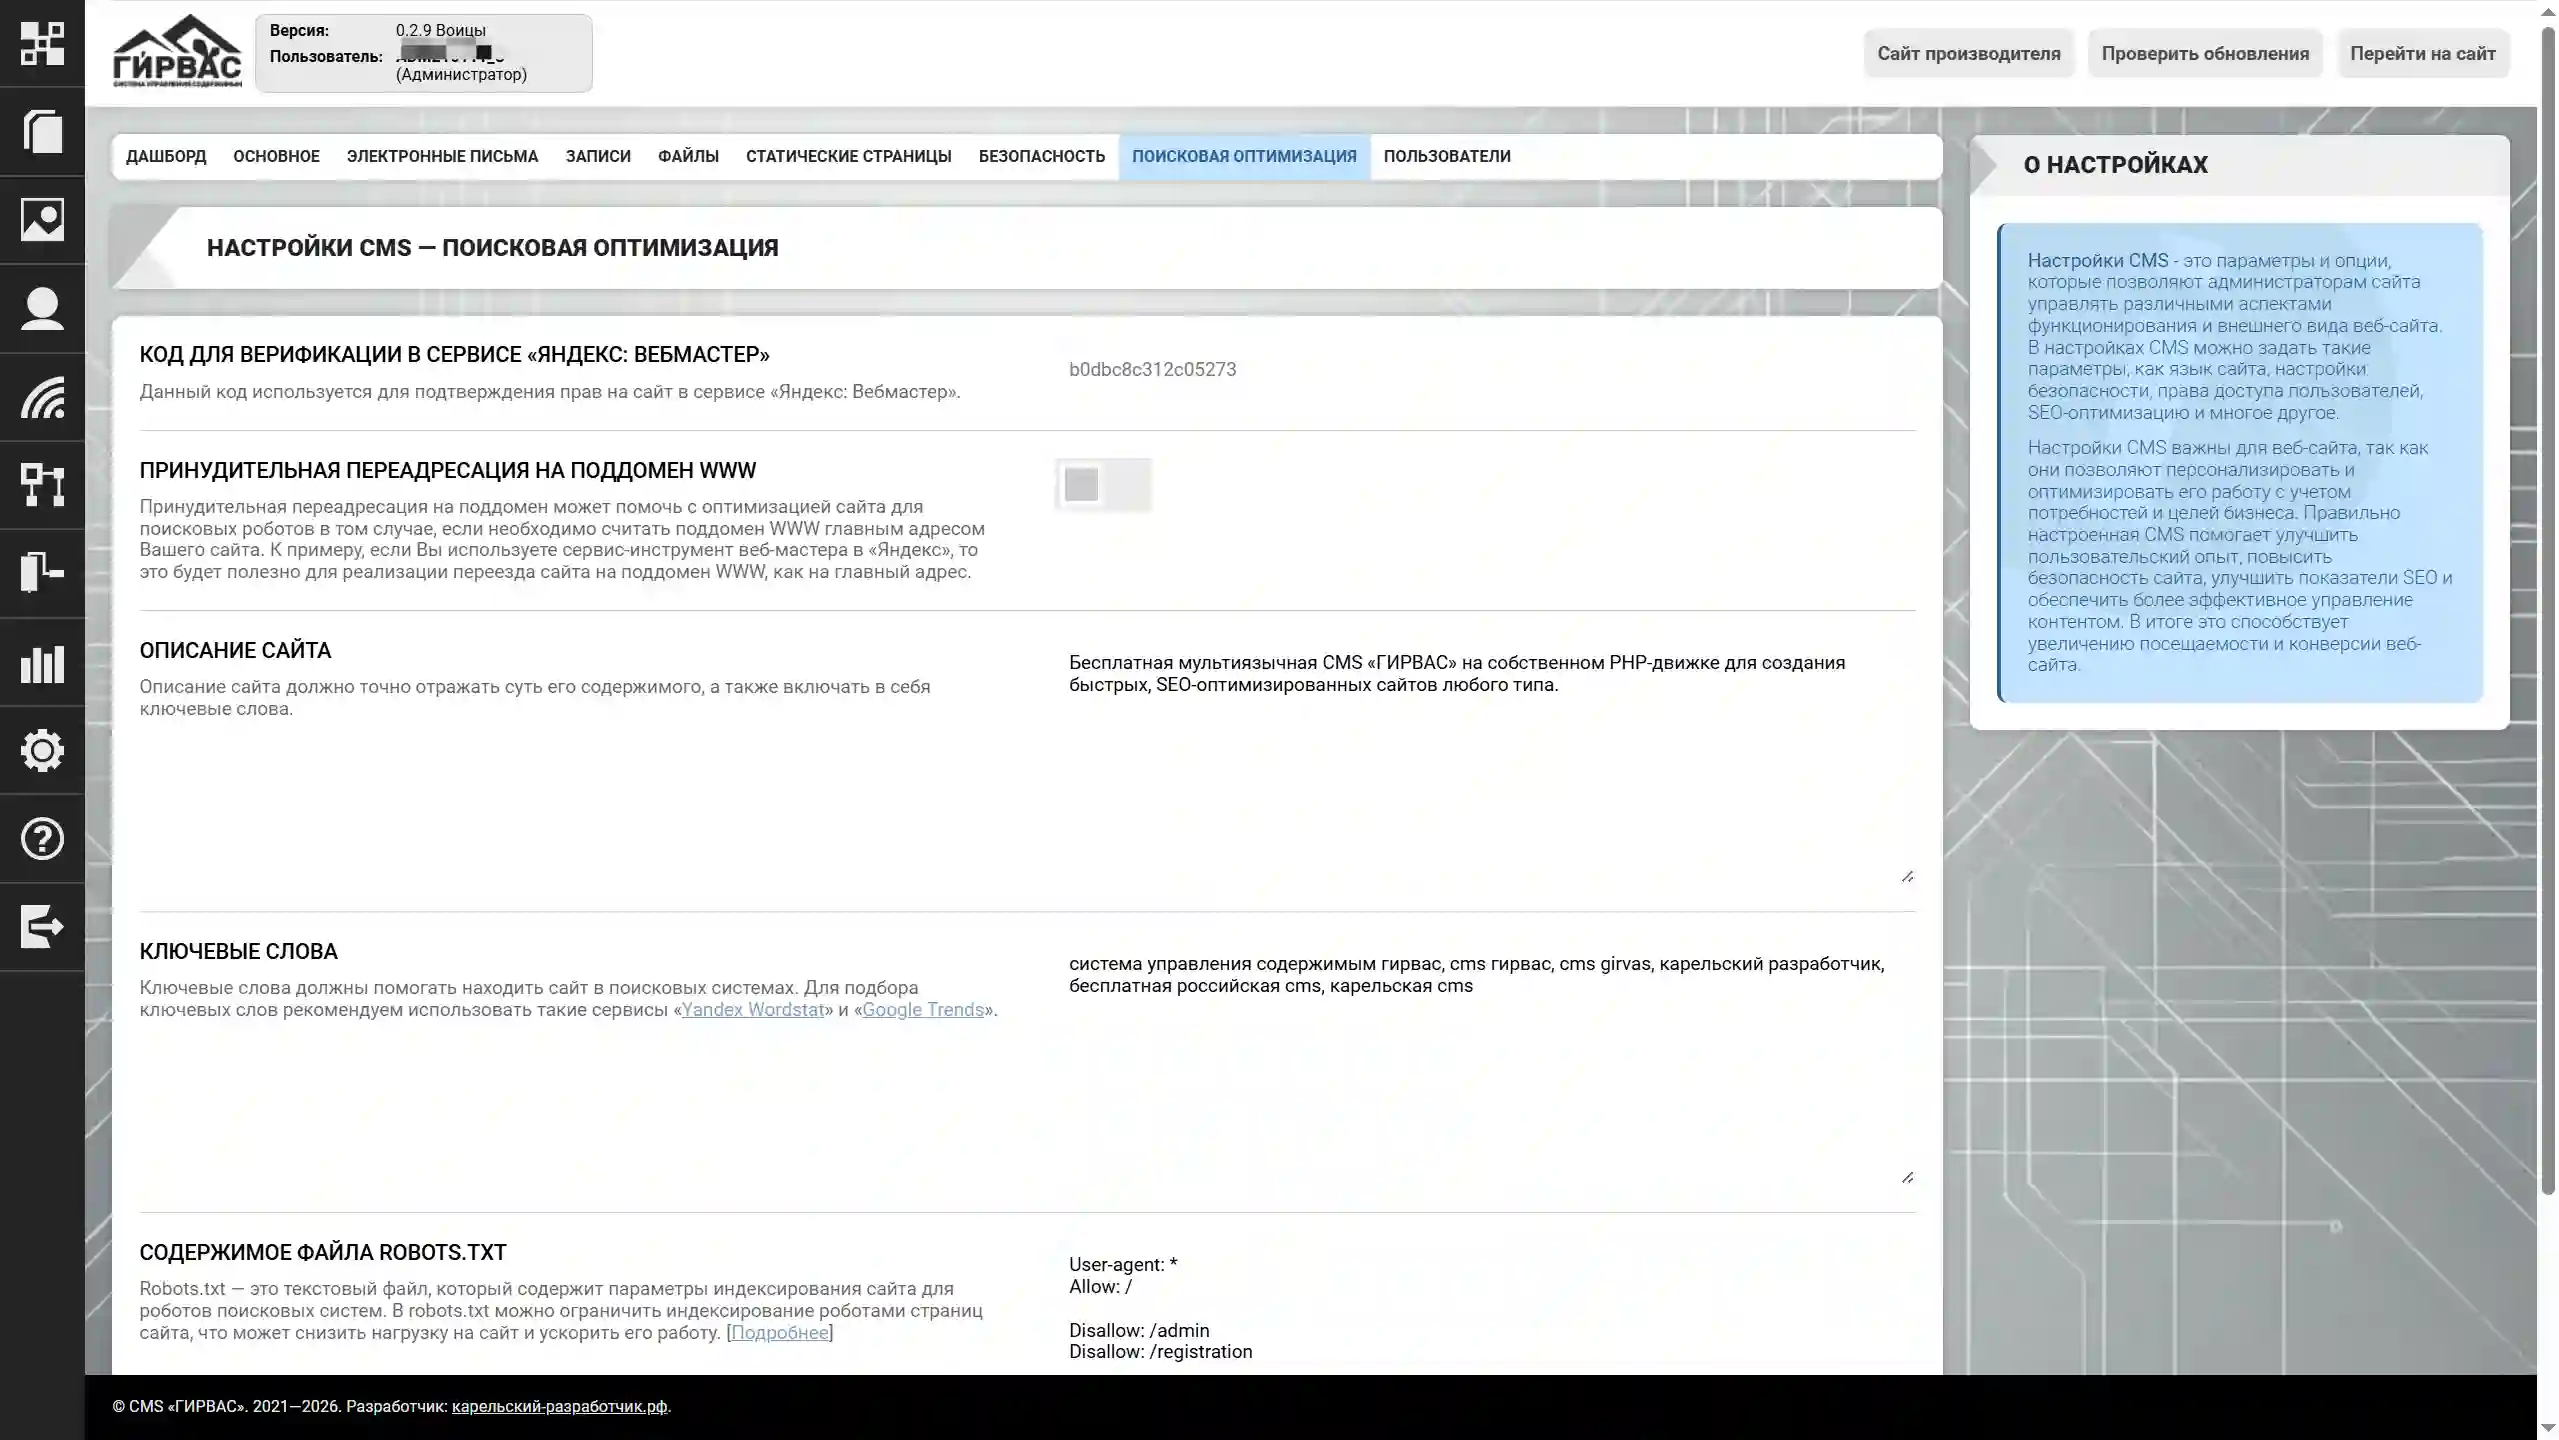
This subsection contains the following parameters:
- Verification Code for Yandex Webmaster – a code for confirming site rights in Yandex Webmaster. Learn more about obtaining the code: https://yandex.ru/support/webmaster/ru/service/rights
- Forced Redirect to WWW Subdomain – a parameter that automatically redirects to the WWW subdomain if the site is running on it. Please note that subdomains are being phased out;
- Site Description – the parameter value is embedded in the "description" meta tag of the web page;
- Keywords – a set of words defining the content of the web page. For keyword selection, we recommend using Yandex Wordstat and Google Trends;
- Robots.txt File Contents – the contents of the robots.txt file located in the root of the CMS. Before editing, ensure that the web server has write access to this file. More information about how robots.txt works: https://карельский-производитель.рф/entry/what-is-this-robots-txt.
Users
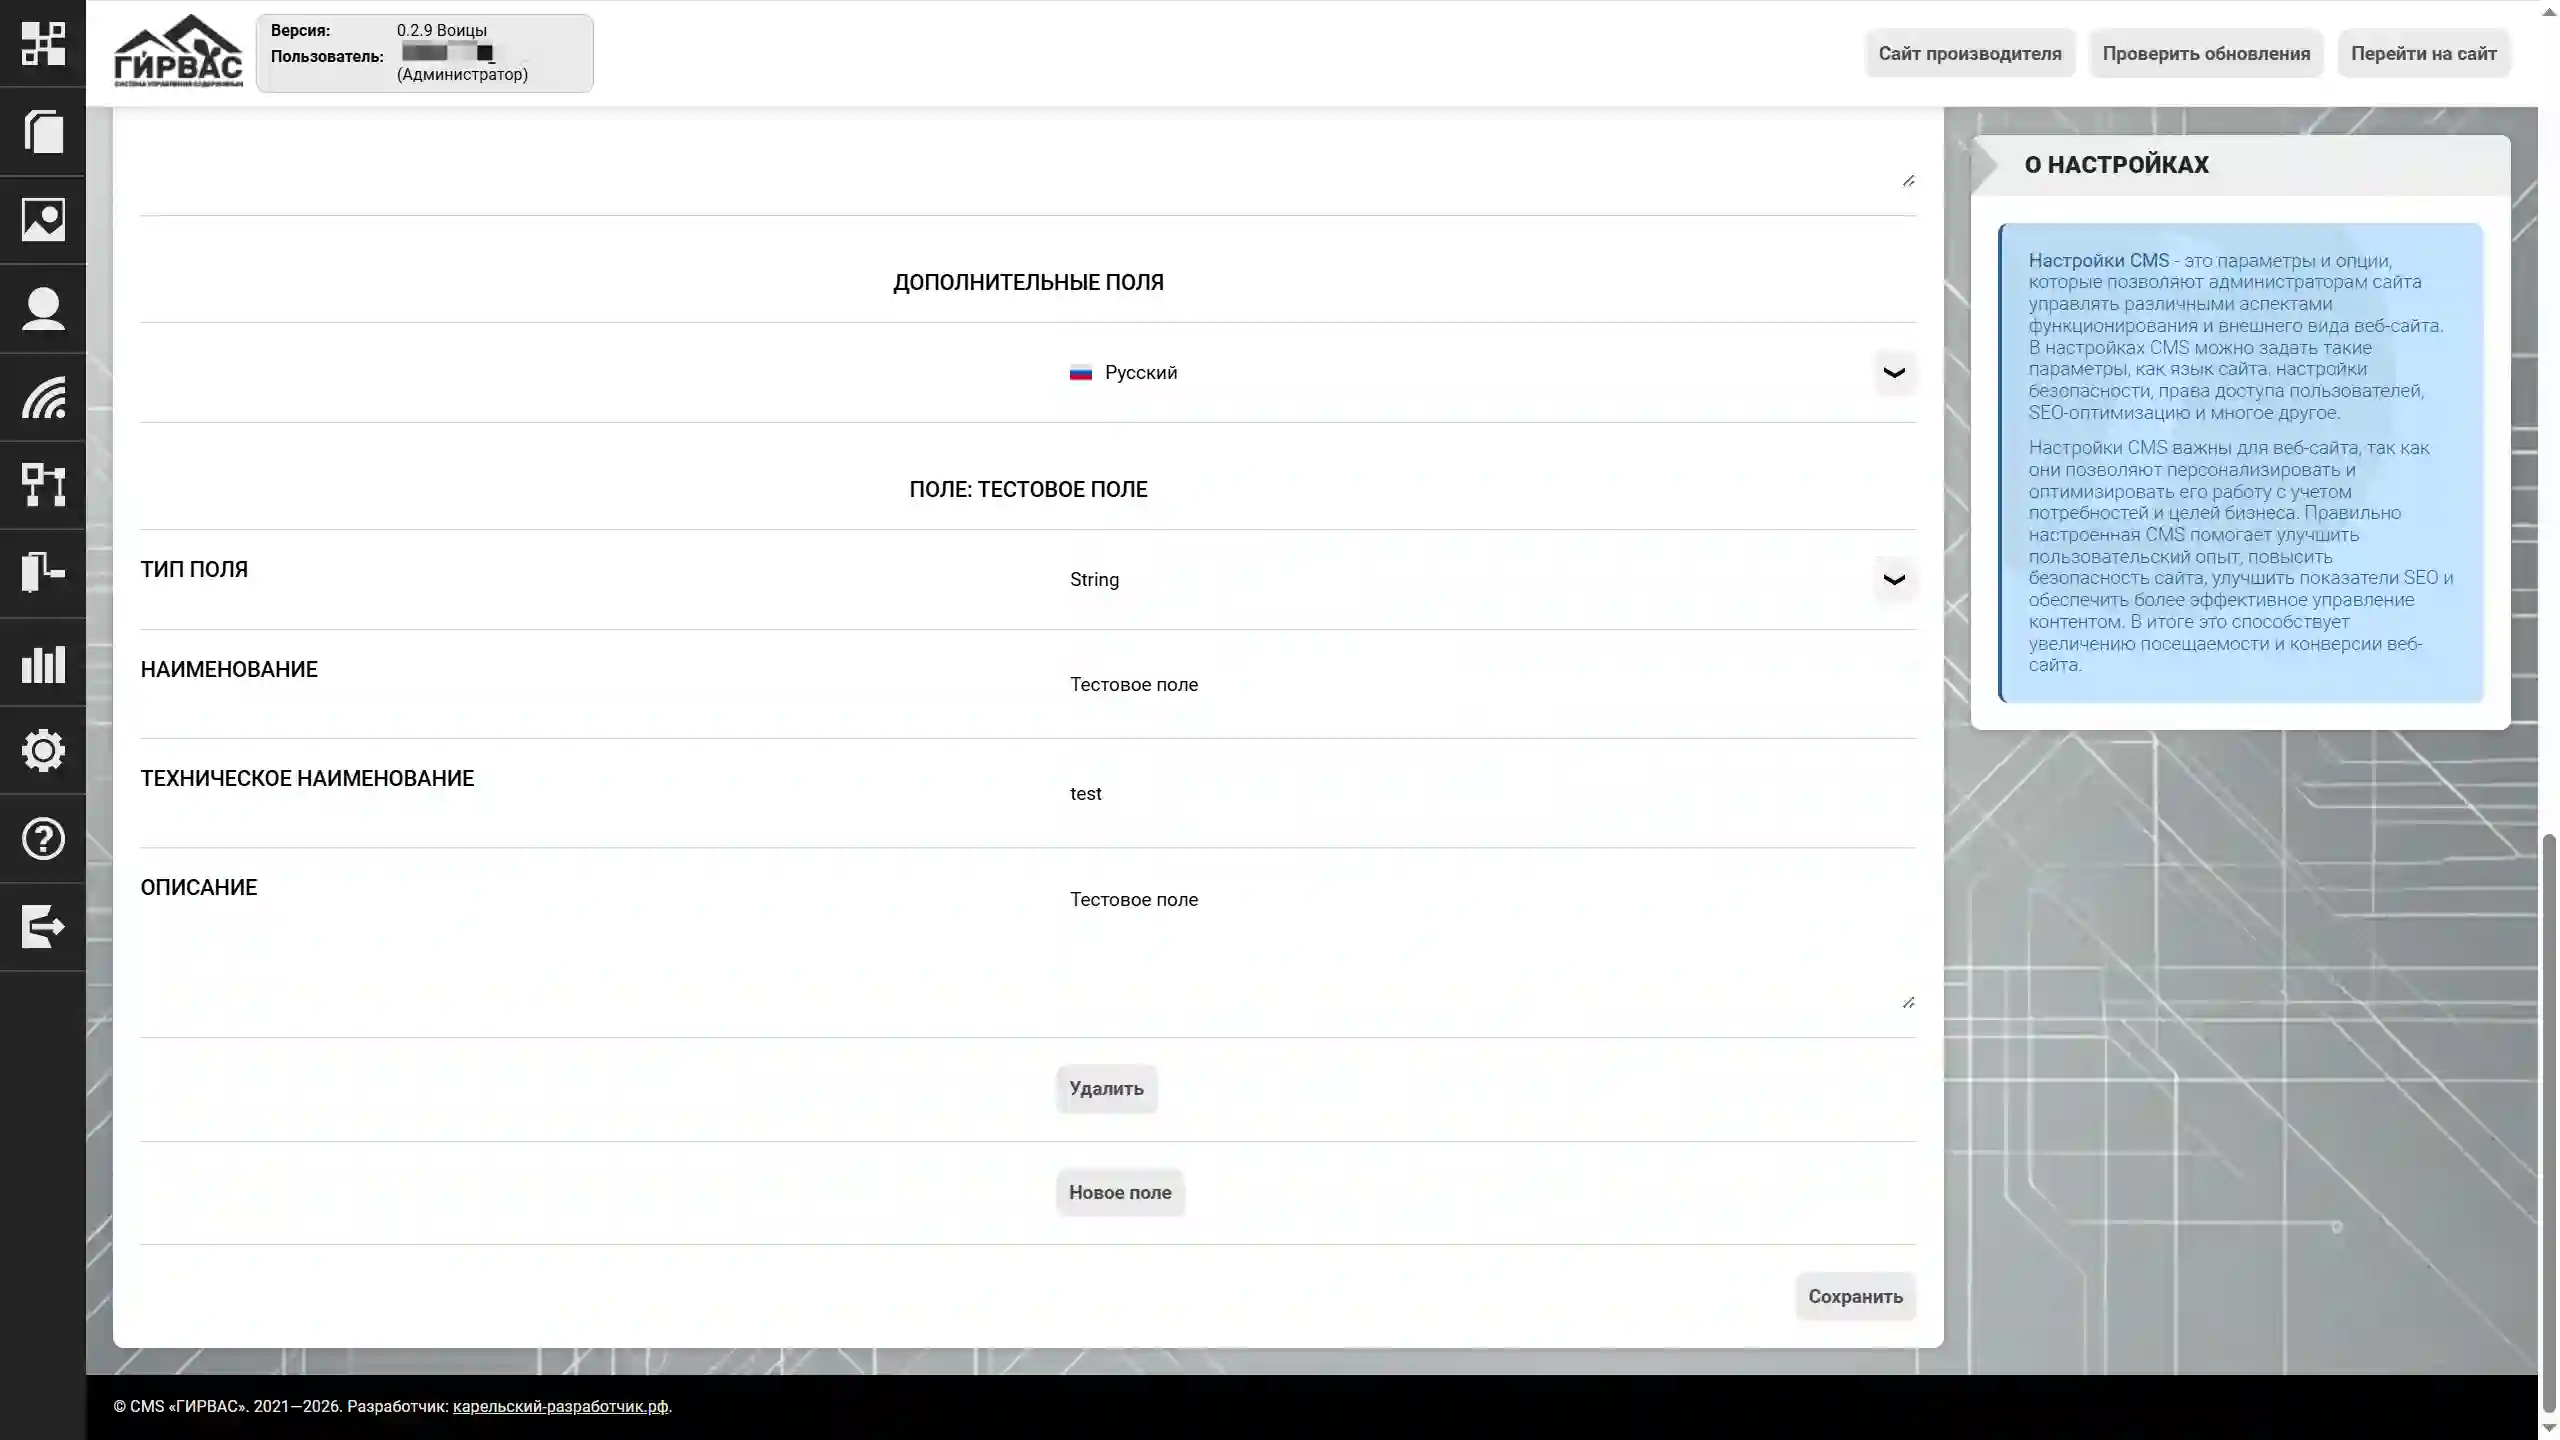
The "Users" subsection allows you to add additional fields to your website profiles, allowing you to display additional information on the full profile page (e.g., full name, profession, address, etc.). You can also customize how avatars, logins, and passwords work.
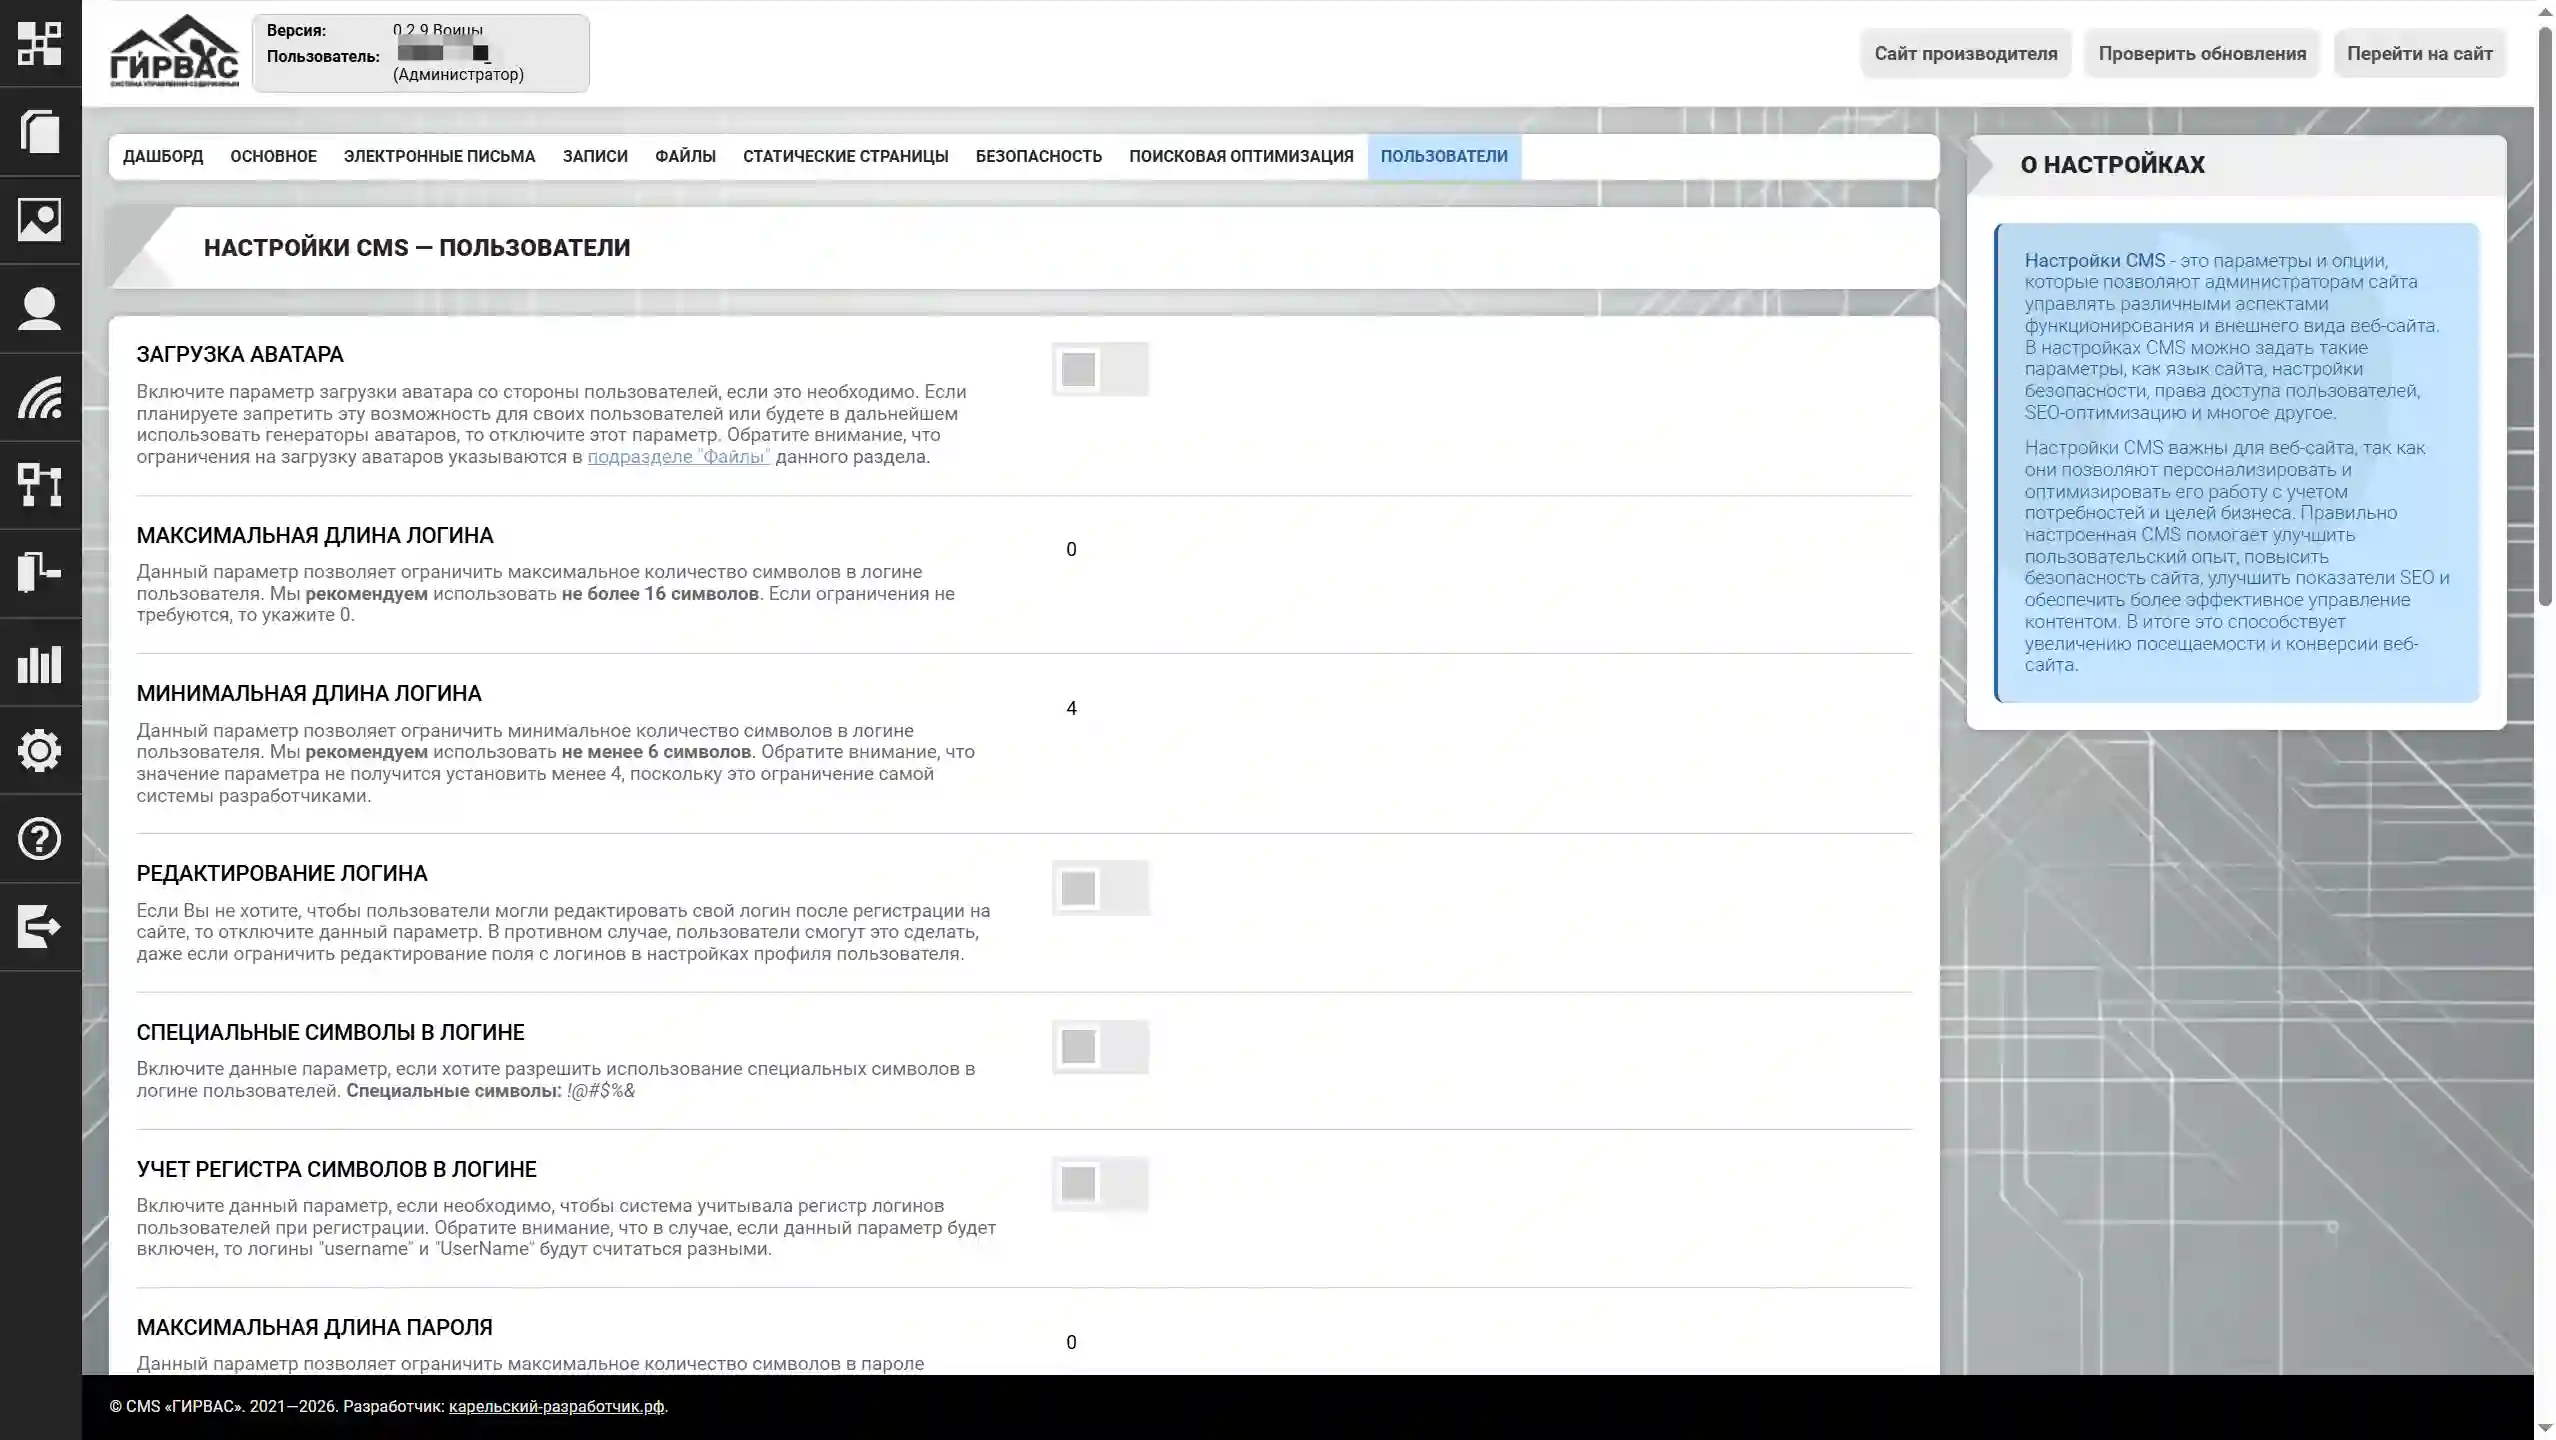
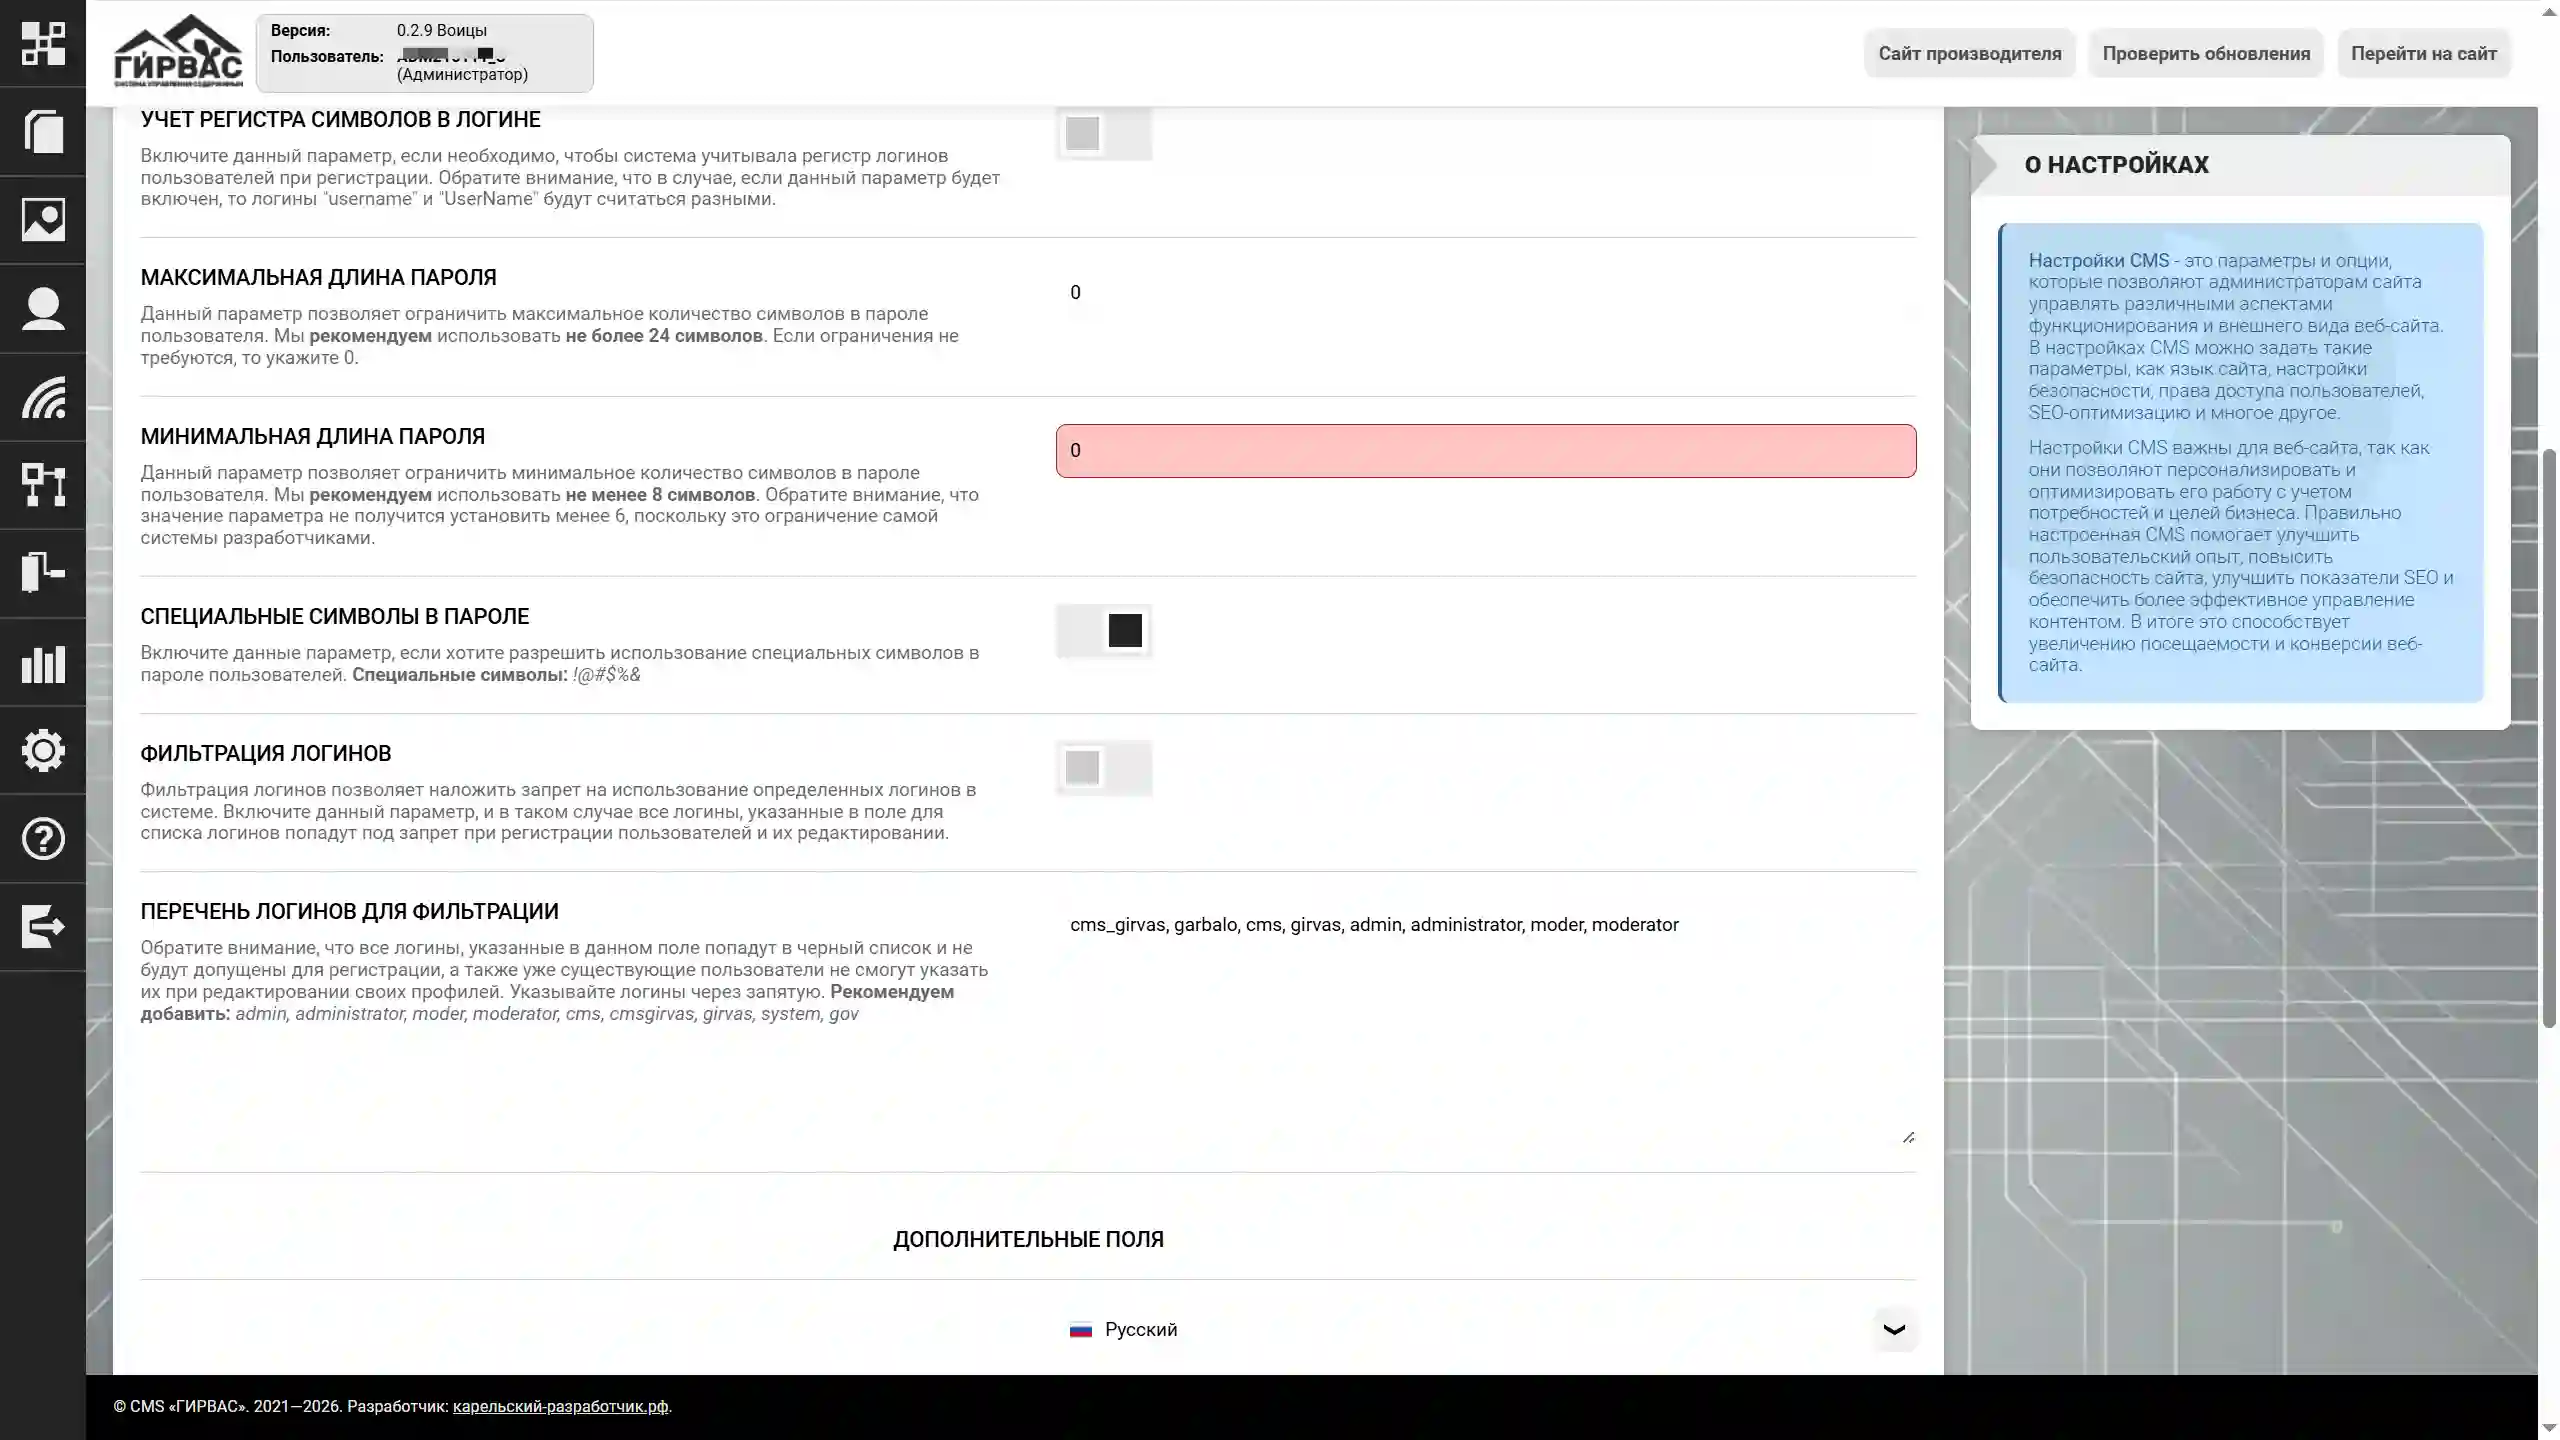
The form includes the following fields:
- Avatar upload – a parameter that determines whether users can upload avatars. If this functionality is required, this parameter should be enabled. If you plan to use avatar generators or prohibit this feature, this parameter should be disabled. Avatar upload restrictions are configured in the "Files" subsection of the "CMS Settings" section.
- Maximum login length – a parameter that specifies the maximum allowable number of characters in a user login. The recommended value is no more than 16 characters. If no limit is required, enter 0.
- Minimum login length – a parameter that specifies the minimum allowable number of characters in a user login. The recommended value is at least 6 characters. The parameter value cannot be set to less than 4 characters due to a system limitation.
- Login Editing – This parameter determines whether users can change their login after registration. If this parameter is disabled, login editing is unavailable, regardless of the user profile settings.
- Special Characters in Login – This parameter allows the use of special characters (!@#$%&) in the user login when enabled.
- Case-Sensitive Login – This parameter determines whether logins are case-sensitive. When this parameter is enabled, the system treats the "username" and "UserName" logins as separate accounts.
- Maximum Password Length – This parameter specifies the maximum number of characters allowed in a user password. The recommended value is no more than 24 characters. If no limit is required, specify 0.
- Minimum Password Length – This parameter specifies the minimum number of characters allowed in a user password. The recommended value is at least 8 characters. This parameter value cannot be set to less than 6 characters due to a system limitation.
- Special characters in password – This parameter allows the use of special characters (!@#$%&) in the user password when enabled.
- Login filtering – This parameter disables the use of certain logins in the system. When enabled, all logins specified in the login list field are blocked for registration and profile editing.
- List of logins to filter – This field specifies the logins to be blocked. Logins included in this list are not allowed for registration and cannot be specified by existing users when editing profiles. Logins are separated by commas. The recommended list is: admin, administrator, moder, moderator, cms, cmsgirvas, girvas, system, gov.
The form includes the following parameters for additional fields:
- Field Type – one of the possible field types: text, multiline text (textarea), number (Number), date (Date), email (email), phone (phone), checkbox (checkbox), submit button (button submit), reset button (button reset);
- Name – the name of the element, which will be displayed next to the element field;
- Technical Name – the technical name of the element. Only Latin characters are allowed in this field. It will be embedded in the "name" attribute of the HTML element;
- Description – a short description of the element, which can be displayed next to the element name;
When working with additional fields, use the following toolbar elements: "Delete" to delete an element, "New Element" to add a new element. After completing all the necessary manipulations, be sure to click the "Save" button in the bottom toolbar.