Navigating the Documentation
The software can run on Linux and Windows operating systems that have a web server already installed and configured.
ATTENTION! Installing and configuring a web server is not covered in this guide.
Preparation
To install the software, you must complete the following steps:
- Download the latest version of the software using Git and clone the repository located at https://gitflic.ru/project/garbalo/cms-girvas;
- If you are using Apache2 web servers, make sure mod_rewrite is installed and enabled, as the software natively converts URLs into human-readable web page addresses. Also, make sure the root directory where the software is located has an ".htaccess" file; otherwise, URL conversion will not work. If it does not, you can create your own ".htaccess" file with its own rules for URL conversion.
- Please note that the software currently only works with PostgreSQL (version 13.13 and later), so make sure this DBMS is installed on your server.
Installing the GIRVAS CMS
To simplify installation of the management system, a wizard has been developed that will install and configure the system quickly and correctly, guiding the user step by step.
Start
Go to <domain>/install (localhost/install) to begin installing the software. If the web server is configured correctly and the mod_rewrite module has been enabled and installed, your browser will display a page with the software installation wizard, which will prompt you to complete several steps to successfully complete the installation.
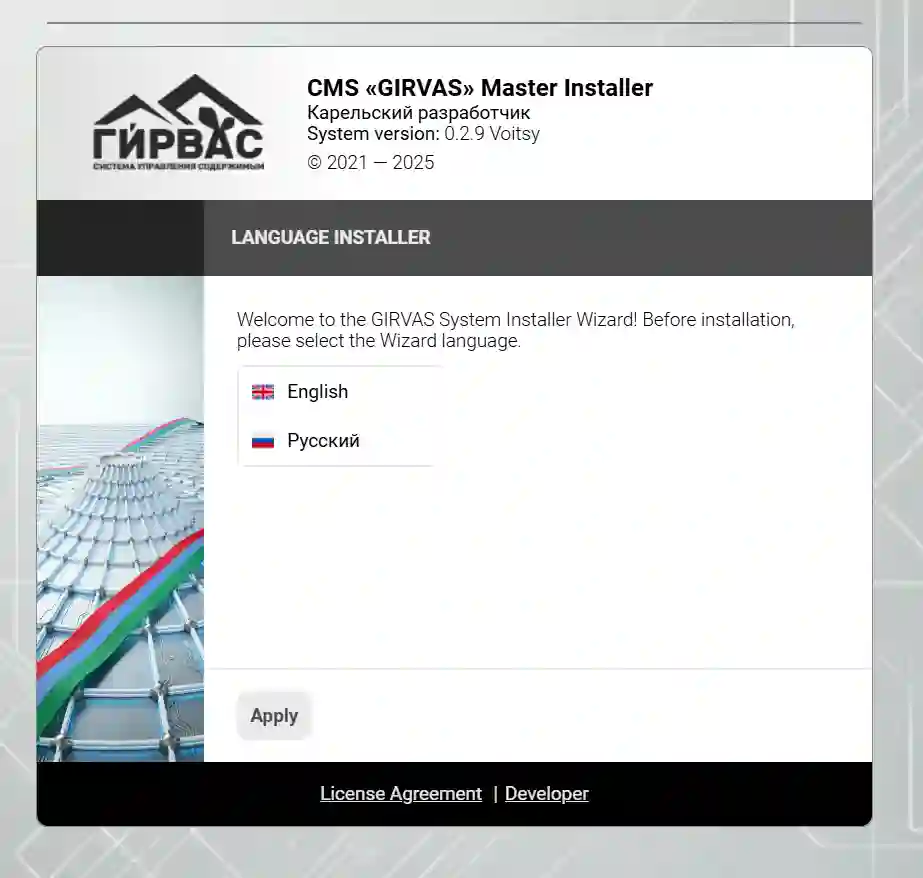
Read the installer's instructions carefully, as if you follow the steps incorrectly, you may have to reinstall the software. Select the desired language for the wizard interface and click "Apply" to begin installing the GIRVAS CMS. After proceeding to the first step, the interface should switch to the selected language.
Step #1
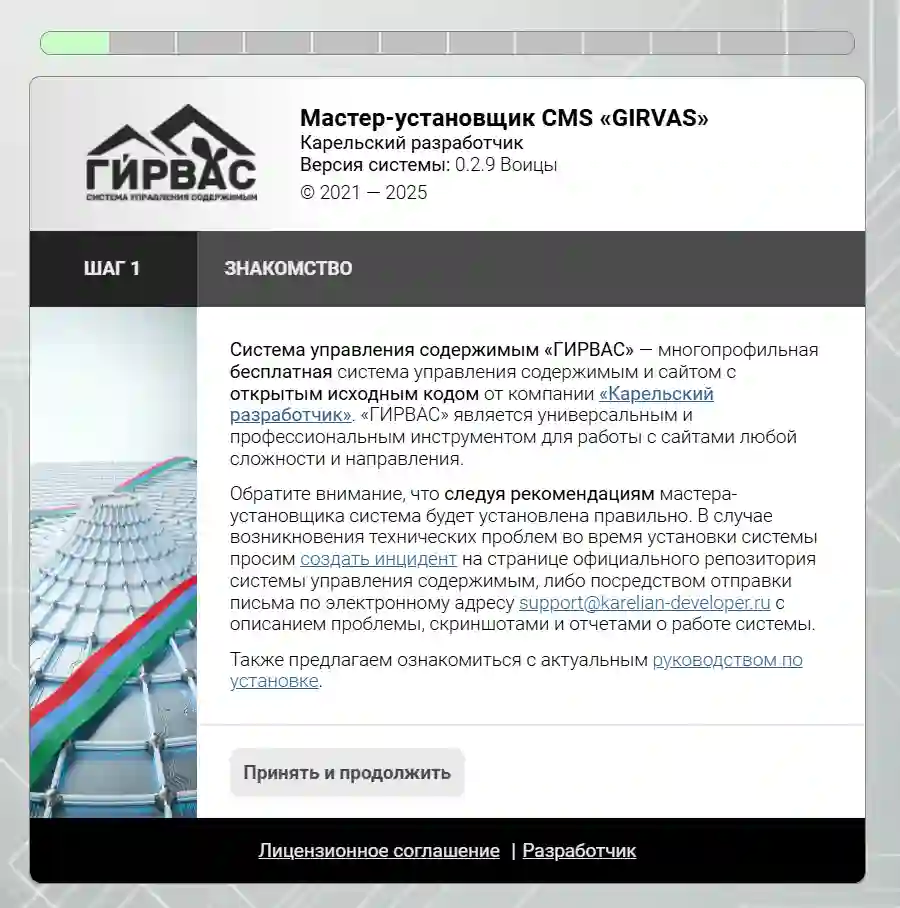
The installation process begins! Click the "Accept and Continue" button to proceed to the second step.
Step #2
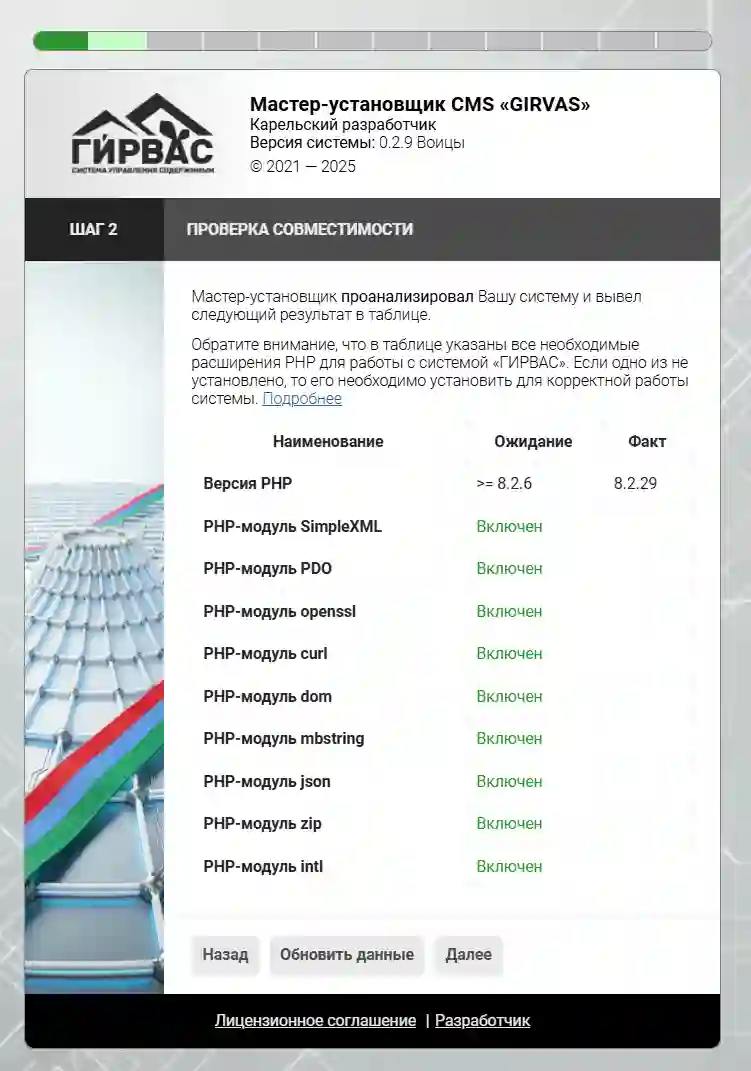
The second step will allow you to check whether the PHP interpreter installed on your web server meets the requirements. If the interpreter version does not meet the minimum requirement or a module required for CMS operation has not been installed, the Installer Wizard will indicate this in the table.
If a required module has not been installed, the "Actual" column in the table will show "Disabled," indicating a missing or disabled PHP module.
Please note that all modules must be enabled for stable operation; in this case, all modules will show the "Enabled" status in the table.
Step 3
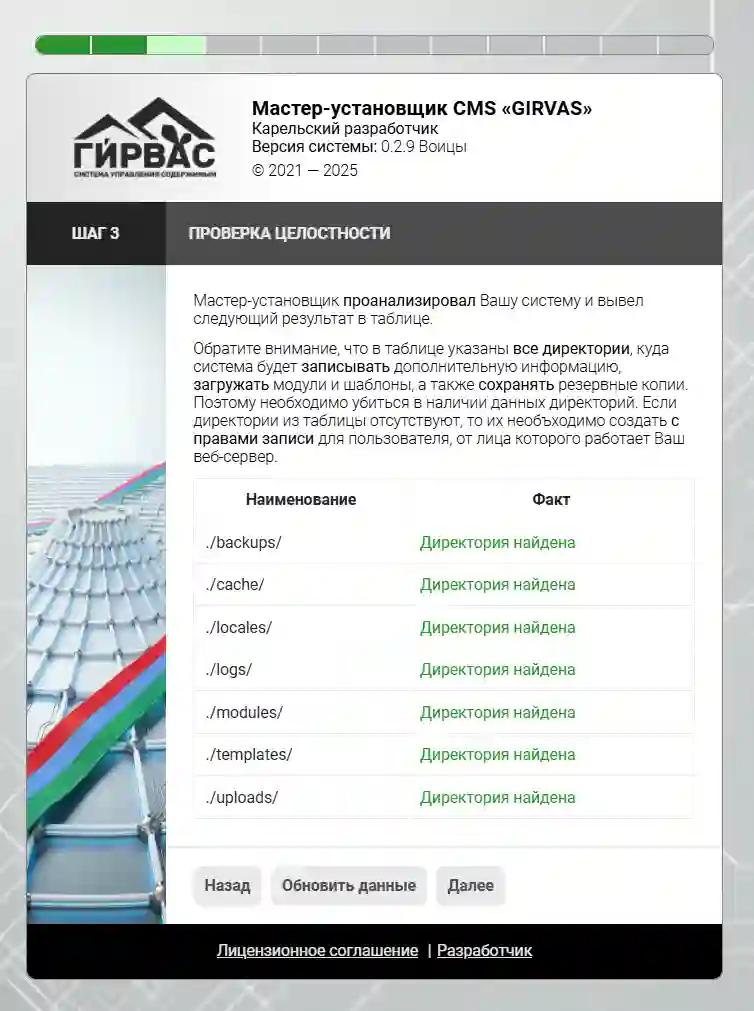
The third step will check the integrity of the file system, specifically the presence of the directories required for correct operation.
If the "Fact" column for the corresponding directory indicates that the directory does not exist, then it does not exist, or incorrect rights were granted to the User (on behalf of whom the web server operates, usually www-data).
Step #4
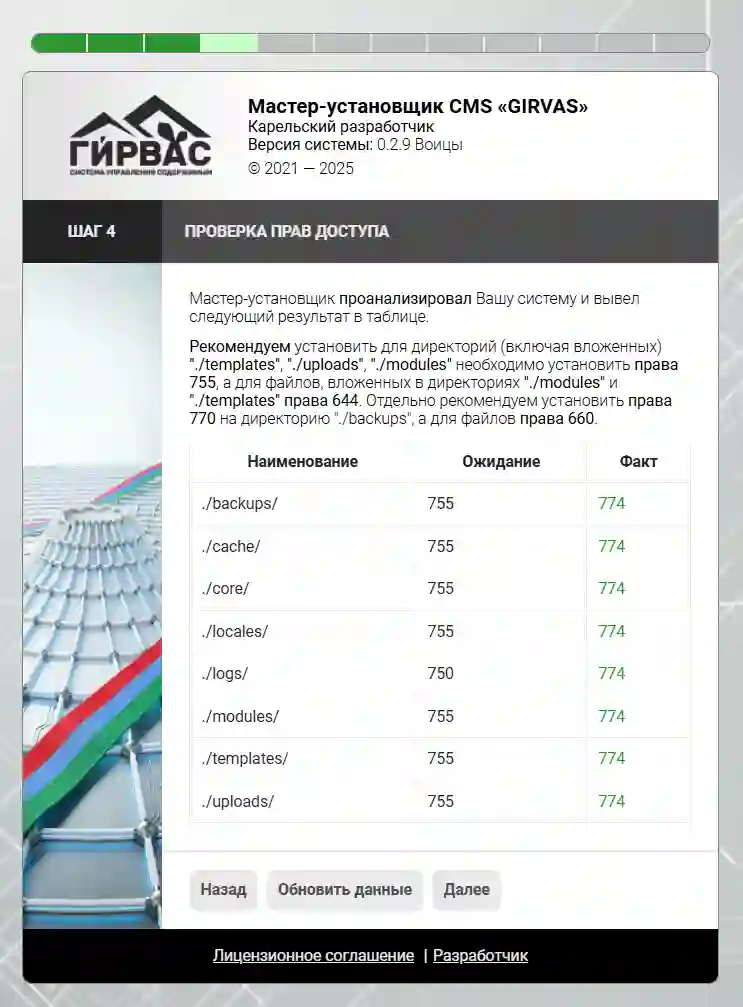
The fourth step checks the system directories for the required permissions. It is recommended to grant permissions of 0755 for the directories specified in the table.
Step #5
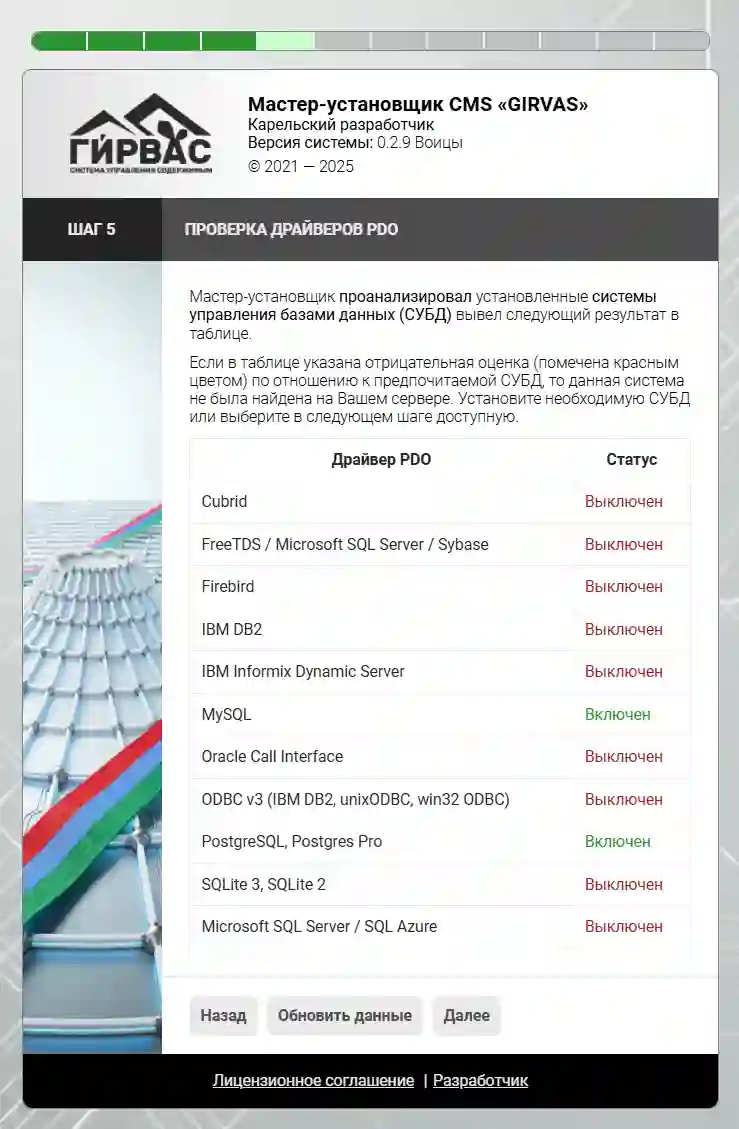
The fifth step will help you check the installed modules for the PHP interpreter, which allow you to work with various DBMSs, such as MySQL, PostgreSQL, Firebird, and others.
ATTENTION! Currently, the GIRVAS content management system works exclusively with the following DBMSs: MySQL, PostgreSQL.
Step 6
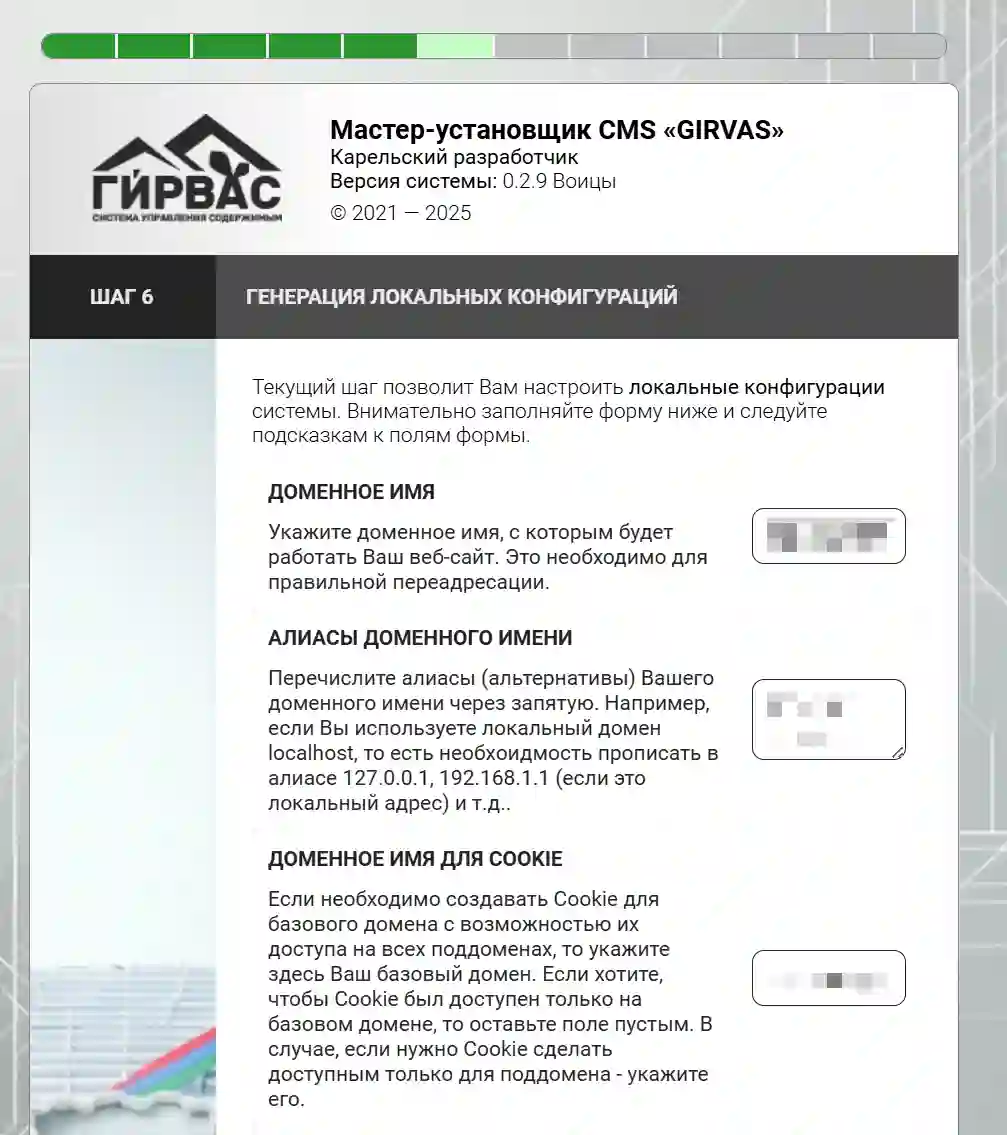
The sixth step is crucial, as it involves the basic system setup and database connection.
After completing all the required information, click the "Create Configuration" button.
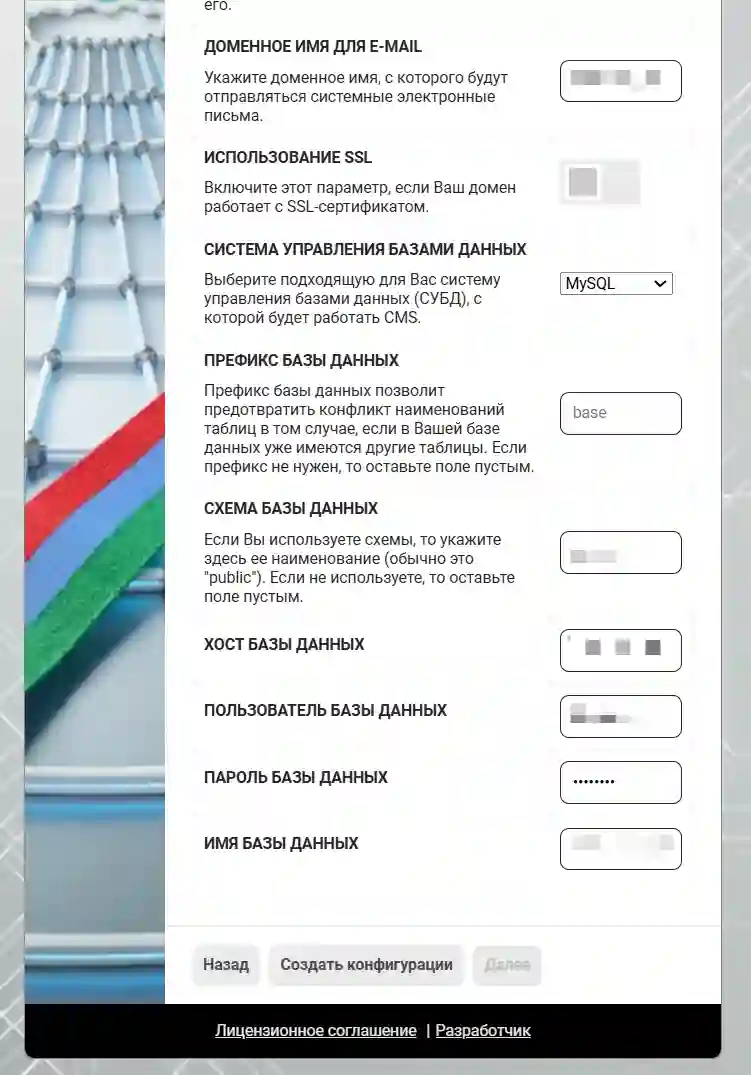
Field Descriptions
- Domain Name – This is the domain name that will be used to correctly redirect users.
- Cookie Domain Name – This is the domain name that will be used to create the cookie. ATTENTION! If you enter an incorrect domain name, user authorization on the website may not work. If you don't know what to enter, enter the same name as you specified in the previous field.
- Domain name for E-mail – This is the domain name that the server will use when sending emails. For example, if you specified example.ru, the server will send an email from noreply@example.ru when a user registers through the registration form.
- Use SSL – This parameter also affects user redirection. If this parameter is enabled, absolute links will be generated using the HTTPS protocol; otherwise, they will be HTTP.
- Database management system – The system that the CMS will work with when working with databases. ATTENTION! The GIRVAS content management system currently works exclusively with MySQL and PostgreSQL.
- Database Prefix – A special parameter that allows you to create tables in the database with a special prefix before their names. For example, if you specify the prefix "prefix", the tables will look like this: "prefix_users", "prefix_entries", etc. If no other systems will create tables in this database, this field can be left blank.
- Database Schema – A special parameter that is useful for the PostgreSQL DBMS. The schema is used as a namespace in the DBMS, allowing you to group tables within the database. Typically, the schema is named "public".
- Database Host – The IP address of the server where the DBMS is located. Please note that if the server with the DBMS uses IPv6, you must specify the parameter value in the format [XXXX:XXXX::XX].
- Database User – The name of the user under whose account manipulations with the database will be performed. Database Password – The password for the database that was set when it was created. Database name – the name of the database that was specified when it was created.
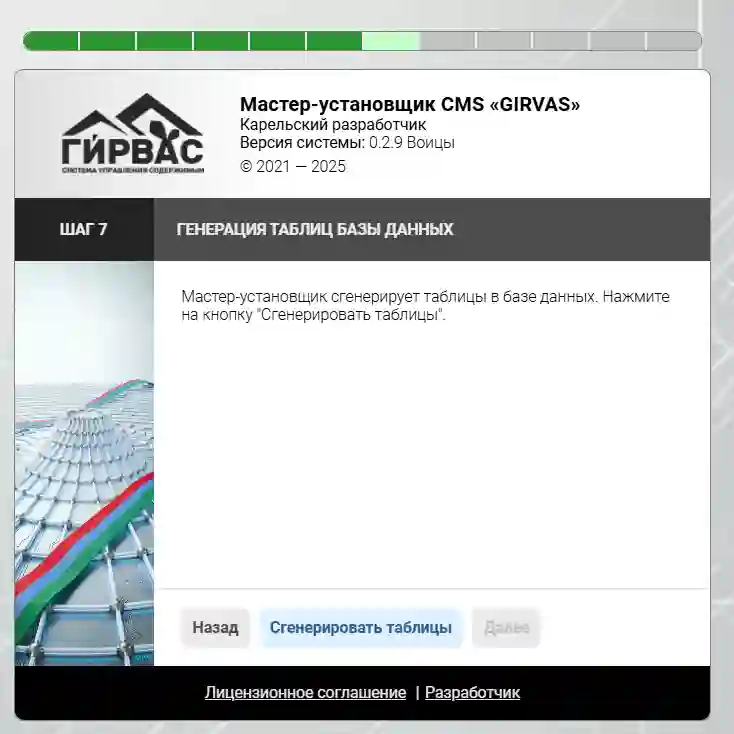
Step #7
Step seven will help you generate tables in the database. To do this, click the "Generate Tables" button. If the tables are generated successfully, the Installation Wizard will notify you in the same window.
Step #8
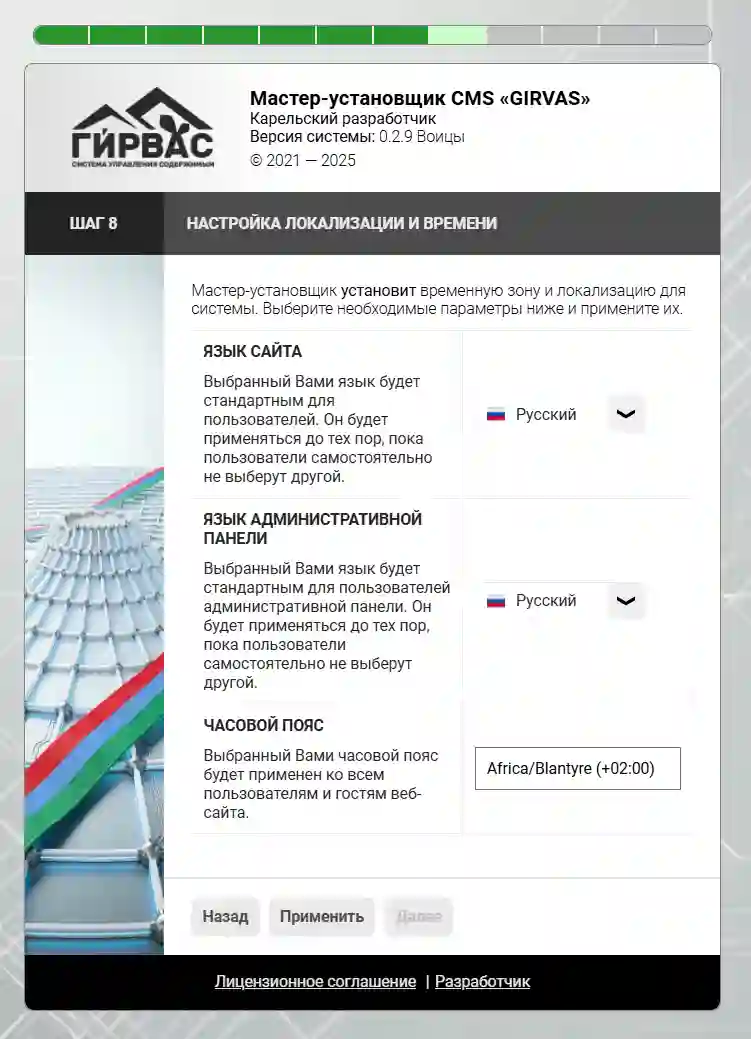
Step eight will help you configure the website language, the admin panel, and select the desired time zone. Once completed, click the "Apply" button.
Step 9
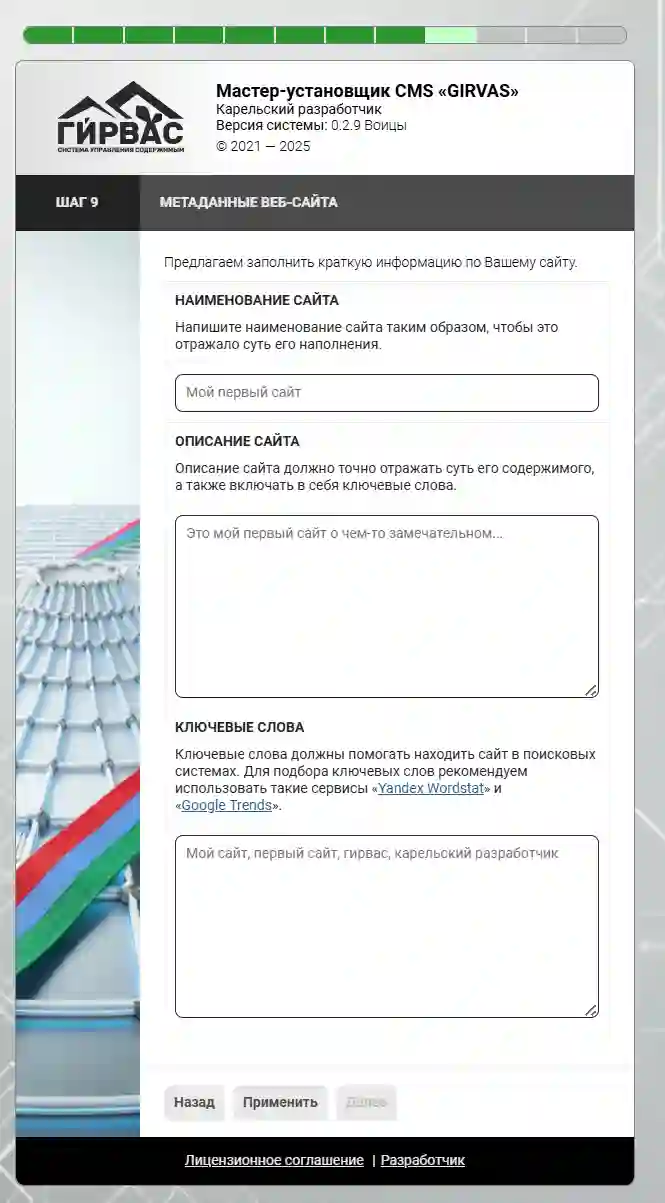
Step 9 will help you configure your website's metadata. Please note that the quality of the data entered in these fields will affect how search engines index your website, so it's important to follow certain guidelines when entering them.
Recommendations
- The website name must be between 50 and 60 characters long.
- The website description must be between 150 and 160 characters long. Please note that it would be very helpful if the website name and its keywords were included in the description.
- The keywords should describe the website's content. The total length of all keywords should not exceed 255 characters.
After completing all fields, click the "Apply" button.
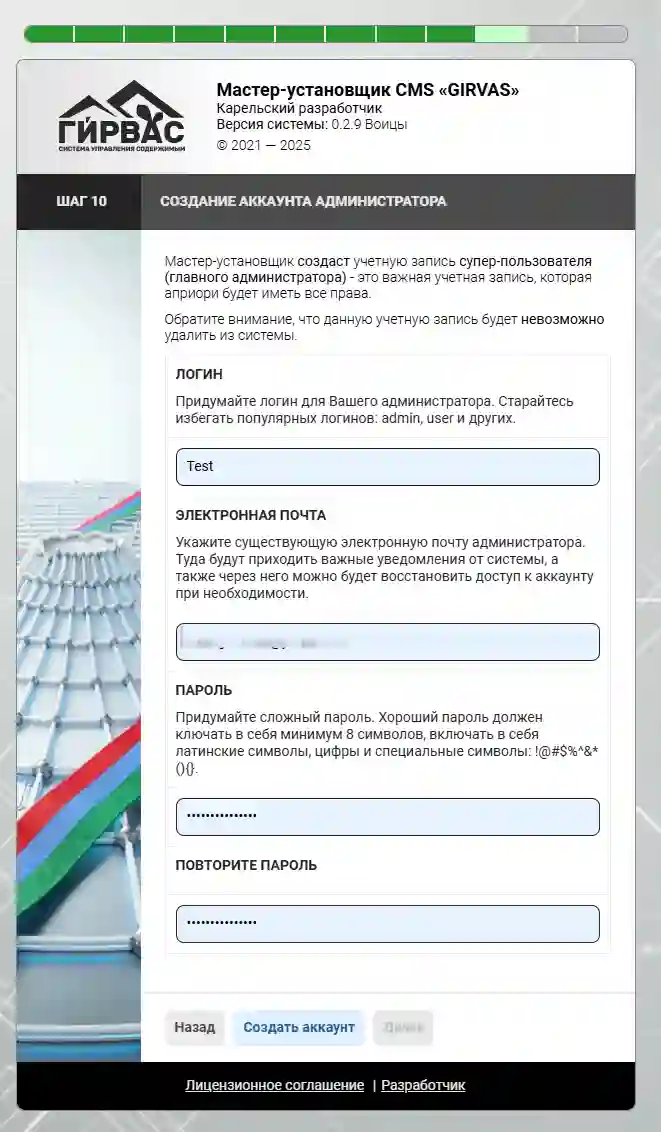
Step 10
Step 10 allows you to create an administrator account. Fill in the details, specifying the administrator's login, email address, and password.
When entering the password, we recommend using both lowercase and uppercase Latin letters, as well as numbers and the special characters !@#$%^&*(){}.
After completing all fields, click the "Create Account" button.
Step #11
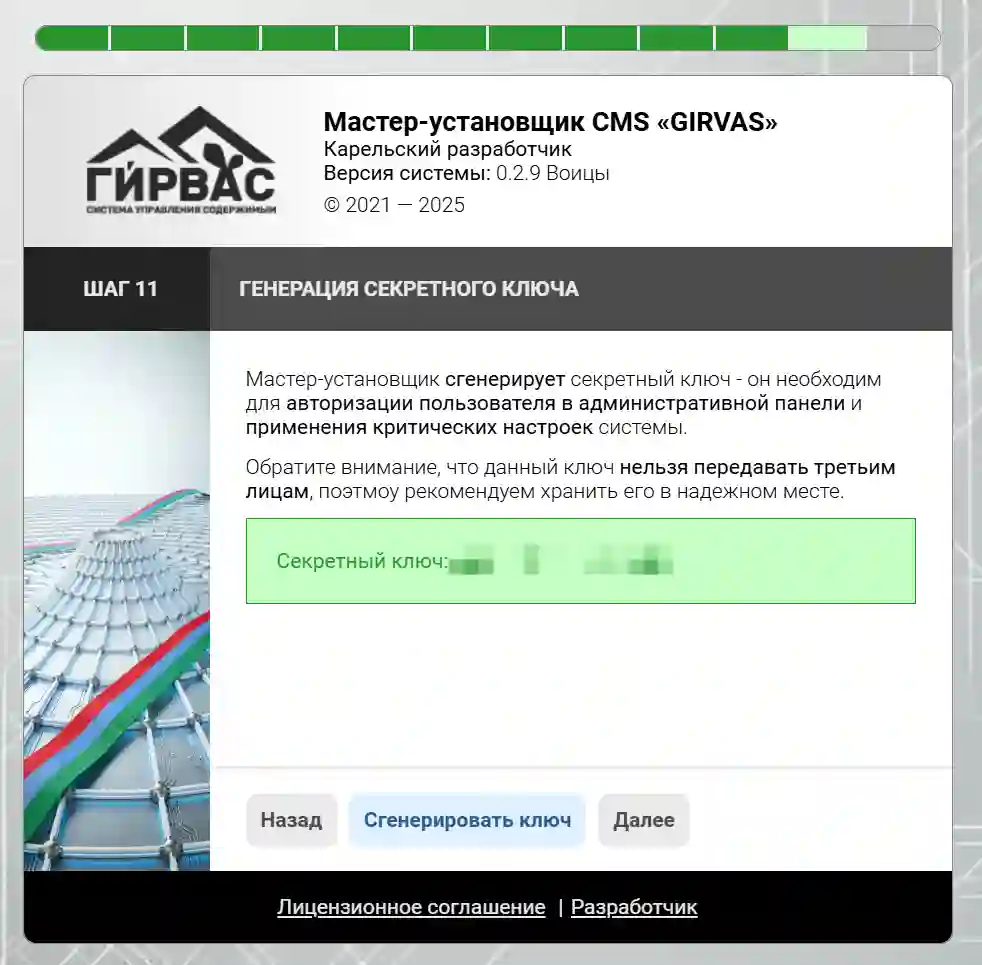
Step 11 allows you to generate a secret access key for the admin panel. Click the "Generate Key" button, then copy the key and transfer it to a text document or write it down on paper, which will appear on the screen after a few seconds.
The key will be in the following format: XXXX-XXXX-XXXX-XXXX
ATTENTION! This access key must be written down, as it cannot be restored, but it can be reset and a new one generated. Never share this key with anyone, as it allows you to log in to the admin panel.
Step #12
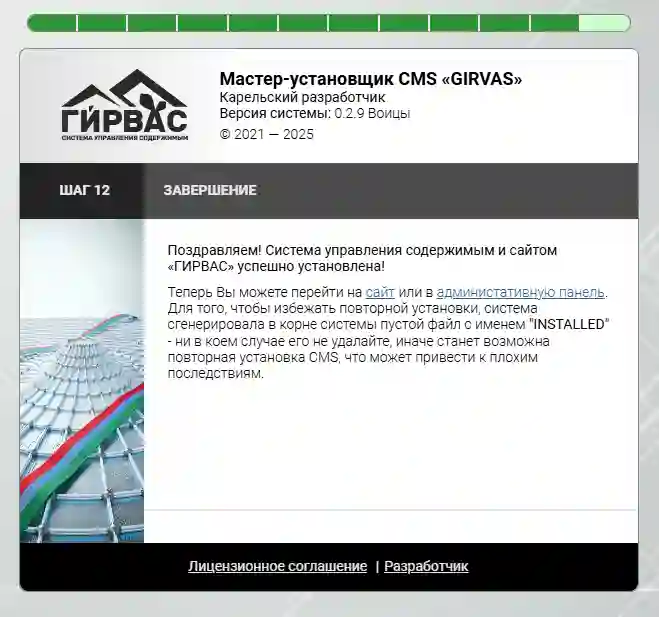
Complete the installation by going to <domain>/admin or <domain>. The installation is complete.