
CMS "GIRVAS" is a modern content management system designed for quick deployment and administration of web projects of various directions: from a business card website to a corporate website. TimeWeb hosting (JSC "TimeWeb") provides a stable infrastructure optimal for working with this platform.
In this guide, we will look at the process of installing "GIRVAS" on TimeWeb servers: from downloading the distribution to basic configuration. The guide is compiled for users with different skill levels — all steps are described in detail, but without excessive technical complexity.
Registration on the TimeWeb website and choosing a tariff plan

Before installing CMS "GIRVAS", you need to register on TimeWeb hosting and choose a suitable tariff plan. TimeWeb offers flexible terms, including 10 days of free service testing, allowing you to evaluate performance before paying.
Key features of the tariffs:
- Technical support — quick resolution of issues through the ticket system or chat.
- Guaranteed uptime — server availability up to 99.9%.
- Security — free SSL certificate for data protection.
- Scalability — ability to increase resources (CPU, RAM, disk space) as load grows.
How to choose a tariff:
- Determine the project requirements:
- For small sites, the "Hosting" tariff is suitable (from 347 ₽/month).
- For high-load projects — "VPS" or "Dedicated Server" (from 1,482 ₽/month).
- 15–20% discount for long-term payment.
- Free site transfer when switching from another hosting.
Registration process:
- Go to the official TimeWeb website.
- Click "Register" and fill in your contact details.
- Choose a tariff and payment period (month/year).
- Activate the trial period (if needed).
After payment, you will get access to the admin panel where you can start installing "GIRVAS".
Note: If you encounter difficulties, TimeWeb support will help you configure the server.
Overview of the TimeWeb admin panel after registration
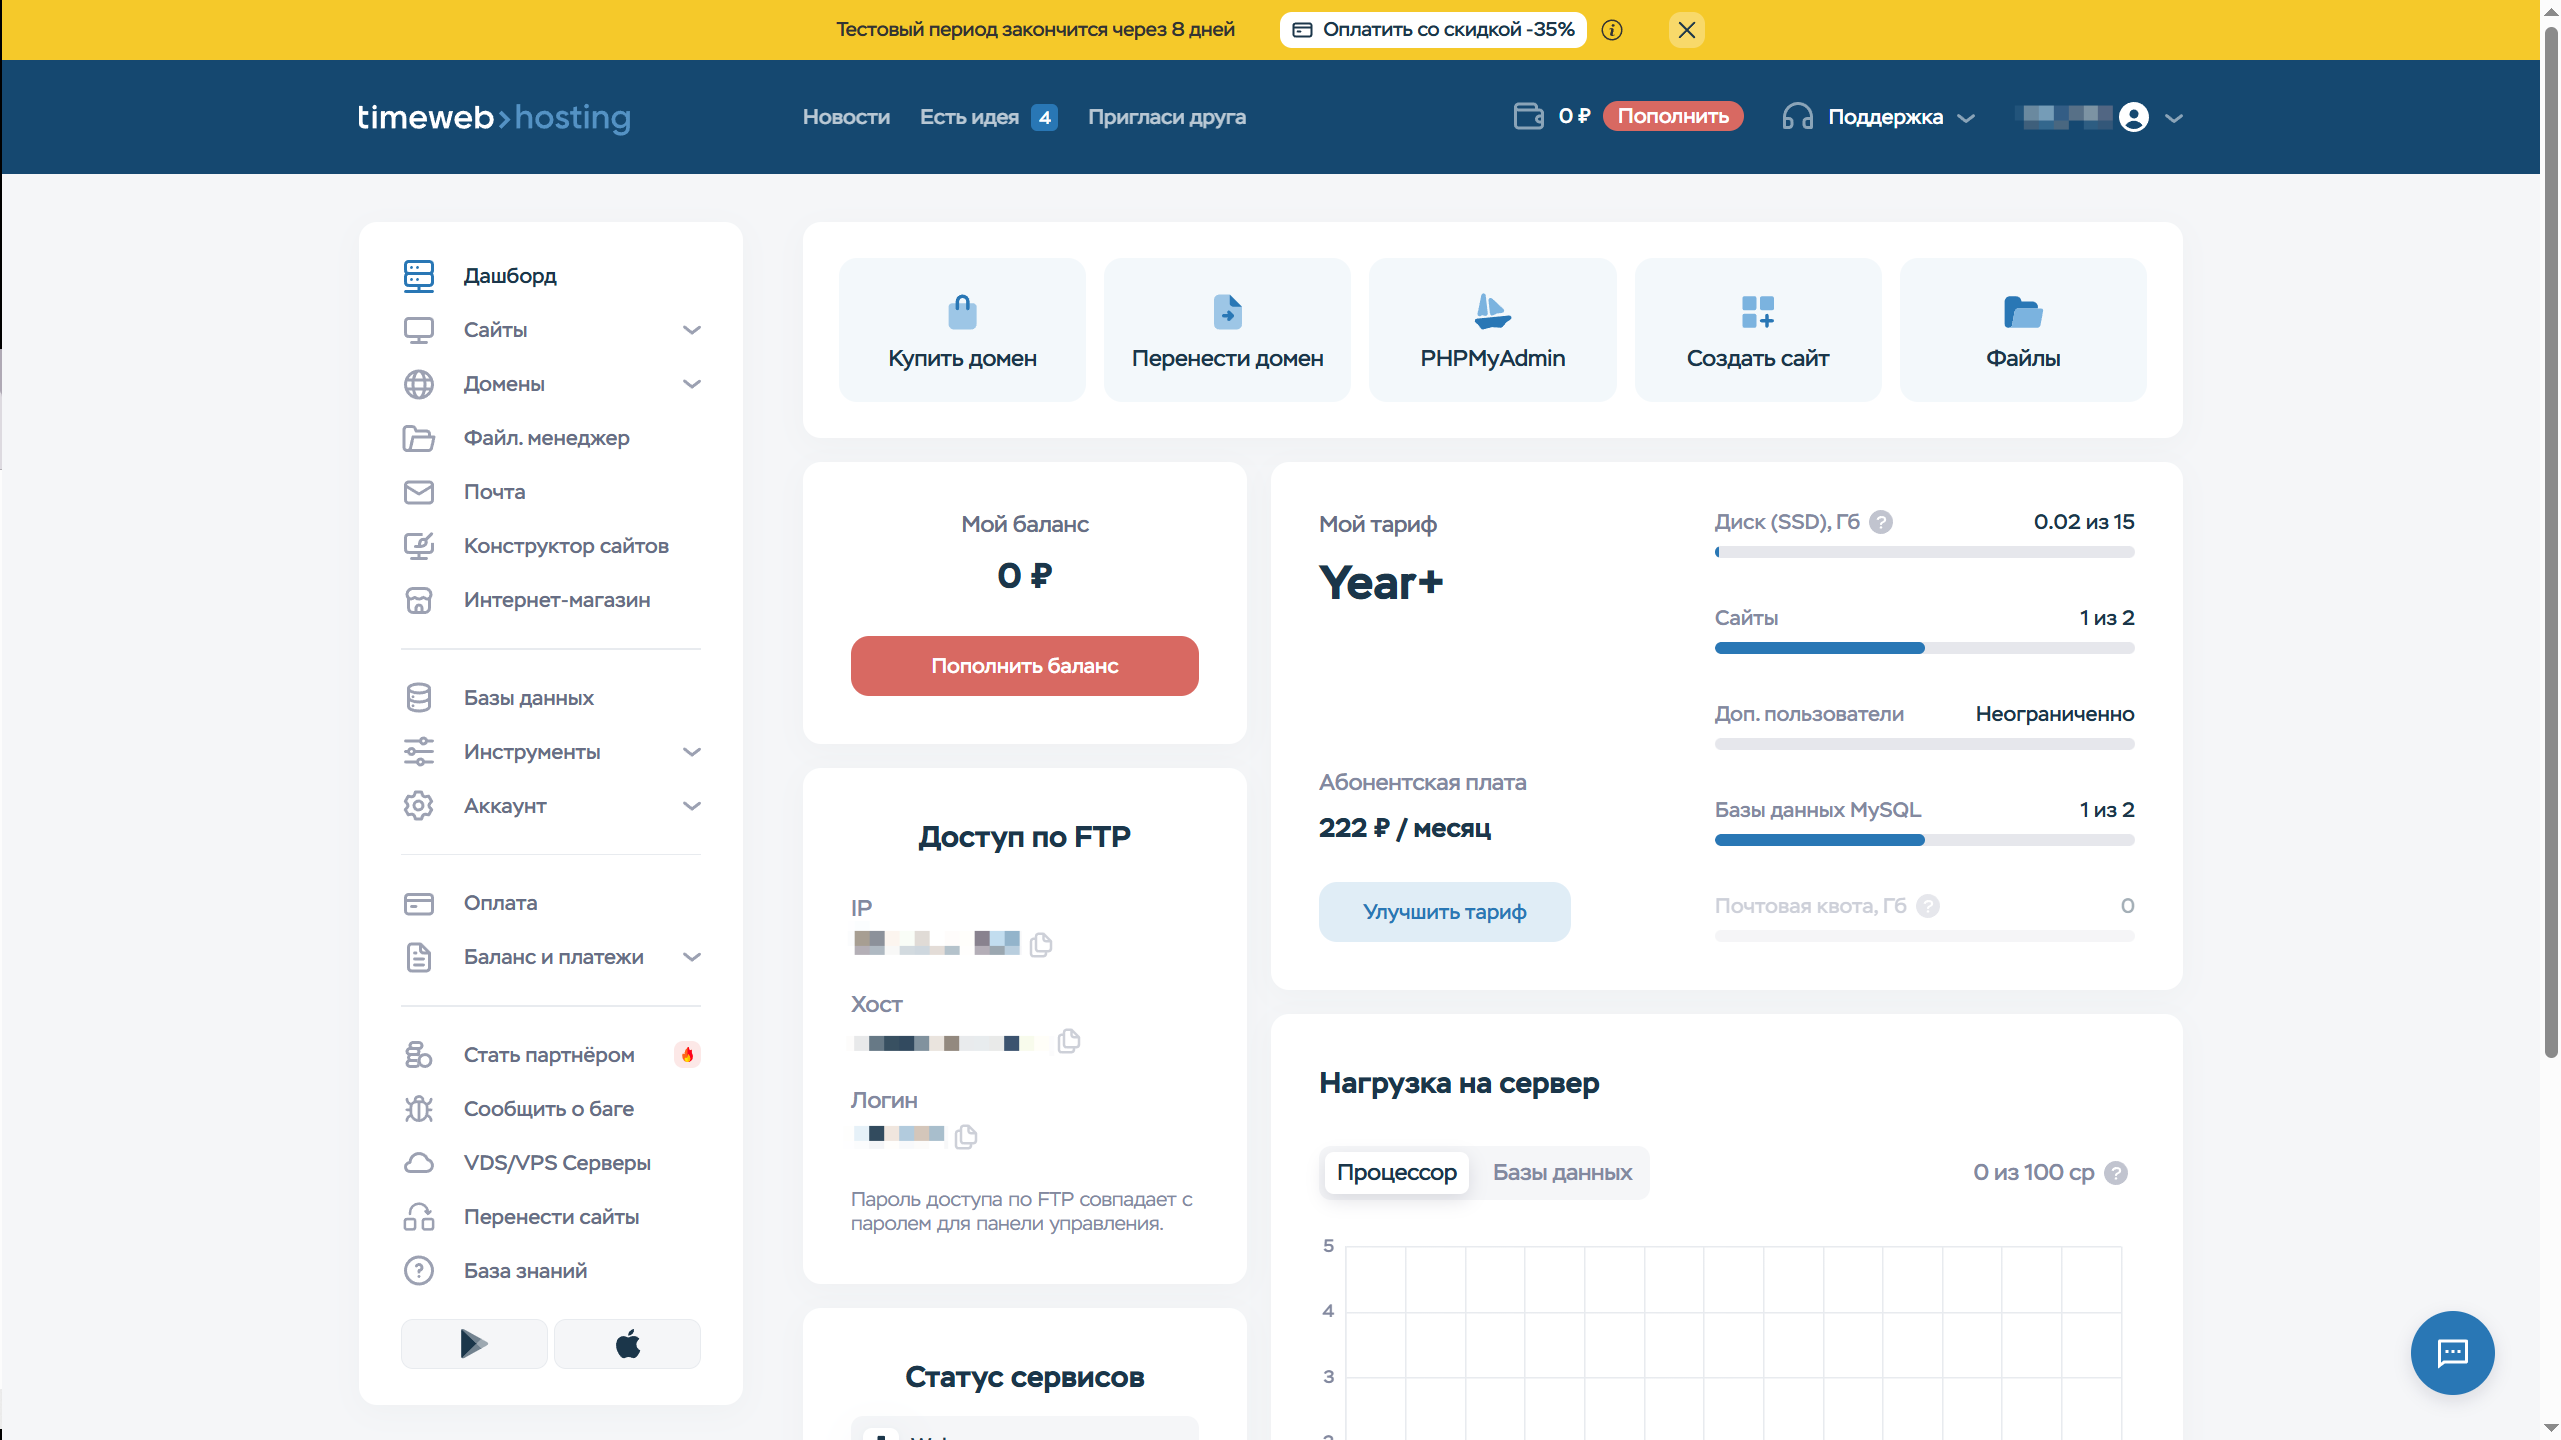
After successful registration and tariff selection, you will get access to the TimeWeb hosting admin panel. The interface is divided into several key sections that will be needed for further CMS "GIRVAS" installation:
Main sections of the panel:
- File Manager
- Allows you to upload, edit, and manage site files directly through the browser.
- To install "GIRVAS", you need to upload the system archive here.
- Here you can create a new database and user for the CMS.
- Required during installation (username, password, database name).
- Host, username, and password for accessing files via FTP client (e.g., FileZilla).
- The password matches the admin panel password.
- Tool for administering MySQL databases.
- May be needed for manual data import.
- Displays server load (CPU, disk space).
- Important to monitor tariff limits.
If your tariff includes 15 GB of disk space (as in the example), make sure it is sufficient for the CMS and future site materials. For high-load projects, consider VPS tariffs. The management system itself takes no more than 100 MB.
Downloading the CMS "GIRVAS" distribution from GitFlic
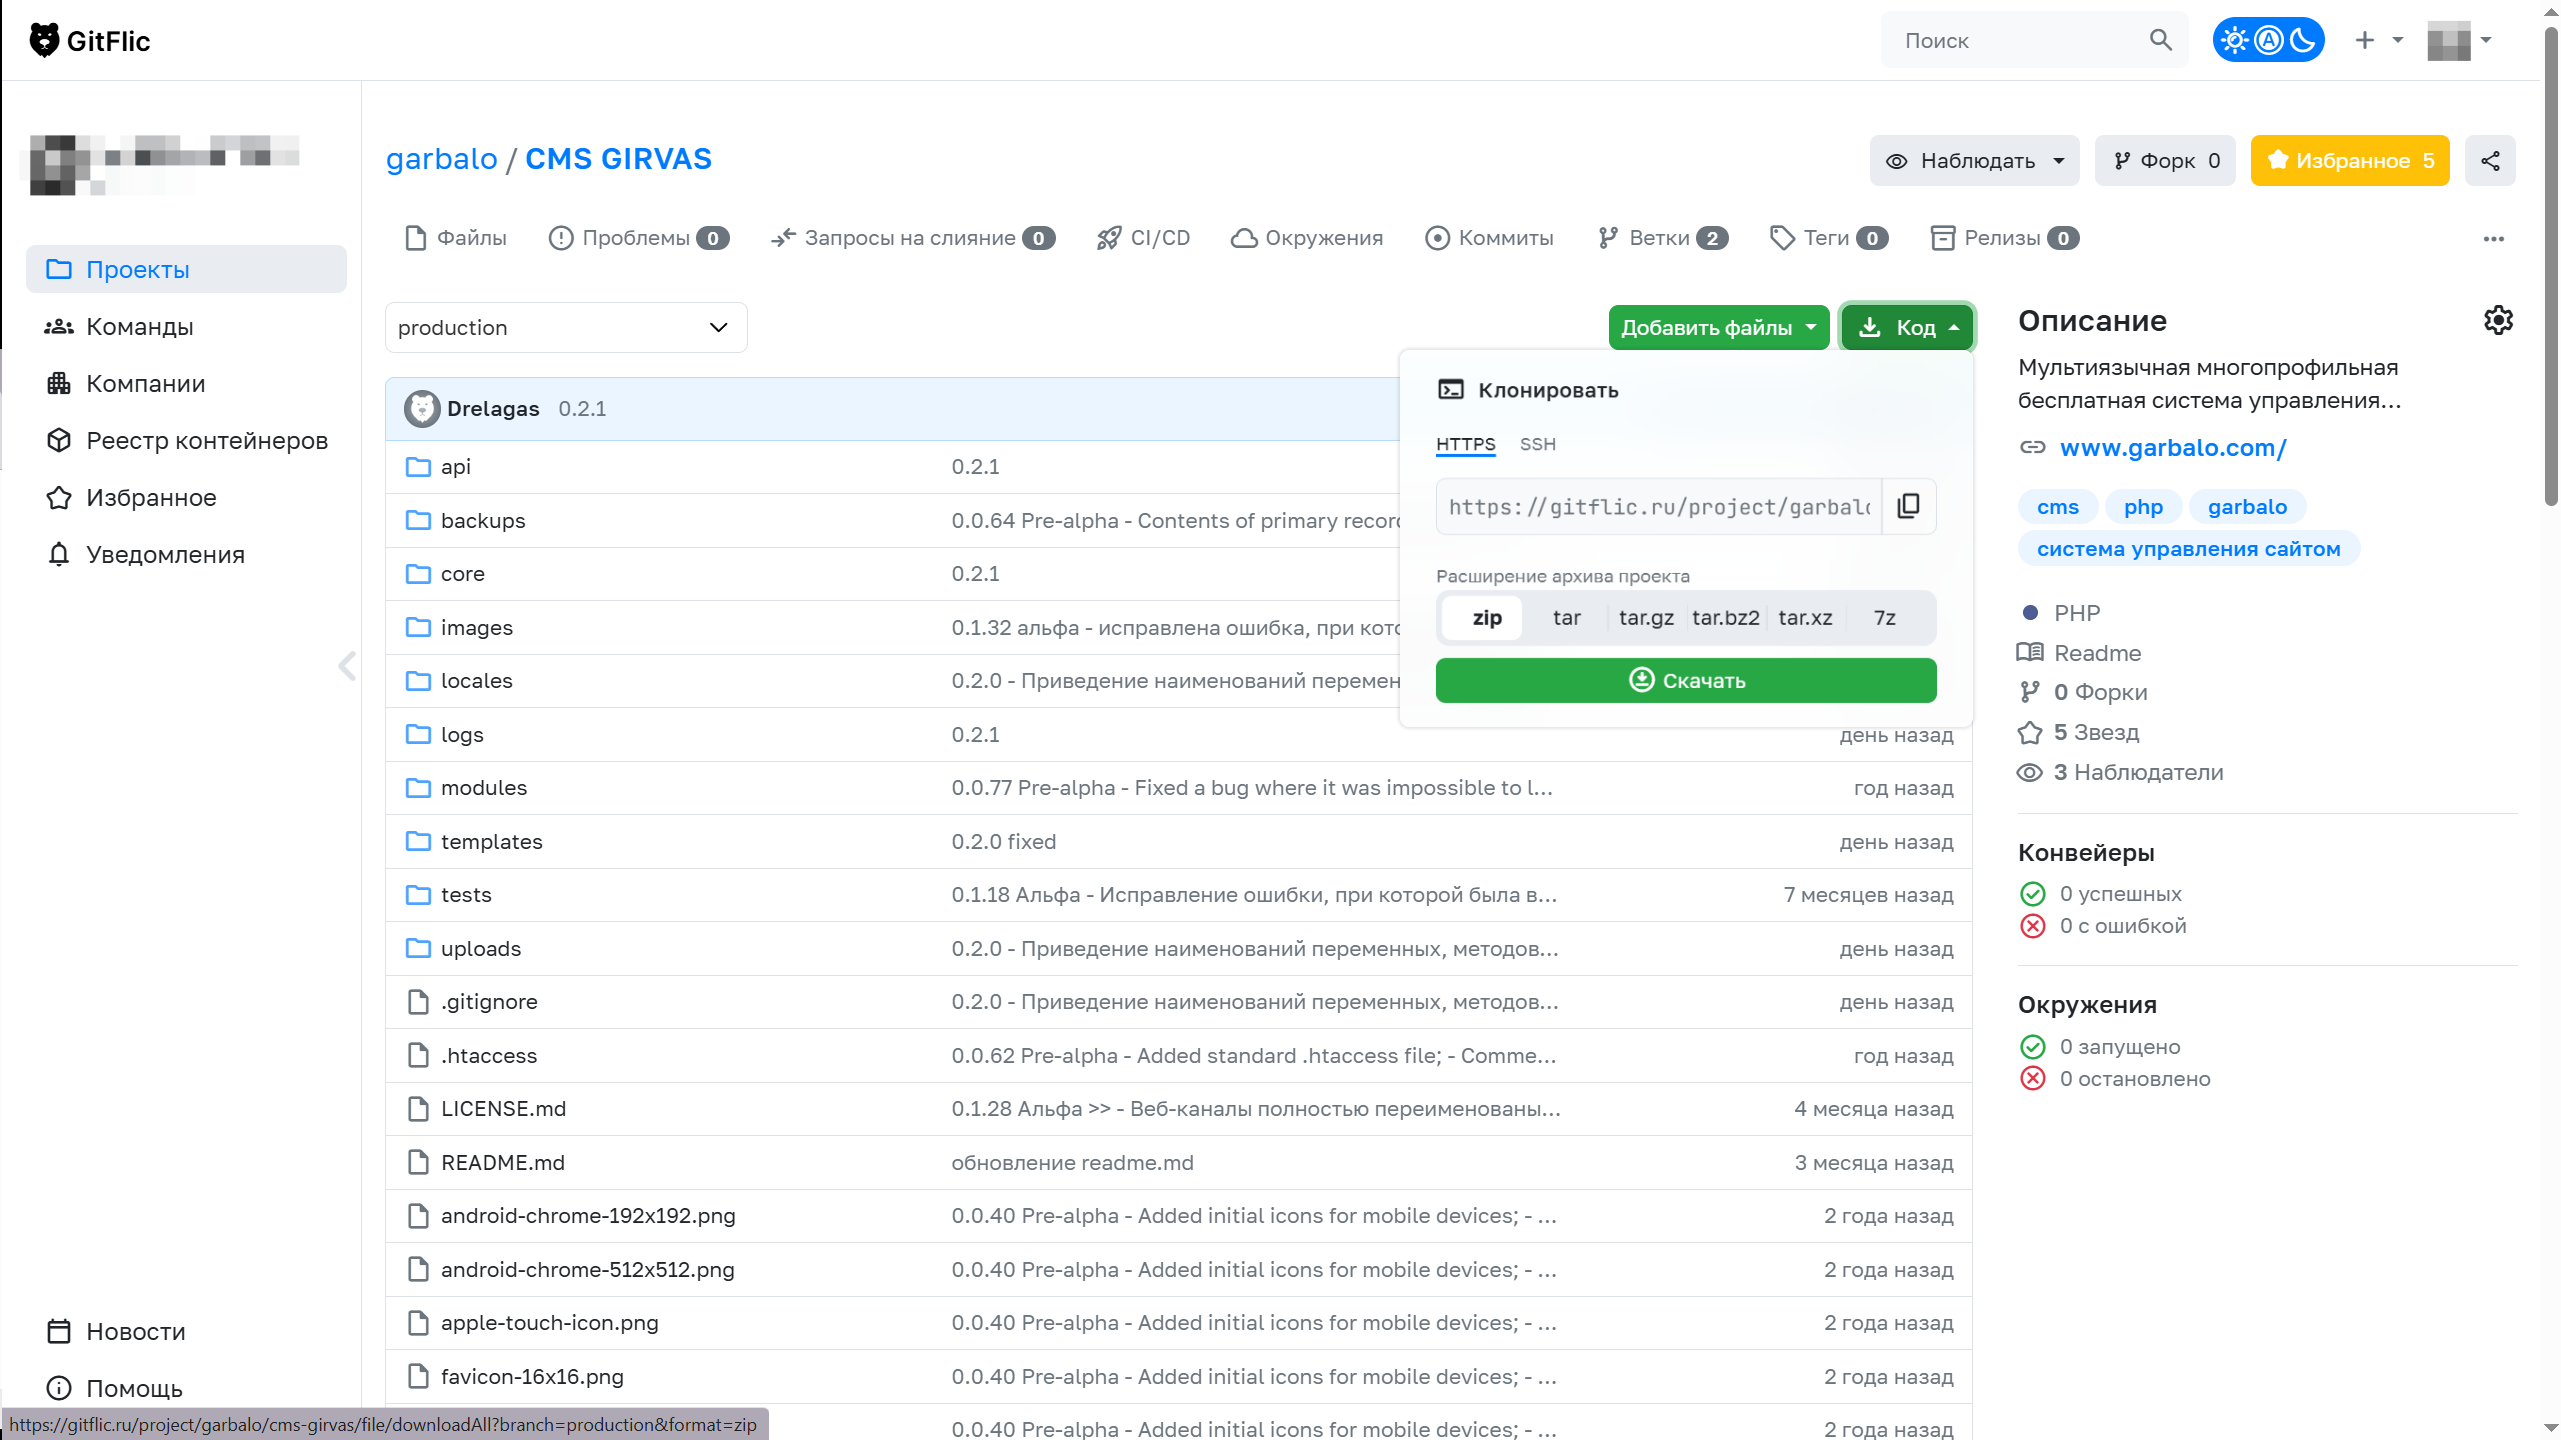
Before installation, you need to get the current version of the system. The project"s official repository is hosted on the GitFlic platform (the Russian equivalent of GitHub). Here"s how to do it:
- Go to the CMS "GIRVAS" repository.
- Downloading the archive
- Click the "Download" button (usually in .zip or .tar.gz format).
- Save the archive to your computer. Example name: girvas-core-0.2.1.zip.
Important!
- Check that the archive contains all key folders: core, modules, templates (see the structure in the screenshot).
- Presence of dependencies (e.g., PHP modules) - they are listed in the README.md file.
- Alternative method
- Git cloning (for developers): git clone https://gitflic.ru/project/garbalo/cms-girvas.git
Uploading and extracting the CMS "GIRVAS" archive to TimeWeb hosting
Now that the CMS "GIRVAS" distribution archive is downloaded, you need to upload it to the server and prepare it for installation. In this section, we will look at two upload methods: through the built-in file manager and through an FTP client.
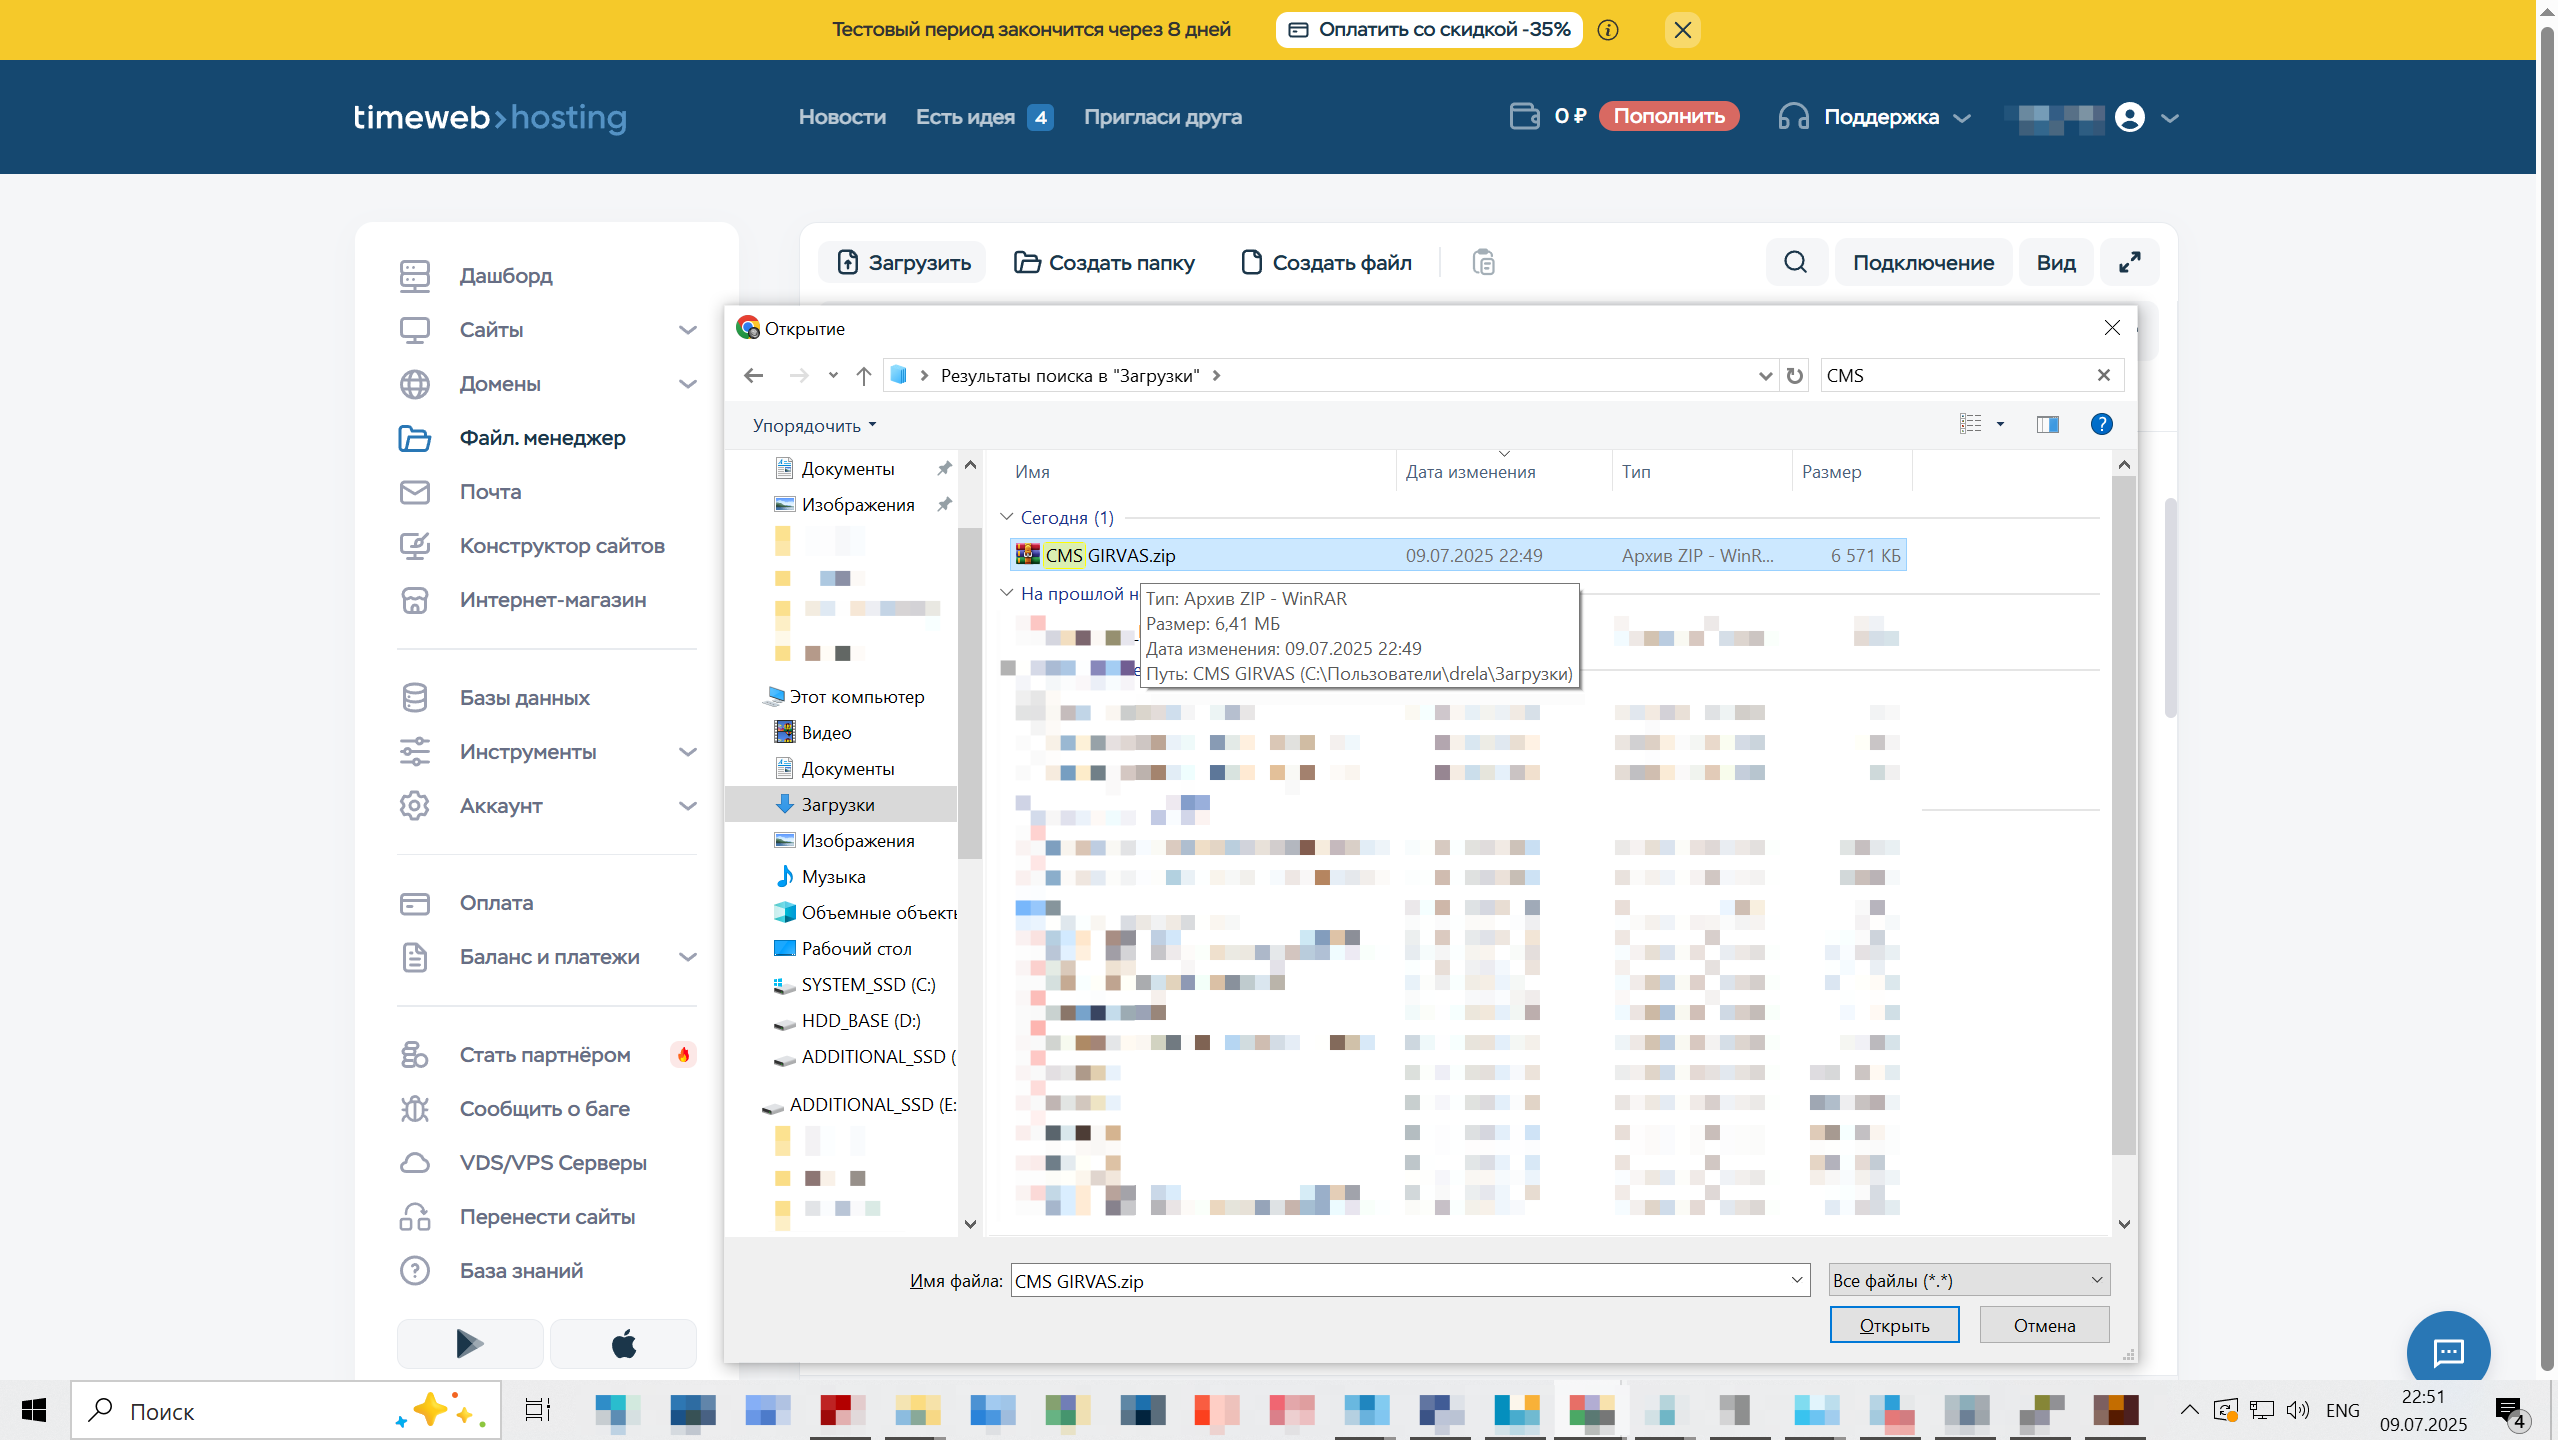
Uploading the archive via the TimeWeb file manager
- Log in to the TimeWeb admin panel and go to the "File Manager" section.
- Open the root directory of your site (usually public_html). If the site is new, this folder may be empty.
- Click the "Upload" button (see screenshot) and select the CMS "GIRVAS" archive (e.g., CMS GIRVAS.zip, as in the screenshot).
- Wait for the upload to complete. The file will appear in the list.
Extracting the archive
- In the file manager, find the uploaded archive.
- Right-click on it and select "Extract" (or click the corresponding button in the interface).
- Specify the destination folder for extraction — select the current directory (public_html).
- Confirm the action. The system will automatically create the CMS folders and files.
Checking the result
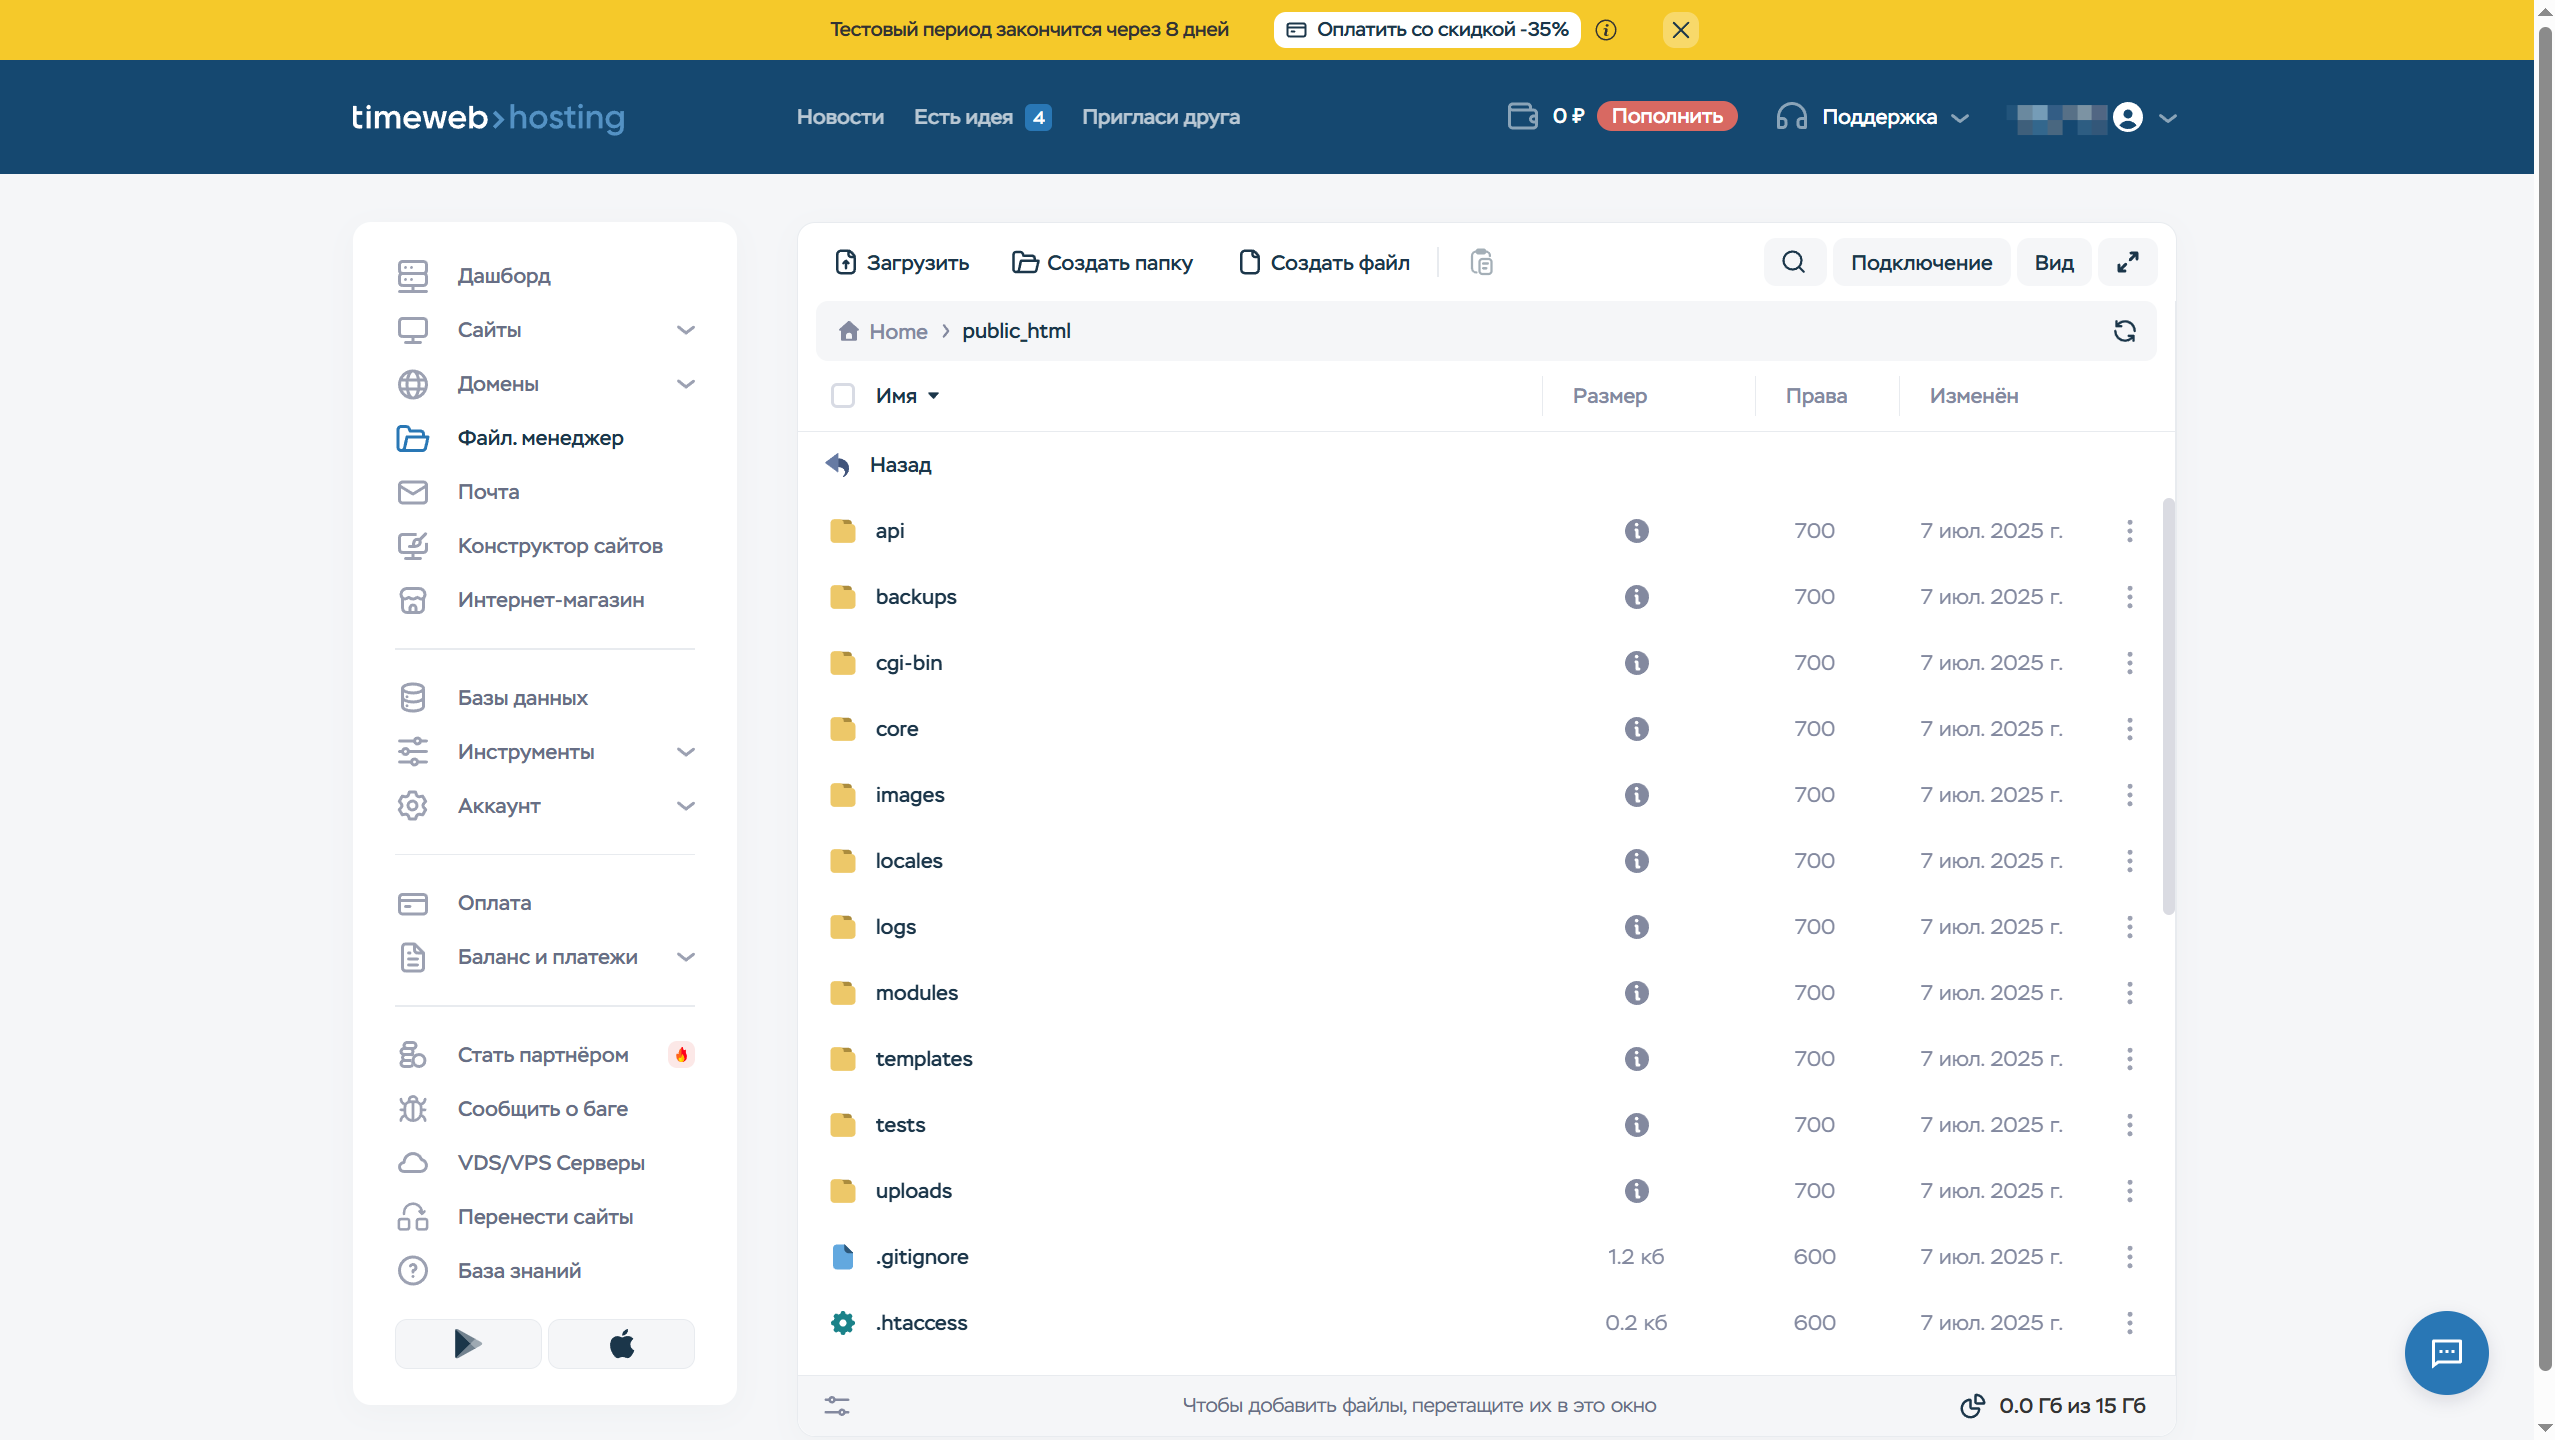
After extraction, the public_html directory should contain the system files and folders, for example:
- core/ — CMS core,
- modules/ — modules,
- templates/ — templates (themes),
- uploads/ — upload folder.
Important!
- Make sure that access permissions for the uploads/, logs/ and other system directories are set to 755 (for folders) and 644 (for files). This can be done in the file manager in the "Permissions (CHMOD)" tab.
- If the files are not displayed, try refreshing the page or check the archive integrity.
- After extraction, there should be no empty «INSTALLED» file in the system root. Otherwise, system installation will be impossible.
Alternative method: uploading via FTP
- Use an FTP client (e.g., FileZilla).
- Connect to the TimeWeb server using the data from the "FTP Access" section (host, username, password)*.
- Upload the archive to public_html and extract it through the file manager or the unzip command in SSH (if available).
Creating a MySQL database for CMS "GIRVAS" in the TimeWeb panel
CMS "GIRVAS" requires a MySQL or PostgreSQL database to work (in the example we will use MySQL). In this section, we will detail the process of creating it through the TimeWeb admin panel.
Navigating to the database management section
- Log in to the TimeWeb admin panel.
- In the menu, select "Databases" → "MySQL Databases".
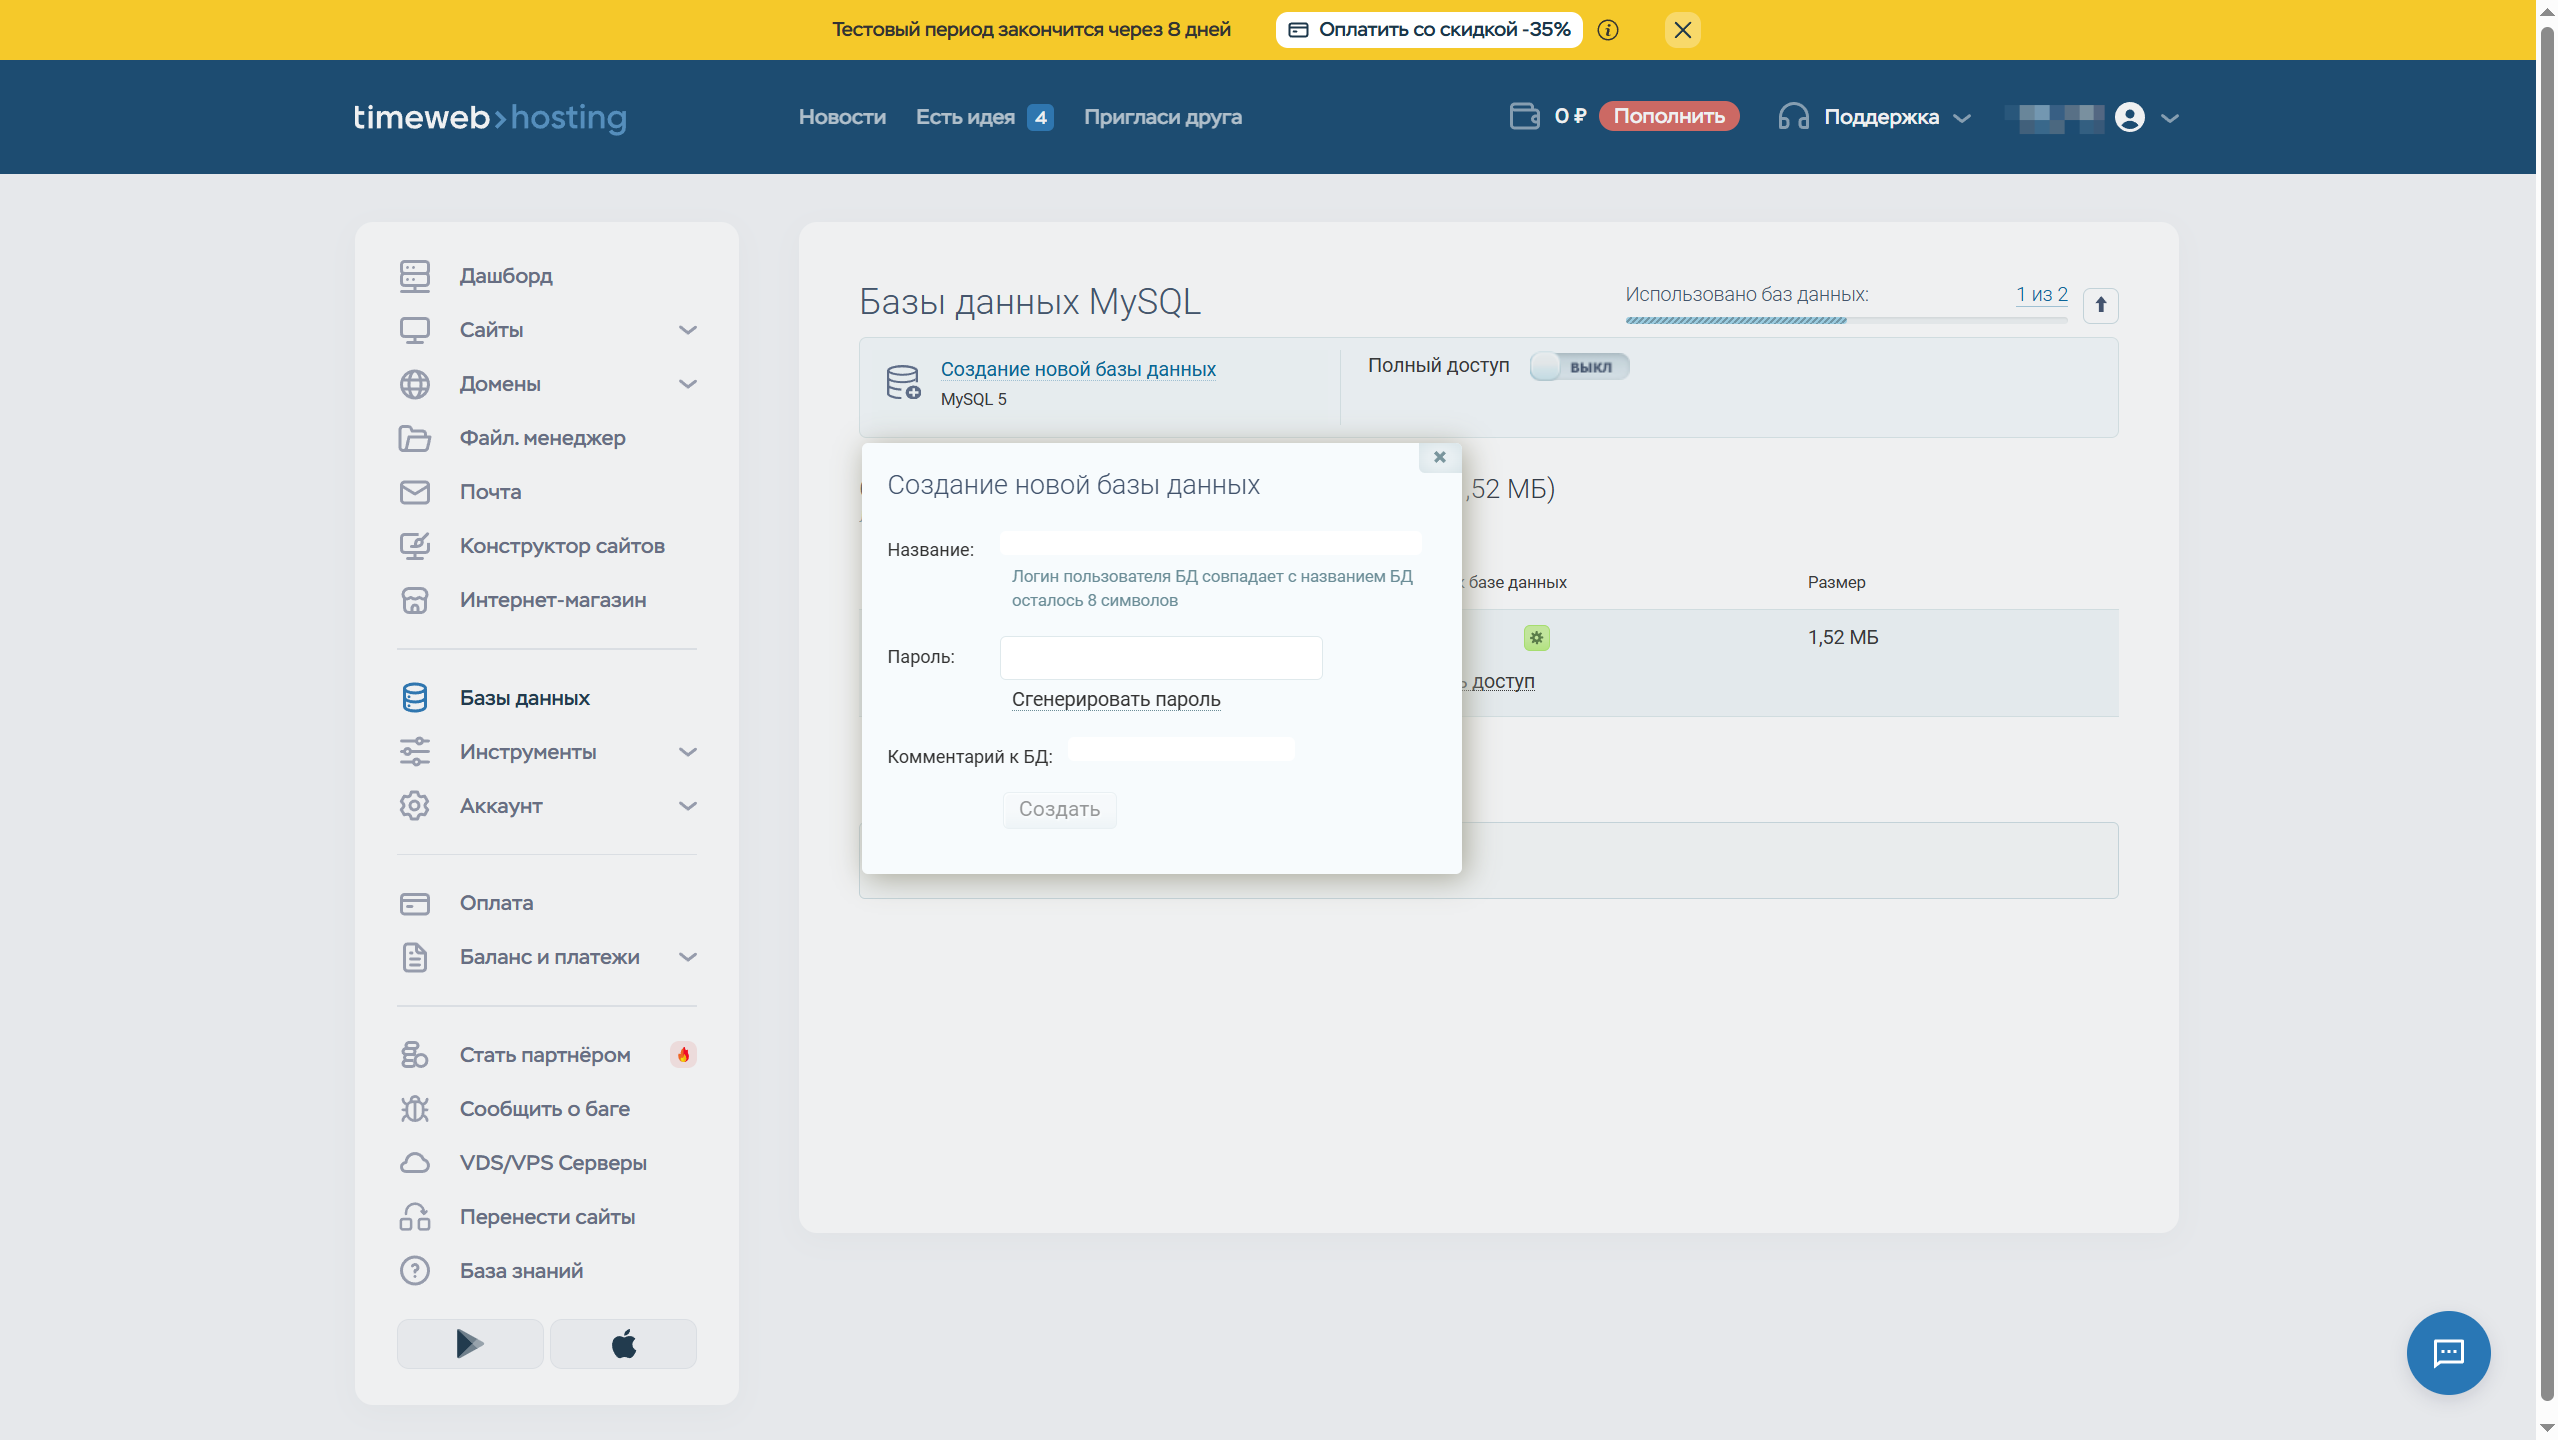
Creating a new database
- Click the "Create Database" button.
- Fill in the parameters:
- Database name: choose a name (e.g., girvas_db). Limitation: 8 characters (the username matches the database name).
- Password: click "Generate Password" or create a strong password yourself, or use a password generator. Save it in a safe place — you will need it during CMS installation.
Checking the created database
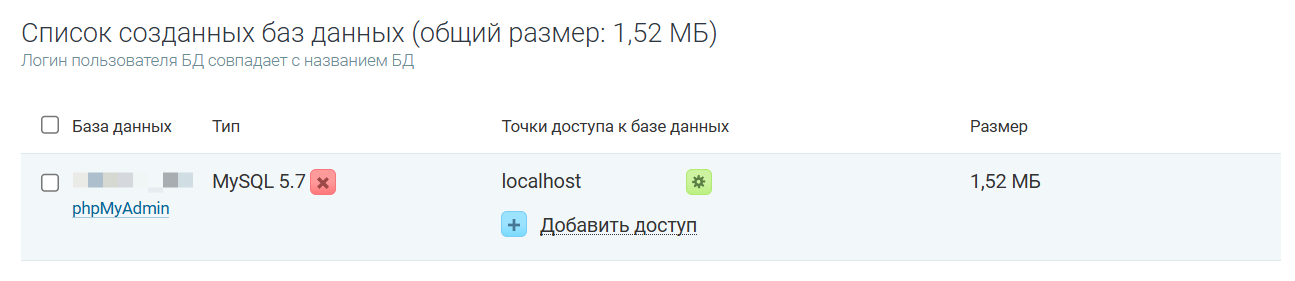
After successful creation, a new entry will appear in the database list with:
- Database name (e.g., u123_girvasdb),
- Type (in the example MySQL 5.7),
- Database access points (usually localhost),
- Size
Important!
Write down these details. They will be needed during the CMS installation phase:
- Database name,
- Username,
- Password,
- Host (localhost).
Note that "phpMyAdmin" can be used to manage the database — you can access it by clicking the "phpMyAdmin" link right below the database name (as in the screenshot above).
Now you can proceed with the system installation according to the official documentation.
Result of CMS "GIRVAS" installation
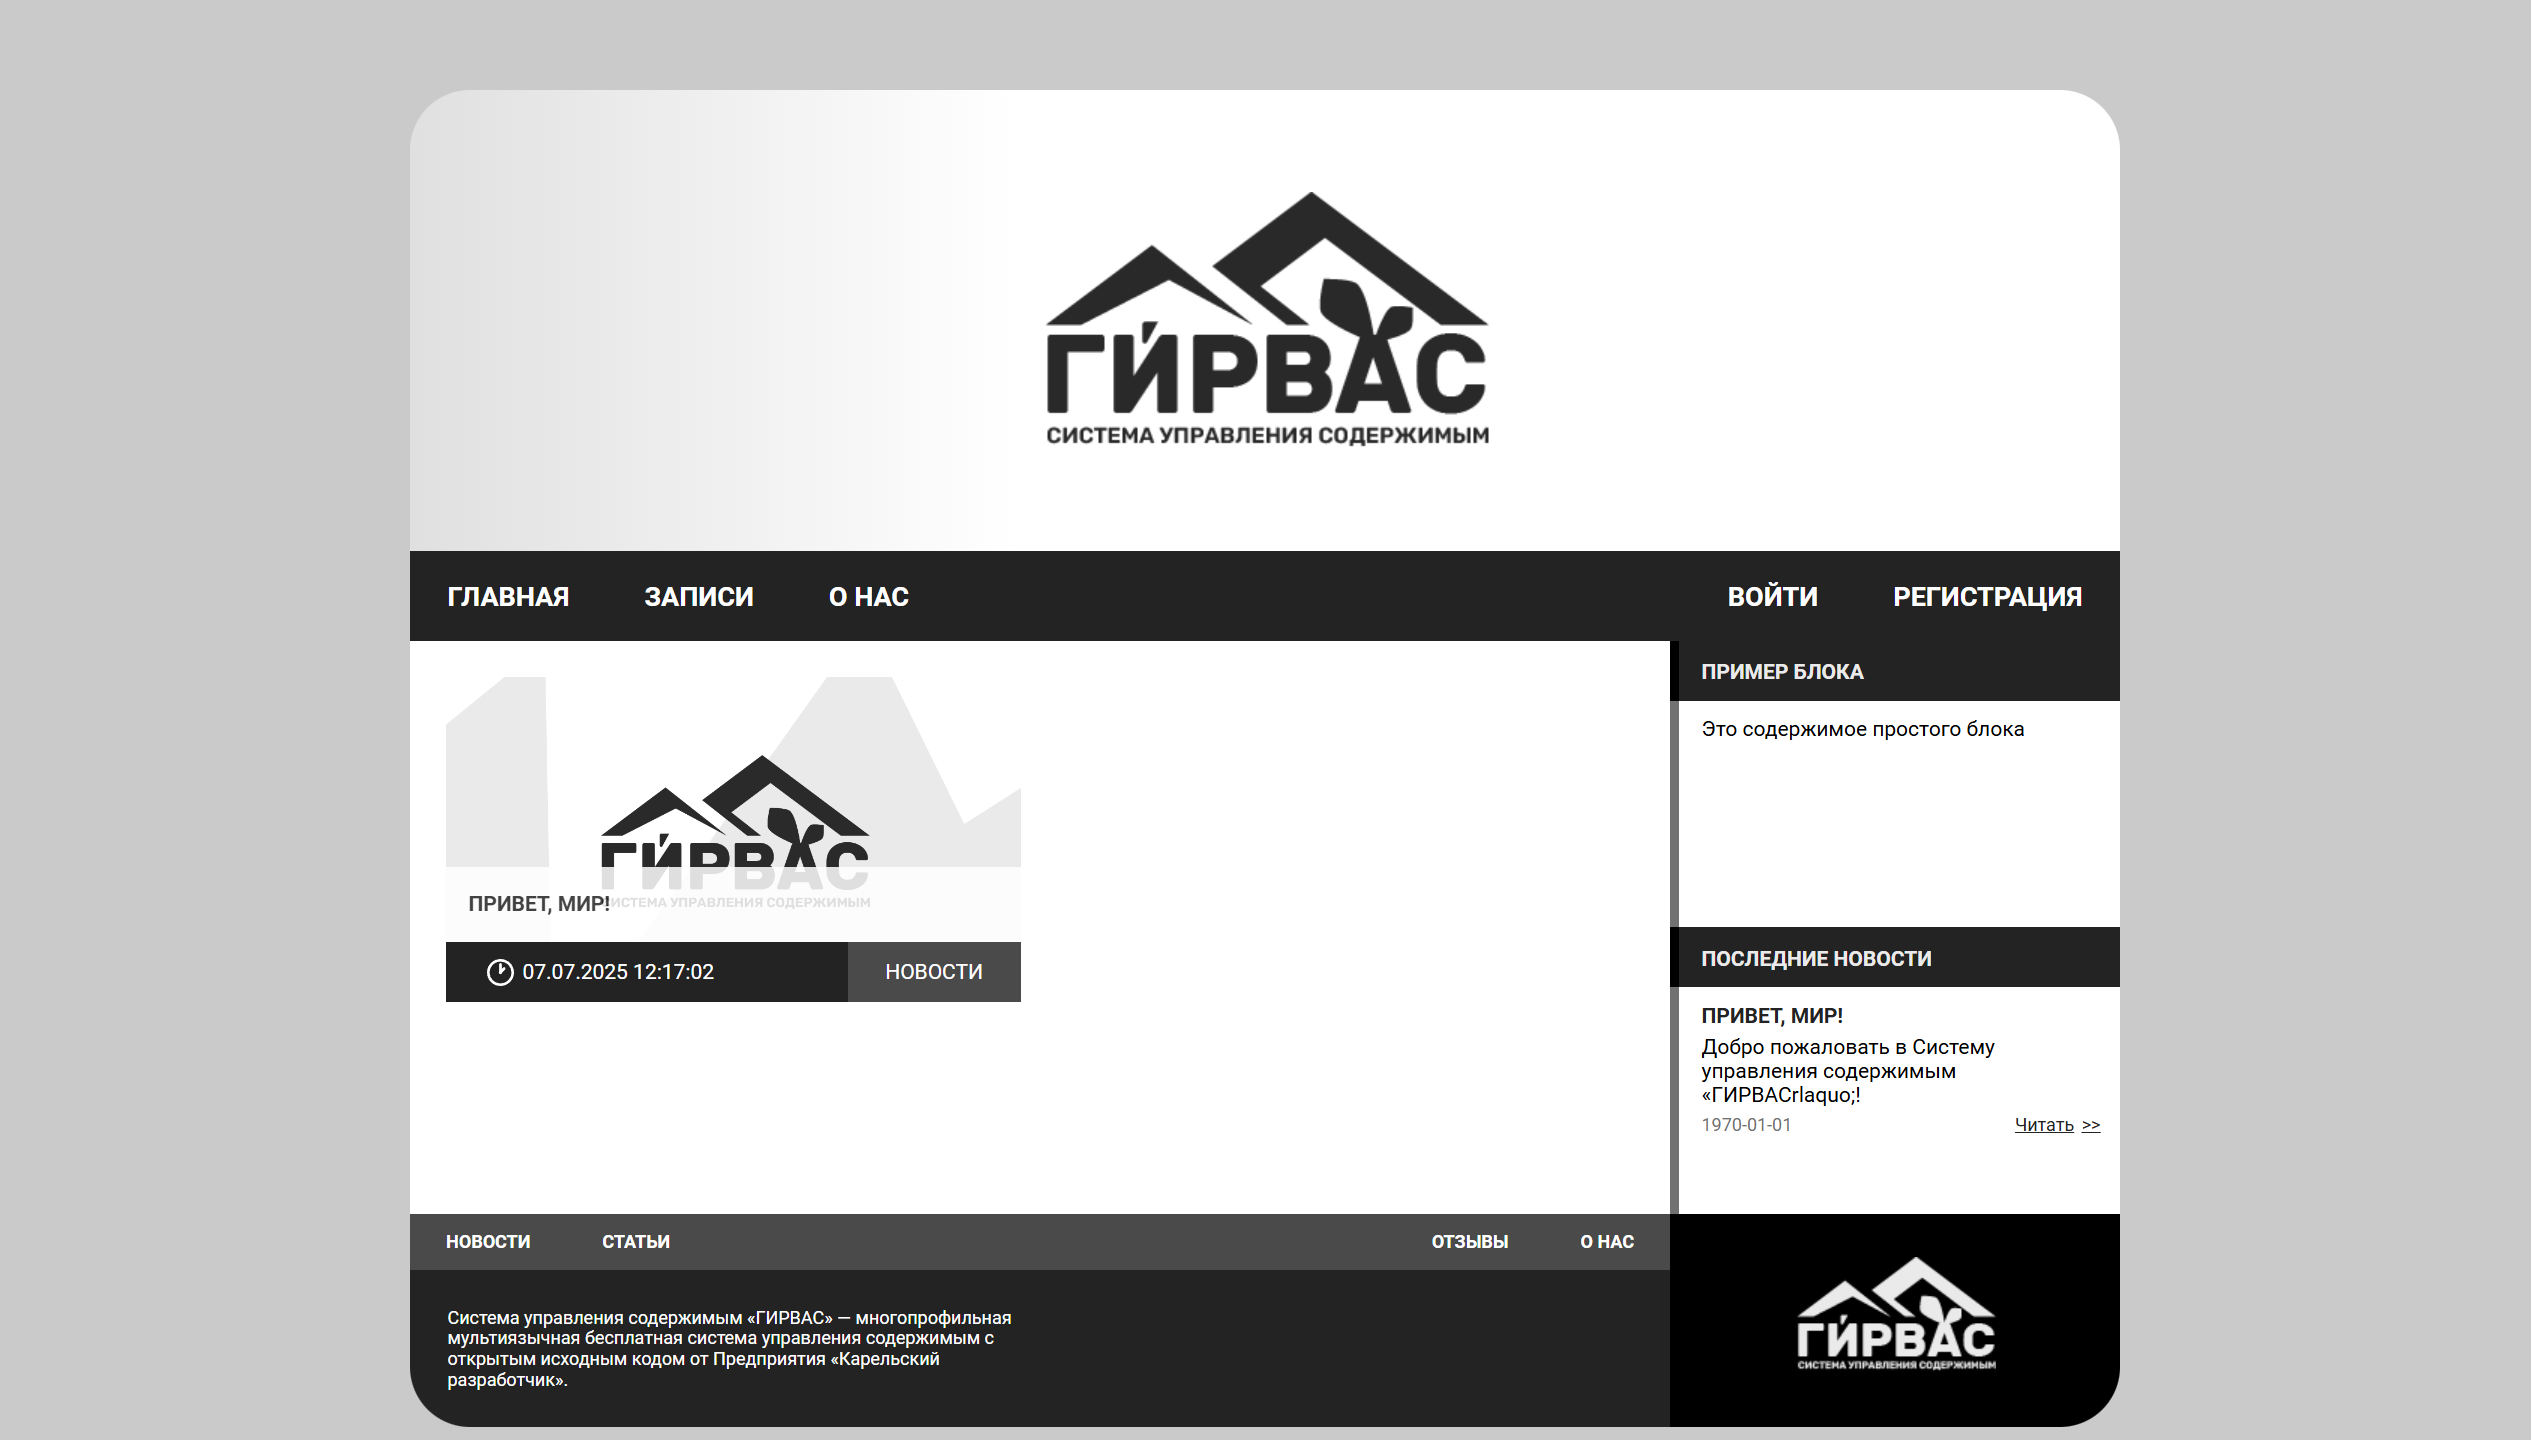
If you have done everything correctly following the guide and the official installation documentation, you will see the primary site theme running on the CMS "GIRVAS" content management system at your site address.
Good luck!
Comments